Ingredients Series #4 – Water

Hi all,

Thanks for joining us this week for another post in the ingredients series. This week we’re taking a look at the ingredient that makes up 90-95% of our beer but often goes overlooked. Water. We’ll look at its importance in brewing, a little history of the relationship between the two, how water in different areas of the world influenced popular styles and finally options for treating and properly taking care of your water.


Last Week In New Beerginnings

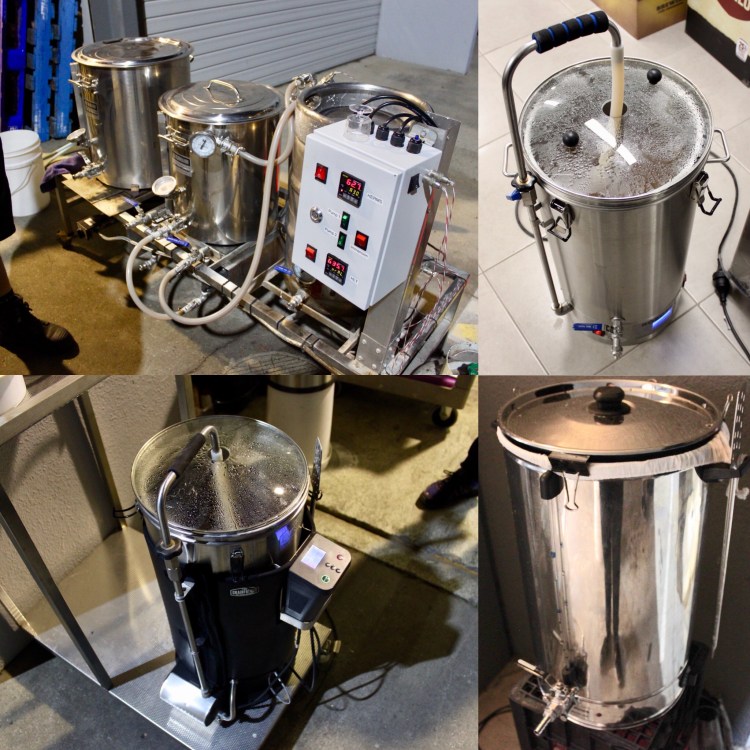
Last week, in fact for the last few weeks I have been somewhat dull in my goings on in terms of brewing due to starting a new day job, which is nice! Last week was full on training and getting up to speed so hardly had time to think about extra-curricular beer activities!

I promise for your sake and mine that I’ll be back into it soon!


Water in Brewing

The ingredients we have covered so far in this series, although important in terms of flavour, aroma and arguably make beer..beer, they only make up approximately 5-10% of the ingredients by weight. Water makes up the vast majority of beer so to say we should think about that just as much as the other 5-10% of ingredients is an understatement.

Brewers have been considering water from the beginning, in fact water may have been one of the reasons beer became as popular as it has. Before sanitisation, filtration or any other technologies we use to ensure our water is clean and safe to drink, low levels of alcohol and certain herbs were used to disinfect the water and prolong its shelf life. This was especially useful on ships where sailors would go without a fresh water source for months at a time. Hops provided an anti-bacterial quality to the beer and the alcohol, although very low level (as low as 1-2%!), was enough to prevent more microbial growth and prolong the safe life of the water.

There are many considerations that brewers make for their water, measuring pH, reading their water report or sending their water away to be tested (More on this later), different additions of minerals to adjust the water’s taste or other properties.

All of these considerations and adjustments relate to the water’s chemistry. Water chemistry and the makeup of simple water is an incredibly complex topic with far more information than would be possible to fit into a single post. To that end, I will keep this information fairly basic and centred around what you need to understand to get a head start with water.

Basic Water Components

This section covers the common components of water that brewers look at or adjust. We’ll cover what it is, how it affects beer and ideal levels, leaving the ways of treating it for a later section.

  • pH – This is the measure of how acidic or alkaline your water is. pH is vital to many chemical reactions, including many of the ones in brewing. The primary pH to be concerned about is the pH of your mash. This is because the addition of the grains will change the pH, before this the pH can only be estimated, not measured. If measuring your pH to calculate any adjustments, the mash would be the time so you can make sure you add the right amount. The ideal range of pH for a mash is 5.1-5.6, this should ensure you hit the proper levels for the rest of the process. Low pH (acidic) also gives a sour flavour, so pH control is a vital consideration if making a sour beer. I would seriously consider getting yourself a pH meter so you can monitor this important component.
  • Hardness – Hardness is essentially the total dissolved minerals in a given amount of water and can be split into two distinct sections. Temporary Hardness, caused by Calcium and Bicarbonates in the water and is removed by boiling, and Permanent Hardness, caused by a combination of Calcium and Magnesium Sulphates. These together, along with the water’s pH and temperature give the water’s total hardness. Some beers require high or low hardness in order to taste right. Another consideration is that very soft water, that’s to say water with very low levels of dissolved minerals, is always quite high in pH and will require adjusting. The same does not work in reverse however, low pH water does not mean it has low hardness.
  • Magnesium – Best recommended to be used in very small amounts, this can act as a great yeast nutrient but also dries out the beer’s mouthfeel, if overused, more than around 30ppm (parts per million – 1ppm=1 part magnesium to 1 million parts water), then the beer can dry out too much and become nastily astringent.
  • Calcium – Calcium is the main ion that drives the ‘hardness’ of the water, it can act as a yeast nutrient and also works to lower the pH. Best range for brewing is anywhere between 50-150ppm with around 100ppm being the most desired range.
  • Sodium – Most commonly added with salt additions, Sodium adds body and mouthfeel to beer but obviously can contribute a salty taste like seawater. Some beers like Gose take advantage of this but even in acceptable beers, too much is considered undesirable. Something to beware of is household water softeners. These devices take away lots of minerals like Calcium and Magnesium that make water hard but their removal comes at a price. They are traded for higher levels of Sodium. Normally Sodium ranges from 10-70ppm and can be increased to around as high as 150ppm before becoming detrimental. 200+ppm is getting into the undrinkable range.
  • Chloride – This is not to be mistaken for Chlorine, which is added to most municipal or city water as a disinfectant. Chloride also contributes to the body and mouthfeel of your beer and make it slightly more malt-forward. It can produce medicine-like flavours when used in concentrations over 200ppm. Normal ranges are 10-150ppm and are balanced with Sulphates. A common ratio to consider when designing a water profile is your Chloride to Sulphate ratio.
  • Sulphate – In a way, Sulphate is like the opposite of Chloride, it makes for a dry, sharp hoppy beer. In high concentrations it can produce astringent notes in beer that are undesirable. Normal ranges differ depending on the type of beer you’re wanting to produce. Lagers and light beers range from 10-50ppm, 30-70ppm for most malty ales, 100-150ppm for slightly hoppy-er ales and lagers and up to 500ppm for IPAs and other highly bitter beers.

Brewing Water Around the World

It may or not surprise you that water can taste vastly different around the world. Some water is very hard (like Burton-On-Trent in the UK) and some is incredibly soft (like Pilsen in the Czec Republic, the home of Pilsner). These locations are often associated with certain styles of beer, it was only when I started to research water that I found out why. It’s because the water in different areas lends itself to brewing specific styles of beer.

For example, if you tried to brew a light lager or hoppy IPA in Dublin without altering the water, it would not work very well. This is because the water is soft with a high pH and slightly higher ratio of Chloride to Sulphate. A dark, malty beer like stout would have the right mouthfeel and the dark malts would help bring down the pH in the mash to the acceptable range.

This lead to the creation and utilisation of water profiles for brewing. These would allow brewers to take their water closer to the water profile of another place and change the charateristics of it so they can brew styles of beer that may not normally be able to be brewed with their untreated water.

You can find this information for your own city also in your area’s water report. This should be available from the company that regulates and supplies the water to your area. Alternatively you can send your own tapwater away to a lab to be tested, although depending on where you live this could be expensive. The US has Ward Labs that charges around $36USD for a kit. Here in australia I checked and my local test facility wanted to charge around $200AUD for the same thing, I did not have it done…

Why get this data though? You know the water profile you want, you’re making a big IPA so you just add some sulphates and a bit of acid to dry it out and accentuate bitterness right? For all you know your pH could be too low already and adding more acid will make for low starch conversion in the mash or you could add the wrong amount of Sulphates. Finding out your starting water profile is like knowing where you are on a map before getting directions, it’s essential. Here is a fairly comprehensive list of different areas around the world on Brewer’s Friend.

The one thing to bear in mind with water profiles is that just because you are mimicing Dublin’s water profile, this doesn’t mean that you are getting the same water that Guinness uses for their famous stout. You may be getting close to it but there is no way of knowing what (if anything) that specific brewery does to treat their water. Often breweries treated their water somewhat in an attempt to get AWAY from the limitations that their water offered. So bear that in mind.

Water Treatment Options

There are many ways to treat your water to achieve something close to your desired water profile. Some are as simple as acid additions to lower your mash pH or adding a bit of salt to your water that you know is lacking in Sodium. Others are more complex, I’ll go through the most common additions and methods for treating your water with the aim of demystifying them so you can start to be confident in altering your water. I’ll also provide you with a few tools to help you out with calculating how much of something to add to achieve a certain result.

Filtration
Probably the easiest type of water treatment to get you started is filtration. Filtration can be as simple as the regular under sink drinking water filter or as complex as a multi-stage reverse osmosis filter.

The under sink systems often just contain a sediment filter and carbon filter. The sediment filter will remove large particles that may have collected in the miles of pipes between you and the local water centre. The carbon filter will remove or reduce some off flavour causing compounds like Chlorine and other additives. These systems are effective at making the water taste better than it otherwise would while maintaining most of the mineral content that we as brewers are concerned with. Any adjustments you normally make to your water should stay the same, with the exception of additions that remove Chlorine and Chloramine, like Campden tablets.

Reverse Osmosis, or RO filters are a different animal altogether. Their job is to filter as aggresivley as possible to remove most, if not all of the total dissolved solids and minerals in your water. These filters are generally a fair bit more expensive that the typical under sink system but are great for those who are looking to build their water profile from scratch every time or have seriously high levels of some minerals that require treatment with something more than a standard filter.

Dilution
The other way the reduce the amount of minerals in your water, allowing you to build them back up again is by diluting it with distilled water or water that has less minerals than your main brewing water. This is essential for some styles and water profiles, like the profile for the town of Pilsen, with ridiculously soft water.

Additions
Once you have a starting water profile you are happy with, you can begin to build it into something else to support the beer you wish to brew. This would be your target profile. This is generally done with additions to increase the amount of certain minerals since you cannot take them away without filtration or dilution. See the list below for the most common water additions and the effect they have.

  • Calcium Chloride – This is an excellent source of calcium to increase hardness and lower pH along with Choride to affect your Sulphate/Chloride ratio and give a nice round mouthfeel to your beer along with accentuating malt character.
  • Calcium Sulphate or Gypsum – This also adds calcium but has the opposing effect to Calcium Chloride, it helps give a sharper hop character and is a good addition to balance your Sulphate Chloride ratio in favour of your hops.
  • Magnesium Sulphate or Epsom Salts – IMPORTANT, its highly recommended that you not just use epsom salts that you would find in your supermarket along with bath soaps. This is not food grade and may contain other substances that should not be ingested. Magnesium sulphate is a good way to make a beer have a dryer mouthfeel with prominent hop flavour. Use with care however as too much will make your beer overly bitter and/or astringent.
  • Calcium Carbonate or Chalk – This is used for raising your pH and hardening water. Use sparingly though as it does not precipitate back out very easily and can affect flavour.
  • Sodium Chloride or Table Salt – This is primarily used to increase your Sodium levels. Be careful using too much as it will make your beer taste like the ocean!
  • Sodium Bicarbonate or Baking Soda – Used to increase hardness and your overall sodium levels.

Brewing Water Resources and Calculators
There are many calculators out there that will help you to make the right additions to your water. Almost all of them require at least a little bit of manual work or input for each brew to get an accurate result. They take into account your grain bill, acid additions, starting vs target water profiles and can even tell you how much distilled water to add to dilute your water enough to achieve certain results.

  • Bru’n Water – This is my personal favourite. Although it can take some getting used to and even potentially a guided tour or two (watch out for one of those from me! In the meantime there are plenty of others) to get your head around. I have personally had great success in using that tool. You basically feed it your starting water profile and grain bill and it will tell you how much acid to add or calculate mineral additions to help you achieve your target.
  • Brewers Friend – I discovered this later the Bru’n Water but I think if I had discovered it first, I would have stuck with it. It’s fantastic, accurate, simple to use and gives you clear directions on your additions, complete with their photo definitions of what a teaspoon measure is! I highly recommend giving this one a try. In the first link is the basic version, here is the advanced version.
  • BeerSmith – BeerSmith has its own water profile tool built in. Mostly useful in the desktop app, you can store your profile in there and choose a target profile. The calculator will then help you to calculate the additions you would need to most closely match your Starting to your Target profile.

There are many many more out there but these are the most common. In terms of more information, I have given only a brief glimpse into the world of water chemistry here. I will be covering more detail in a post coming up soon in our in depth ingredients series. In the meantime, one of the best resources I can possibly recommend is a book called Water, by John Palmer, the author of arguably one of the Home Brew bibles How To Brew. The Water book goes in depth on considerations you can make for your water along with the science behind each mineral and addition. A fascinating but potentially mind-bending read, I highly recommend it!


Thanks for joining us this week with our look at water. Again, thanks for being patient with some somewhat sporadic posts lately while I have been adjusting to a new work/life balance. Now that things are back on a more even keel you should be able to look forward to a more regular post shcedule once more.

Our next ingredients series post, yes there’s another! I know, what could possibly be left right?! The next one will be on anything else you can add to your beer, commonly know as adjuncts. I hope you will read it and be fully confident in your ability to make an Orange coffee milk oatmeal stout in no time!….if such a thing is possible, or even worthwhile, we’ll have to wait and see.

Until next time,

Best,

Sean


If you have any feedback or edit suggestions for this post please contact us and let us know. We want to ensure the correct information is presented in the best possible way so that fellow brewers can stay well-informed.


Want to stay up to date with the latest from Sean and New Beerginnings? Like us on Facebook and Instagram or reach out to us on Reddit.

Ingredients Series #3 – Yeast

Hi All,

Thanks for joining us for our third installment in the ingredients series. This week is all about Yeast. We’ll cover a bit of background on it, its history in brewing. Common types and methods of usage. As usual with these potentially science-heavy posts, I’m going to cover anything necessary to get you brewing and using this ingredient with confidence while leaving the in depth details for a later series of posts.

Last Week In New Beerginnings

BeerSmith 3 is out! I use this software and was very excited to see version 3 for desktop and mobile come out. I spent a few hours creating and arranging all my folders to organise recipes then inevitably thought of a better way to do it so inevitably tore them all down and started again! Rinse and repeat a couple of times and I have what I think is a pretty good system.

I generally brew beer by what I feel like rather than picking through the list of BJCP styles. So I have my British, American, European and Other folders along with a clone recipes and New Beerginnings folder for recipes I use here as part of brew day posts.

This said, it’s good to group similar recipes together, so within those I have styles like IPA, Pale Ale, Lager, Stout etc. I feel this is better than just having an “IPA” folder since English, American and Belgian IPAs can vary drastically and while I’m in the mood for one, might not be in the mood for another.

You also have the option of copying recipes between folders so you have multiple copies that fit into different categories. For example, a Sierra Nevada Pale Ale clone would go in my American -> Pale Ale folder AND my Clone Recipes folder. This way I can find it no matter which place I looked. The one thing to bear in mind is that if you edit a recipe in one folder it does not edit it in others. Meaning that you need to re-copy it to the other locations it fits once you’re done editing.


Yeast

Now on to our main topic for this post, everyone’s favourite microorganism…Yeast!

Background
The yeast we have used to brew with for thousands of years is a single-celled Fungus that at the most base level converts sugar (in the form of Maltose, Maltotriose, Glucose, Sucrose and Fructose) into Carbon Dioxide and Ethanol (henceforth referred to as CO2 and Alcohol). It was first observed in 1680 but not considered to be a living organism at the time. Hundreds of years later, in 1837, Theodore Schwan was responsible for their correct identification as Fungi. However, the first person to recognise their importance in the production of alcohol was Louis Pasteur, the French Scientist in the late 19th century.

Saccharomyces_cerevisiae_SEM
Saccharomyces Cerevisiae Cells under an Electron Microscope

Its cells are Eukaryotic, meaning it has a membrane-bound nucleus containing all of its genetic material rather than the genetic material floating around in the cytoplasm of the cell. This is an advanced type of cell structure that’s similar to human cells except Yeast cells have the added benefit of a cell wall that helps give some shape to the cell as well as extra protection.

There are many kinds of yeast available to brewers but most are strains of Saccharomyces Cerevisiae or Saccharomyces Pastorianus. The former is top-fermenting, meaning it ferments from the top of the wort down throughout and is also known as Ale Yeast. The latter is a bottom-fermenting yeast and is generally used for lagers. I was watching a talk by a world renowned brewing professor Dr. Charlie Bamforth and he gave a little tip to help always differentiate between these two. Look at the last 4 letters of each strain and you’ll realise which one is the bottom-fermenting yeast!

While the uses of these vary (lager strains like to be fermented cooler than ale strains for example), I’m going to try and use one description of everything that should fit both types and only talk about both Ale and Lager yeasts separately when referring to something specific like an exact temperature or using scientific nomenclature (S. Cerevisiae or S. Pastorianus).

Reproduction & Life Cycle
We must understand the way that yeast reproduces and its life cycle in order to create a good environment for it in brewing, especially if you get into the world of harvesting and repitching yeast. If yeast does not have a good, healthy environment then it may cause unwanted effects in fermentation or not ferment at all, but more on that later.

02_starters_1
Yeast during adaptive (right) and fermentation (left) phases. Image obtained from brulosophy.com all credit to M. Schott who authored the article.

Yeast goes through several phases when we put it into wort. First, it adapts to its environment and grows, multiplies and reproduces. This is the adaptive phase, sometimes called the lag or growth phase. This reproduction is an aerobic reaction, meaning it requires oxygen for the yeast to reproduce by budding, a bud forms on the outside of the yeast cell and eventually splits off and becomes its own cell. This process is also used to build lipids and other nutrient reserves for the yeast to use during the next phase. If Oxygen is not present during this phase, the reactions can not take place and you will end up having far fewer viable yeast cells left to go on to the next phase.

After this, the next phase is where fermentation begins, by which I mean the yeast begins to consume sugar and produce Alcohol and CO2, this is where you’ll see your airlock start bubbling at the top of your fermenter. The fermentation process is anaerobic, meaning it does not require oxygen. In fact, oxygen at this stage of the process can begin to have some serious detrimental effects to your beer so it is advised that you limit any possible exposure.

The next phase of the cycle, depending on yeast health, nutrient reserves and environment is either being harvested for further replication and use or autolysis (cell death caused by its own enzymes). It’s generally advised to get your beer off the yeast at this point as too much contact with autolysed yeast can cause some nasty off flavours. However, in practice I’ve found the point at which it’s noticeable does not make much difference on the homebrew scale. Nevertheless, I do it because it’s good practice and if it has the chance of keeping my beers consistent and free from off flavours, I’ll do it.

In terms of Oxygen, it is vital in the initial stage of the yeast’s life cycle so it’s recommended that you give the wort some exposure and aerate it somehow. This can be done with an Aeration Stone or simply by being a little less careful when transferring from the kettle to the fermenter and not being afraid to splash it around a bit! At all other times however, do not expose to oxygen unless absolutely necessary (e.g. for dry hopping) as it will have a detrimental effect on the flavour and appearance of your beer along with its shelf life.

Another point worth noting is that unless you are carbonating with a keg and pure CO2, the yeast also needs to be used for a secondary fermentation in the final package, be it a keg or bottle. This secondary fermentation primarily focuses on the production of CO2 to carbonate the beer rather than the production of alcohol, although a slight increase in ABV of up to or around 0.5% is to be expected.

Preferred Environment
Would you be ok to live your entire life surrounded by hot liquid that becomes so alcoholic that it slowly stops your ability to do anything? Or be so cold that you are literally made dormant, incapable of eating or going about your day? No? Neither does your yeast!

The environment which we create for our yeast is extremely important to the quality of the finished beer. Anywhere too far outside this ideal environment and it begins to act strangely, producing flavours it normally wouldn’t, or stopping working altogether! It’s a combination of factors which make up the ideal environment for yeast.

  • Temperature – Too hot and they produce higher alcohols than simple ethanol, ones similar to what you would find in paint stripper and other industrial alcohols, and this is exactly what they smell and taste like in the beer. Far too hot and it eventually kills the yeast and no more fermentation continues. Too cold and fermentation, like any chemical reaction, slows down and eventually stops. The yeast becomes dormant but warming it back up again will kick it back into gear. Ale Yeast ideally ranges from around 18-28°C and Lager Yeast from 12-15°C. Different strains may vary, always check the packet before using.
  • pH – pH is important for the enzymes in yeast that enable the metabolic processes of the cell. There are many of these that do different jobs but at the base level the process goes Sugar -> Pyruvic Acid -> CO2 & Ethanol. If the pH varies too much (ideal range being around 4.8-5) then the enzymes permanently change and can no longer do the job they were designed for. This is called denaturing.
  • Aeration – As mentioned before, this is vital for yeast when it’s in the adaptive or growth phase in order for the yeast to multiply and build its nutrient reserves.

Natural Competitors – Bacteria
Like any living thing in the world, microscopic lifeforms like yeast have competition for food. This includes other yeasts as well as bacteria. Luckily, good cleaning and sanitisation practices can keep these in check. When you pitch an appropriate amount of viable yeast into a sterile container filled with nutrient rich, sweet wort, it makes quick work of reproducing and becoming the dominant lifeform in there so anything else is generally overpowered. The key to this is the first few components of the previous sentence.

  • Pitch Rate – This refers to how much yeast you pitch, or add, to a given amount of wort. Too little and the yeast gets stressed and possibly dies before fermenting all the available sugar. Too much and you may get a very yeasty-flavoured beer that is cloudy and not all that pleasant to drink.
  • Yeast Viability – The older yeast gets, the less of it is able to reproduce and ferment wort. Dry yeast generally has a longer shelf life of viable cells but liquid yeast has more viability as it’s generally fresher. With dry yeast, you can choose to rehydrate or sprinkle directly onto your wort, I’ve had great results with both. With Liquid yeast you generally need to make a starter as they don’t come with as many cells as dry yeast so you may be underpitching. You should also make a starter or pitch multiple packets if your liquid yeast is over 3 months old, I’ll cover this process later in the post.
  • Sterile container – This is vital for ensuring your yeast has as little competition as possible from foreign wild yeast or bacteria. Clean your fermenter thoroughly after use and before the next use if it’s been a while but ALWAYS sanitise prior to use with a good quality no rinse sanitiser like Star San. Remember, clean to get rid of all the dirt you can see, sanitise to get rid of all the nasties you can’t!
  • Nutrient Rich Wort – You want to make sure you have the best food for your yeast. This means aerating your wort, using good quality, fresh ingredients, adding yeast nutrient if needed (especially helpful with big, high gravity beers). We’ve been through aeration and I’d like to think most of us are sourcing the best ingredients we can so onto the last point. Yeast nutrient contains everything from enzymes to nitrogen and other minerals to ensure your yeast stays healthy throughout fermentation and is especially helpful if reusing yeast over several generations. Another alternative that makes an acceptable yeast nutrient is using old yeast that has passed its use-by date or is not needed (especially useful for extract brewers that swap out the canned yeast for another variety!)

Production of Yeast
Yeast is everywhere, the current theory about the yeast we use today is that it’s a descendant of a yeast that originally came from the skin of grapes. This makes sense since wine was also produced in very high volumes for at least as long as ales and lagers.

This said, there is such a variety of wild yeast on everything that producing a specific strain cleanly on a commercial scale is incredibly difficult. Several companies make yeast cultures available to home brewers in both dry and liquid forms. The most popular and recognised of these are Fermentis (e.g. US-05 and W-34/70 strains), White Labs (e.g. WLP007), Wyeast (e.g, WY1056), Imperial Yeast (e.g. A07 Flagship) and Mangrove Jacks (e.g. M44 US West Coast).

imperial_yeast_pouch_lineup_-compressor
Range of strains on offer by Imperial Yeast

All of these companies take great care to ensure the purity of the yeast they produce as well as packaging it in such a way to make it sterile yet easy to ship/store. This requires a lab and sterile environment along with testing equipment to make sure they are aware of the exact strain they are selling.

The production process, which varies from company to company can be best explained by being fairly general and gathering information from the websites of each. See below:

  1. Lab – The yeast cultures are isolated in a lab from various sources and are ensured to be as pure as possible before moving on to the next phase.
  2. Fermentation – Each yeast is introduced to wort in order to go through the first few stages of fermentation. The adaptive phase to grow the yeast cell count for harvesting and fermentation to ensure the yeast is viable and has enough nutrient reserves to go on to another brew (or several!)
  3. Centrifugation – This separates the yeast from the wort to ensure only yeast moves on to the next phases.
  4. For Dry Yeasts, they are then stored for some time to make them dormant then filtered for more purity and dried.
  5. For liquid yeasts, they are simply packaged at this stage.

With dry yeasts, some extra components are added to aid the useability of the end product. Usually an emulsifying agent is added to help clump the yeast together as without it the yeast cells are so small that they will not make a good powder, more of a cake!

Using Yeast
At the risk of continuing to repeat information, I’m going to keep any information about aeration, pitch rate, wort, temperature and pH considerations to an absolute minimum! Instead I’m going to talk about the rehydration, starter and reuse processes.

Rehydration –
For dry yeasts, you may choose to rehydrate them before pitching. This aids with viability from the minute they hit the wort instead of having to rehydrate, then get to work. I’ll take my rehydration instructions directly from this fantastic Fermentis tips and tricks sheet.

1. Sterilise all equipment and prepare some sterile water (non-chlorinated tapwater is perfect) or wort equal to 10 times the weight of yeast being used, i.e. 10g of yeast = 100g water/wort. If using water, boil first then allow to cool. Ideal temperatures for this are 25-29°C for ale yeasts and 21-25°C for lager yeasts.
2. Gently stir and leave for 30 minutes.
3. Pitch immediately or within NO LONGER than 4 hours.

Making a Starter –
For liquid yeasts, a starter is often recommended to ensure you have a sufficient amount of yeast to pitch into your beer. Dry yeasts generally do not need a starter, just rehydration if you choose to do so. This is best done the night before or at least 12 hours before the beer is ready for yeast pitch. I’m taking this information from the White Labs web page on making starters as I’ve found it to be the best method that works for me. Most measurements in imperial.

1.  Assess what size of starter you need based on the volume and specific gravity (SG) of your wort. For most normal batches within the 1.050 area a 1l starter is plenty.
2. Add 2 pints of water to a pan with 1/2 cup of light dry malt extract (LDME) and boil for 10 minutes and cool.
3. Pour this wort into a sanitised glass container like an Erlenmeyer Flask and pitch the yeast into it. Cover this with sanitised aluminium foil.
4. Shake the flask vigorously to aerate the wort.
5. Keep the starter at room temperature for 12-18 hours stirring occasionally or use a magnetic stir plate to keep to starter aerated and the yeast in suspension.
6. After 12-18 hours, switch off the stir plate and allow the starter to settle as much as possible.
7. Decant most of the separated wort off the top right before pitching, being careful to not disturb the yeast layer at the bottom. Decant around 80%.
8. Once the yeast and wort are close to the same temperature, swirl to get the yeast back in suspension and pitch the starter into the wort.

Other Considerations
The only thing we haven’t talked about yet is the impact yeast has on flavour and aroma with Esters and Phenols. With different combinations of these compounds, each with a unique character, it’s estimated that yeast can contribute up to a phenominal 600+ different flavours to beer.

Esters typically give fruity aromas and Phenols can give some spice. You will find a description of the flavour/aroma profile that yeast is likely to give online before buying to allow you to select a yeast with the character you desire. Usually the yeasts a company produces are categorised by beer style. In the actual production of esters and phenols during fermentation, it is typically a function of many things.

– Temperature being a big one, the higher the temperature, the vigorously the yeast will ferment the wort but it may not be clean in doing so and unwanted compounds may result.
– Shape of the fermenter. Yes you read that right, the physical shape of a fermenter can affect the production or absorbtion of esters and phenols. Tall, narrow fermenters with conical bottoms like the SS Brewtech Chronical help by reducing the amount of trub in contact with the wort and the tall shape provides enough hydrostatic pressure (water pressure within a tall, still column due to gravity) to significantly reduce the absorbtion and production of esters and phenols respectively.


Thanks for joining us for this big post on yeast. These ingredients series posts are aimed at getting you familiar with the ingredients we use to brew and get you using them with confidence so you can make better beer.

We covered a little bit of the history of yeast, delved somewhat into its anatomy and biological processes while learning how to take care of it properly and use the different commercially available varieties properly.

Next in the ingredients series is one of the most important but most overlooked ingredients. Water. It forms at least 90% of our beer yet we often forget that water has a taste of its own and can impart these flavours and characteristics to our beer.

Until next time, happy brewing,

Sean


Want to stay up to date with the latest from Sean and New Beerginnings? Like us on Facebook and Instagram or reach out to us on Reddit.

Brew Day #2 Club Brew

Hi all,

I’m taking a break from regular posts this week to allow me to delve a little deeper into research for future ingredients posts. This week’s post will cover my previous week’s brewing activities which were very different to normal!


Last Week in New Beerginnings

Last week in New Beerginnings I tried the first of the Pilsners that I bottled last weekend and it was delicious! The chill haze that I was worried about was none existent and it dropped incredibly clear, by far the brightest brew I’ve produced. It looks a little dark in this photo but I swear it’s just the photo, it’s much more Pilsner-coloured in real life!


Brew Club Brew – English Golden Ale

As part of an activity for a local brewing club, Brisbane Brewers Club, my local brewing supplies store, Hoppy Days hosted a brew night where the same beer was brewed simultaneously on 4 different systems. The only difference other than this was 4 different base malts for the beer so for the recipe I’ll just say use any crisp English pale malt like Maris Otter.

The brew was done simultaneously on a Grainfather, Robobrew, 3-Vessel HERMS system and an Electric BIAB. See below for photos.

5880FBC3-0203-4589-8E3E-D046C3858359

It was a good comparison of the features of each system. Everything from $300 to over $3,000 set ups! By far the easiest were the Grainfather and Robobrew beers as you could set your mash temps and boil schedule and away they went. All mashed in at the same time, the Grainfather actually won the race to be mashed first and was first done overall since it could begin heating to boil sooner. The only downside to all the systems other than the Big HERMS system, which wasn’t an issue with this brew, was the fact that they were limited to a standard ~20l (5 Gal) batch and you would have to do two brew days in one if you were to brew a double. The comparative size and cost of the HERMS system was a far bigger downside in my opinion but it is something to look to in the future if ever I were to expand into double batches.

Now for the brew itself

Recipe
5kg Crisp English Pale Malt
40g of East Kent Goldings @ 60 minutes
40g of East Kent Golding @ 10 minutes
1/2 a Whirlfloc tablet for kettle finings @ 10 minutes
20g of East Kent Goldings @ Whirlpool for 10 minutes.

Mash at 66°c for 60 minutes with a Mash out at 75°c for 10 minutes.

Boil for 60 minutes

Expected OG was 1.040 and expected FG after 10 days in the fermenter should be 1.007 for an estimated ABV of 4.4%

It was then racked into a cube and picked up the next day by the lucky few who were assigned to ferment them. I put my hand up so I got one and was given a pack of Giga Yeast GY031 British Ale #2, a liquid yeast contatining 200 billion cells, more than enough to pitch into a standard, non-high gravity 19L batch without making a starter.

IMG_0109

After 7 days at 18°C, the gravity reading was 1.020 and it tasted still very sweet. I was worried that fermentation had stalled somewhat so I put the temp up a degree in hopes of encouraging the yeast to kick back into action and finish the job off.

That’s all we have on this post so far as the brew is not yet finished. Next steps are to cold crash and bottle. I’ll update this post when it’s all said and done so we can check how it turns out!


My next brews I have planned are for Christmas this year and next winter. I’ll brew another Pilsner and a session Pale Ale for Christmas but I’m going to put down a Russian Imperial Stout (est 9.6% ABV) in hopes it will be adequately aged by next winter as a winter warmer!

Thanks for joining us with this quick update.

Cheers,

Sean


Want to stay up to date with the latest from Sean and New Beerginnings? Like us on Facebook and Instagram or reach out to us on Reddit.

Ingredients Series – Hops

Hi all,

Thanks for joining us this week in the second instalment in our ingredients series where we discuss everyone’s favourite plant, Hops! Sorry for being a day late on it, I intended to get it out over the weekend here but had a migraine on Sunday so could barely think let alone write a post on such a large topic!

Since this is potentially a MASSIVE topic, we’re going to go through as much detail as possible to get you brewing and using this ingredient with confidence. We will try not to delve too deep into the science aspects, that comes in a later, significantly larger post!

Last Week In New Beerginnings

This past week I have only had chance to deal with the beer that I currently have in the fermenter, the Pilsner I brewed in a recent post. I moved the temp up and down a little for Diacetyl rests and a cold crash. I’m happy with how it’s turned out other than a little chill haze that bugs me but I’ll work out when I rebrew it. It smells and tastes fantastic, even with no carbonation!

I bottled that brew and now just have to sit and wait for a few weeks for it to carb up. Meanwhile I can think about what beer I’ll brew next.

For now though, lets focus on the present, that means moving on to our main segment this week, Hops.


Hops

Hops are the flower of, most commonly, Humulus Lupulus, a climbing, perennial plant that contain compounds to add bitterness along with flavour, aroma and antiseptic properties to beer. They are used by brewers the world over and are by far the most popular bittering ingredient in beer. In the family Cannabinaceae, they are relatives of cannabis. Don’t let this fool you into thinking you can smoke them or use cannabis in beer in place of hops! They are in the same family and retain some of the same properties in regards to potential for anti-bacterial and medicinal use but that’s where the similarities end!

Initially used for these antiseptic properties, the introduction of hops would allow beer to stay unspoiled for longer periods. Their bittering properties were initially a downside and were just ‘put up with’ since this was far outweighed by the benefits of using them as an antiseptic and stabilising agent.

Before hops, people used other plants or combinations of plants such as mugwort or Gruit in beer to add similar properties. The use of hops in beer was first noted as far back as the 9th century and became popular initially in the Hallertau region of Germany. This region still produces the most hops out of anywhere else in the world. Other popular areas include Europe and the U.K, the U.S, Australia and New Zealand.

Each of these regions has a different species within the Humulus genus, Lupulus are European hops, Lupuloides, Neomexicanus and Pubescens are native to North America for example. This means each region tends to have some similar characteristics and mixing different regions requires good knowledge of the hop’s properties.

Anatomy and Types of Hops

Hops are the flower of the plant and the structures within this flower contain all the compounds that brewers seek to extract and use to flavour their beer. Below you will see a diagram and cross section of a hop flower pointing out several anatomical structures.

Obtained from http://bioweb.uwlax.edu/bio203/s2009/sewalish_andr/Humulus%20Lupulus%20-%20Common%20Hops/Hop%20Anatomy%20and%20Chemistry%20101.html

As you can see, one of the most important parts of the hop plant is the Lupulin gland. They are the yellow glands of hop plants containing essential oils and acids that make your beer bitter. There are two kinds of these acids:

  • Alpha Acids – These are the main component that provides bitterness. Highly insoluble in their natural form, they get changed (through a process called Isomerisation) into a different form when exposed to heat and convert to Iso-Alpha Acids. These Iso-Alpha Acids are soluble and impart bitterness to the beer, They are broken down even further into the 5 following compounds. Humulone, Adhumulone, Cohumulone, Prehumulone and Posthumulone. Of these, the last two are present in such low levels that they are mostly considered negligible and Cohumulone in high levels gives a very harsh bitterness.
  • Beta Acids – There are 4 of these, Lupulone, Colupulone, Adlupulone and Prelupulone. They are similar to Alpha acids in that they impart bitterness but do not do so through isomerisation during the boil. They remain insoluble and convert to a soluble state with age or oxidisation. They are generally considered undesirable.
  • The other thing that is produced by the Lupulin gland is essential oils that contribute flavour, aroma and even foam stability to the beer. There are too many to list and go through individually but they give an incredibly wide range of flavours, some nice and some not so much. See below, they can be,
  • – Fruity – Citrus, Pineapple, Passionfruit, Blackcurrant
    – Floral – Geranium, Rose, Mint
    – Spicy – Black Pepper, Aniseed
    – Vegetative – Grassy, Capsicum, Cucumber, Potato
    – Nutty – Almonds
    – Caramelised – Honey
    – Woody – Balsamic, Vanilla
    – Earthy – Mushroom
    – Chemical – Cabbage, Rancid (cheese or sweat), Catty (also referred to as cat piss)
    – Microbiological – Cheesy, Fatty

Production of Hops

Hops are grown for commercial use in Hop fields that are geared specifically towards growing them. Even though Hop plants are incredibly resilient plants and capable of high rates of growth (even up to 1-2 feet a week!), commercial Hop growing facilities like Hop Products Australia take great care to ensure ideal conditions for their hops to grow efficiently and healthily.

Hop Field in WI, USA, © 2018 Gorst Valley Hops

Since they are naturally a climbing plant, most often Hop fields have a lattice system of wires for the plants to attach to and grow vertically. This also makes them easier to harvest as they are hung vertically. After they are harvested, they are moved into an Oast House for drying and packaging.

Hops are available in several different forms to brewers, each has it’s own advantages and disadvantages:

  • Wet Hops – Rarely found commercially due to an extremely short shelf life. Wet Hops are what comes straight off the vine, before the drying process. Because they have not been processed or dried, the amount of acids and essential oils is significantly lower per weight of product than other forms of Hops. Using Wet Hops usually requires using more than you would with other kinds. They can also only be purchased at or shortly after harvest time.
  • Whole Cone Hops – These are Hops that have been dried but have had no more processing than that. They have a slightly longer shelf life than Wet Hops but must still be used quickly to avoid spoiling. Like Wet Hops, Whole Cone Hops must be used in larger quantities than many other forms as the contents of important structures like the Lupulin Gland are not as concentrated for the same weight of hops.
  • Hop Pellets – Probably the most popular form of Hops available to brewers. Hop Pellets are the product of Hop cones that have been dried, unnecessary material removed, macerated into very fine material and fed through a machine that compresses the material into pellets. This leads to high levels of Alpha Acids and Essential Oils per pellet as well as a reasonably long shelf life when stored correctly.
  • Hop Hash – This resinous mash of Hop matter is highly concentrated, with Alpha Acid and Essential Oil levels often 2 or 3 times higher than would otherwise be found in the same hop. When a hop is pelletised, some hop matter is left over in the machine, it is highly compressed or mashed and so contains far more oils and acids than normal. These must be used in lower proportions than whole or pelletised Hops but can also be used very effectively as a dry hop due to the high concentration of aromatic essential oils.
  • Hop Extract – There are 2 main kinds of Hop Extract, CO2 and Iso Extract. CO2 Extract is designed to be used during the boil in place of using hop pellets. It should work the same as regular hops, with early additions being isomerised and used for bittering and later additions used for flavour/aroma. Iso Extract is pre-isomerised extract that is typically effective only for adding bitterness after fermentation. Be aware that they will add bitterness very successfully but also add haze to the finished beer.

Hop uses

There are many ways to use hops, different stages to add them to the wort/beer that achieve different effects, different combinations of hops to adjust the flavour and aroma of your beer etc. Firstly however, I’d like to talk about these different effects that hops can have in beer and how they can be achieved practically. Then I will move on to different ways and combinations of adding them to beer to achieve those effects.

Any addition of any hop to your wort/beer will achieve one or more of the following.

– Bitterness
– Flavour
– Aroma

Which of these you will get from that particular addition is denoted by the amount of time the hops are in contact with boiling wort. Due to the process of Isomerisation, where heat over time causes the insoluble Alpha Acids to turn into soluble Iso-Alpha Acids, the longer hops are in contact with vigorously boiling wort the more bitterness they will impart. During this time the hops will also release essential oils into solution that will affect flavour and aroma. These are broken down and boiled away in time so these additions must generally be done later in the boil. See below for another beautifully hand-drawn diagram of hop utilisation over time.

As you can see, although this is definitely not to scale, it gives you the general idea that bitterness increases with time until all the Alpha Acids are Isomerised whereas flavour and aroma build and drop very quickly as the essential oils are absorbed then boiled off.

To get a predictable result, brewers often use specific times for their hop additions to achieve the desired aspect. See below for typical hop addition times (in minutes)

60 Minutes or more – Alpha Acid conversion to add lots of bitterness, little to no flavour, little to no aroma.
45 Minutes – High bitterness, medium flavour, little to no aroma.
30 Minutes – Medium bitterness, high flavour, low aroma.
15 Minutes – Little bitterness, medium flavour, high aroma.
0 Minutes (Flame Out) – Little to no bitterness, very low flavour, very high aroma.

However, hops are not exclusively added during boiling. There are many times that brewers can choose to add them, each contributes a different character.

Boil – Most common method of hop addition, this achieves everything from bitterness through to flavour and aroma.

Dry Hop – This occurs in the fermenter after or sometimes during active fermentation. This contributes strong aroma but can contribute haze to the beer, especially if used during active fermentation. This is undesirable for most beers but a vital aspect of some more modern styles such as NEIPA which is characteristically hazy.

Whirlpool – Occurring at the end of the boil, the whirlpool phase helps concentrate the Hop matter and hot break material to the centre of the boil kettle. Some brewers use this time to add extra hops in place of a late boil addition to achieve some extra aroma.

First Wort Hop – This is when hops are added during the beginning of the sparge when the ‘first wort’ is collected in the kettle. It contributes almost exclusively bitterness but some anecdotal evidence suggests it can lead to a smoother and more pleasant bitterness than early boil additions.

Mash Hop – Similar to First Wort Hop but occurring during the mashing stage instead of adding hops to the first runnings of the sparge. You add your hops to the mash along with the grains. It achieves a similar character to First Wort Hopping.

The other thing that must be talked about in terms of the practical use of hops is choosing which hop to use. Some styles necessitate a particular hop, such as Saaz in a Czech Pilsner, but for the most part hops are best picked according to the brewer’s individual tastes and preference for where they want that beer’s direction to go. I’ve found the Hop Flavour Spectrum, by Hop Products Australia, to be incredibly useful in characterising hops. I have plotted this chart with my own favourite hops too so I can choose which hops would blend together nicely.

See the chart below, all copyright for this chart goes to Hop Products Australia, I am recommending its use purely as a home brewer and do not claim to have any official partnership with Hop Products Australia, other than buying their hops for my own use.

©2018 Hop Products Australia

Successful hop pairings would include hops from similar groupings or combine with a neutral hop that isn’t going to battle against the others. For example from the chart above, it would make for a very unusual pairing to use Vic Secret and Ella Hops whereas Galaxy and Enigma would pair together brilliantly and compliment each other’s flavour.

Here are some common pairings and an example of what character they would give the beer:

Citra and Centennial – A Bright citrus flavour and aroma with high bitterness, perfect for fruity American IPAs.
Fuggles and East Kent Goldings – Earthy, floral, classic British flavours.
Tettnanger and Hallertau – Floral and Spicy, typical for German or some Belgian Beers.

There are many more possible combinations but these are just a few based on my own experience. I’d suggest printing out the Hop Flavour Spectrum and looking up the hops you wish to use and place them somewhere on the chart. This will leave you with a chart of your favourite combinations and allow you to see new ones that you had not thought of before.

The final note I have on the use of hops comes as a suggestion from one of our reddit readers u/AlfredRWallace. Hops, as previously mentioned, have a shelf life and degrade over time until you’re left with mostly beta acids which do not impart a pleasant bitterness.

This spoiling is a chemical reaction and like all chemical reactions is dependent on heat. The warmer the hops, the quicker they spoil and vice versa. I would recommend always storing hops in airtight bags (vacuum sealed if you can) in the freezer. This method allows you store hops for significantly longer periods, months instead of weeks in the fridge or days at room temp! This is important as buying hops is expensive but bulk buying helps cut this cost a little. If you bulk buy and store your hops properly, you can easily get away with buying 3-4 batches worth of hops, making each batch cheaper to make. Thanks u/AlfredRWallace for the suggestion!


Conclusion

Thanks for following along with this week’s post, I hope it has given you a brief overview of hops to help you get brewing and using them effectively. I have many more posts planned that will go much more in depth into the science behind hops. They are a chemically and biologically fascinating subject.

Next in our Ingredients series is a good a look at Yeast. It will be similar to this post in terms of giving you all the information you could need on how to use it practically and how to choose the right yeast for the job. It is another topic that has much more science behind it than could possibly be included in a single post so I’ll save that for another post down the track. Due to the amount of research required to get that topic right I may have to wait an extra week.

I hope you enjoyed this week’s post, if you have any feedback or edit suggestions for it please contact us and let us know. We want to ensure the correct information is presented in the best possible way so that fellow brewers can stay well-informed.

Until next week. All the best,

Sean


Want to stay up to date with the latest from Sean and New Beerginnings? Like us on Facebook and Instagram or reach out to us on Reddit.

Ingredients Series – Malt

Hi everyone,

Thanks for checking in again this week where we’re going to start on our series of posts about ingredients. This week it’s Malt, but before we get onto that…

Last Week In New Beerginnings

I have to admit, this past week has been a quiet one for me on the beer front. What I have done, and would encourage you all to try at some stage is get friends/family to review and judge your beer. I sent some beer down to my brother for him to try. Since he is heavily into exploring craft beers and has a buddy that he regularly tries beers with he decided to do a full tasting panel!

I set him up with the BJCP Style Guidelines and he made a scoresheet. Not only did he do this but he went out and got a comparable beer from the same style as each of mine to see how it ranked against a commercial counterpart. Here is the list of what I sent him along with the commercial beer and their scoresheets:

English IPALittle Creatures IPA (not an english IPA but commercial examples of that can be hard to find in Aus)
American Pale Ale – Kosciuszko Pale Ale – No Review
Golden AleSteam Ale Golden Ale
Irish Stout – Guinness – no review due to drunkeness….no really!
American Brown Ale – White Rabbit Dark Ale – As above, although he later revealed that the commercial one was “like eating fairy bread compared to Ffffffire!”

Some of the beers I sent them were not my proudest creations but they seemed to enjoy them and it was interesting to get some more impartial feedback than just my own. If you’re game to let you buddies free with a scoresheet and a flight of your beers, I suggest you do it. It made me think twice about some beers that I had all but written off and has given me some goals for next time.

Now on to this week’s topic…


Malt, other than water, is arguably the biggest component to beer. Without it, we would essentially have bitter water, there would be no colour to it, no sweetness, no alcohol, as much body and mouthfeel as a cold cup of tea. Not great.

Because of this importance, and the importance of all components that make up our beer I thought it appropriate to go into some detail and do a spotlight post for each major ingredient, starting with Malt.

In this post, we will go through some classifications of malts, how to tell them apart, how to use them as well as touch on the malting process itself from crop to mash to help you get some perspective and perhaps a new appreciation for this wonderful ingredient.

Types of Malt + Their Creation

Types of Grain Used in Brewing
The predominant type of grain referred to when discussing Malt is barley. More specifically, Hordeum Vulgare, a species of monocotyledonous grass, of the family Gramineae. It’s ancestors were derived from the Middle East, what used to be called Mesopotamia and other surrounding countries such as modern day Syria and Iraq. Modern day Barley is grown and sold the world over to cover the needs of brewers but mainly farming and industry as animal feed. The difference between Malting and Feed Barley is the protein and moisture content, so if you come across a cheap sack of grain that doesn’t look like it’s specifically for brewing, it probably isn’t and won’t make very good beer!

Barley however, is not the only grain used for brewing beer. We will be covering all the bases in this post, if it’s a grain and can go in a mash, we’ll cover it! But first I’d like to break down ‘Malts’ a little more, into two separate categories that serve two very different purposes.

Base Malts & Specialty Malts
There are 2 classifications of Malts that encompass all varieties at the brewing stage, Base Malts and Specialty Malts. Base Malts are always going to make up the majority of your malt bill or grist. They are usually only lightly to medium kilned so as to not denature many enzymes and maintain a higher potential for starch to sugar conversion. They are an essential component to brewing and without them your beer would be unbalanced and lacking in several desirable aspects. This said, because they are usually only lightly kilned, the beer they produce on their own is light in colour and flavour. The need for this additional colour and flavour paves the way for our next category.

To make beers more exciting and have a broader range of potential flavours and colours, brewers make use of Specialty Malts. These are malts that have generally been kilned for longer, producing a darker end product to both colour the beer and alter its flavour. Specialty Malts are not generally used as the sole ingredient in a brew since the longer and/or hotter kilning process denatures the enzymes it contains meaning it cannot convert much starch to sugar. It requires use in combination with base malts to develop these sugars.


2-Row Barley

By far the most common type of malt used in beer is 2-Row Barley. It is called so because of the shape of the plant itself. When looking down at a head of Barley from above, it appears to have 2 rows of grain. See below

img_0130.jpg
Image obtained from brulosophy.com


The reason for this being the most popular grain is simple, it has the highest starch content per weight of grain than any of the other Malts in this post. The more starch, the more poential sugar, the more alcohol for the same weight of grain. It also has much more evenly-sized grains than 6-Row Barley, making it preferable for brewers as they can set a predicatble width for their mill and not get half the grains pummled into flour while the other half remain untouched. It can be used as a base and specialty malt in up to 100% of the grist with no other grains.

6-Row Barley

The other type of Barley commonly used in brewing is 6-Row Barley. After reading the description of 2-Row barley above, I’m betting you can guess why it’s called 6-Row? I’ll tell you anyway! It’s because when looking down at the head from above, it appears to have 6 individual rows of grain. See Below.

Image obtained from brulosophy.com

Why do we need a second type of Barley if 2-Row is so great? The answer is simple, it’s cheap. It’s most commonly used by large commercial breweries, particularly in the US. Think Bud, Coors, Miller etc. It’s cheap because it has several aspects of its anatomy that are “undesirable” in comparison to 2-Row Barley.

– Less available Starch
– More Protein (enzymes)
– Thicker husk

This makes 6-Row is itself far less efficient as there is plenty of protein, but not as much starch to convert with it. This is what makes it cheaper, the lack of potential for it to produce as much ABV per weight of grain.

These attributes though, do have some advantages that make brewing with 6-Row a worthwhile endeavour.

Because they have more proteins, they are able to help out enzymatic activity when used with other Malts/adjuncts in the mash that are lacking in protein content of their own. Their thicker husks also help the lautering step of the mash when using grains/adjuncts that have not got husks of their own. It surrounds them so they don’t clump together and produce problems like a stuck mash or stuck sparge where the water can’t get flow through and help extract sugars to form wort.

Wheat
One such alternative Malt is Wheat. Wheat, even moreso than Barley, is probably the most popular and widespread crop on the planet. It is used in everything from Beer to bread, to animal feed and all sorts of other industry. We will focus on its use in brewing.

As previously mentioned Wheat lacks husks, a byproduct of heavy selective breeding over many years that has benefit for all uses of wheat except brewing. If used with no other additions to help lautering, it would become an impenetrable paste and you could not sparge or drain effectively, ending up with a stuck mash. Use at least 30% grist of non wheat such as rice hulls and/or decent levels of Barley to circumvent this problem.

Wheat can give a very light and delicate mouthfeel, golden colour and often a slight acidity & crispness. It’s also not as modified as barley at the malting stage, meaning germination leaves more longer chain proteins instead of short ones that must be dealt with in the mash, which reduces efficiency. A multi-step mash is a must when brewing with high proportions of wheat in the grist to help the proteins contained within to do their job and convert as much starch as possible. Some styles require wheat as part of the grist. Weissbier for example (being a Wheat beer) must have at least 50% wheat to be considered in style.

Rye
Rye, like Wheat, is a husk-less Malt that is predominantly used in bread-making. It gives a wonderful slightly spicy flavour and a rounded, full mouthfeel. Can impart reddish hues to the beer. It’s generally recommended to use only up to 20% of the grist but can be used in higher proportions if counteracting with other grains/adjuncts such as 6-Row Barley or rice hulls.


Oats
Oats, we all know them from dishes like porridge, some forms of bread, cookies etc so it only makes sense that someone at some point said “Hey, let’s chuck them into this beer and see what happens!” Boy I’m glad they did. Oats impart a delicious flavour to beer but are most often associated with the very full body and mouthfeel they give, akin to drinking a pint of bread! The mouthfeel can also be described as Oily sometimes (in a good way, if that makes sense). Oats are an essential part of some beers now, obviously there are beers that they lend themselves to very nicely such as oatmeal stouts and the like but in terms of more “in-vogue” beers, they are an essential component of a New England IPA (NEIPA) to give that characteristic mouthfeel.

Again they are a husk-less grain, but unlike Wheat or Rye, Oats actually get de-husked intentionally. They are also often steamed to gelatinise the starch contained within.

Some considerations are:
– Cook whole/flaked/rolled oats before adding them to the mash to ensure they work best, alternatively use Quick Oats, which have been pre-cooked. Do not use minute or microwavable oats as they are generally too small and become clumpy, leading the lautering problems.
– It’s generally recommended to use them only up to 10% of the grist.


Rice
Rice has many uses and is the staple food in many countries. Drinks such as Sake, although usually considered a rice wine, is actually closer to a beer in it’s creation. The rice, traditionally is not malted but rather hydrolysed using a combination of polishing to reveal the endosperm and then exposing it to a fungus to develop enzymes that will turn the starch to sugar.

In terms of its history in beer as we know it however, it was used by earlier US brewers to supplement inefficient 6-row Barley. The extra enzymes in the Barley would help to convert the starches to sugars and thicker husks would help it not to gelatinise, allowing sparging and draining to take place. This tradition is used still today by large American breweries such a Budweiser to add extra sugars to their wort.

Rice gives a very thin/low mouthfeel and dry due to almost all fermentable sugar. It also adds next to nothing in terms of colour.

Considerations:
– Must be cooked before adding to the mash to gelatinise the starch.
– General recommendation is to use no more than 30%

Corn
The final type of grain that I’ll cover in this post is Corn. Again, corn is grown the world over, primarily for uses other than beer. However, in beer it is a excellent source of starch and converts to sugar very well. It gives a very light colour to the wort and adds very little body or flavour.

Typically used up to 20% of grist. Again, it must be cooked before adding to ther mash unless using Torrified/flaked corn.

Malting Process
Grain is steeped in water to encourage germination to start, it is left to rest and is carefully monitored until germination has occurred to just the right amount then is kilned or roasted to stop the germination. After this the malted grains are polished to remove the beginnings of any roots and the stem that have sprouted as a result of germination.

The Malting process is designed to break down proteins in the grain as well as develop enzymes and starches necessary for conversion to sugars later during the mash.

The grains are steeped for up to 2 days and are repeatedly drained and covered with fresh clean water over approximately 8 hour periods until the roots begin to sprout. After this they are moved in a germination room that is kept between 14-19 degrees for several days. During this time, the grains are sprouting and growing roots rapidly. They can easily become tangled together so to prevent this they must be moved and turned regularly. This used to be done by hand, a process known as floor malting which is still used in some malt houses today. But for the most part the turning of the germinating malt nowadays is done by machinery, most commonly big spirals acting as Archimedes screws and moving the malt vertically upwards so it is constantly in motion.

After this the grains are transferred to a kiln that dries them back down to a moisture level of around 3-6% where it will be able to be safely stored for months. As we know by now from previous explanation of the mashing process, raising the temperature too much (beyond 75°C or so) will denature the enzyme making it unable to be used anymore for conversion of starch into sugar. Killing usually happens in temperature increments, stepping up 2-4 hours from 60-70°C to around 80-90°C. So why does this denaturing of the enzymes not occur? It’s because as the temperature goes up so gradually, the grains dry out, the enzymes which rely upon a certain amount of moisture content, become dormant instead of denatured. This is reactivated again later during the mash since heat and moisture are reintroduced.

The exception to this rule is darker specialty malts such as caramel, black or crystal malts which go through a drastically different malting process to base malts. They are germinated for longer, long enough for proteins to break down further and the enzymes to actually start converting starches to sugar. After this the grains are kilned or roasted at a higher temperature and/or for a longer period of time to allow the sugars in the grains to crystallise. As a result, these grains are darker than base malts but also usually add some extra body and sweetness to give the beer a different character.

Malt Uses

I have already touched on this a little with the concept of base and specialty malts. You have a base malt that makes up for the majority of you beer’s fermentable sugar content as well as flavour/aroma/colour and you have your specialty malt that gives a beer (usually) the maority of its colour but also flavour, body, head retention etc.

Different combinations of these make for drastically different beers. Lets focus on Specialty Malts for a moment, we already know that they add many qualities to beer in terms of colour and flavour but there are others that serve specific purposes and are a great tool to have at you disposal.

  • Carapils ® – This is a Malt most famously and originally produced by Briess. It is a proprietary malt designed to improve body and head retention while adding next to nothing in terms of flavour or colour. There are many brewers who use this to great effect but what must be considered is that it’s easy to overcompensate and start to use it as a safety net for poor practice. Nowadays I tend to use it if I’m doing a style that calls for a particularly strong and long-lasting head. It is exclusive to Briess in the US but produced by other suppliers worldwide where the same trademarks may not apply.
  • BEST MALZ RED X – This Malt is specifically designed to brew red beers, it can be used in up to 100% of the grist so can work as a base malt although technically a specialty. A really unique malt for Red ales or putting a bit of fire into your favourite recipe, it also creates a full and rounded body with a clean finish.
  • Black Malt – This heavily roasted malt is perfect in small doses for darkening a beer slightly and larger doses perfect as the specialty malt for a stout. Be careful though as too much will give you a very strong roast character that may be undesirable.
  • Crystal Malt – We couldn’t talk about Specialty Malts without mentioning crystal malt. It is the flavour, aroma and rich colour of such a wide variety of beers. They impart a nice sweetness and even roasty character in larger doses and are available in different grades of roast. English and Australian companies generally use Light, Medium and Dark to describe the malts but companies in the US use a measurement called Degrees Lovibond which is quantitative measurement of light degradation in a certain depth at a specific wavelength. They are typically sold as “Crystal 20 through to Crystal 120 “and above in 20°L increments.

But these Malts, other than Red X, wouldn’t make a beer on their own, the all important base malt is needed to give a canvas to the beer on which the specialty malts can sit, either to accentuate parts of the base malt or provide some colour of their own. This said, it is always worth taking care in choosing your base malt as the wrong malt can make or break a great beer. Here is a breakdown of some common base malts and their characteristics.

  • Pale Malt – Arguably one of the most versatile base malts, Pale 2-Row makes a great base for everything from lagers to porters and anything in between. It is my usual starting point when creating a recipe unless I want a particular flavour or am doing a style that necessitates a specific malt like Pilsner.
  • Pale Ale Malt – The difference between this and regular Pale Malt is that Pale Ale Malt is generally used more in British style ales but can also make a great addition to lagers.
  • Pilsner Malt – This Malt is a very light coloured pale malt. Obviously used predominantly for Pilsners but also great for use in many light beers in which a clean, cracker-like flavour is desired. The biggest consideration with this malt is that due to a very light kilning, it is prone to develop DMS which can give an unpleasant corn off flavour. To get around this it’s generally recommended to boil for a little longer as the boiling process helps to remove the precursors to DMS.
  • Golden Promise – This is a traditional Scottish malt that is equivalent to a pale ale malt. It produces a very pleasant, sweet and golden wort.
  • Munich – This malt is traditionally used in German styles and has a slightly higher than average nitrogen content. This makes for a denser and more compact endosperm (the starch content of the grain) and a good multi-step mashing process can be required to make full use of all that the grain has to offer. Darker colours due to the kilning process occurring at a higher temperature than many other base malts. Because it can be tricky to deal with, some brewers use it in conjunction with other grains to help boost the amount of sugar converted in the mash.

Conclusion

Thanks for following along with this week’s massive post on malt. I think it is important to know as much about our ingredients as possible so we can be discerning in our recipe creation and make sure we choose the right tool for the job, resulting in better beer. Join us next week where the ingredients series continues with an in depth look at our favourite bitter plant, Hops.

Best,

Sean


If you have any feedback or edit suggestions for this post please contact us and let us know. We want to ensure the correct information is presented in the best possible way so that fellow brewers can stay well-informed.


Want to stay up to date with the latest from Sean and New Beerginnings? Like us on Facebook and Instagram or reach out to us on Reddit.