Christmas Brew Day

Hi all,

Though I’d share a quick post on a Christmas brew I made up yesterday. It should just be ready in time for Christmas if it all works out right.

I wanted to do something that I know everyone in the family would like but put a bit of a twist on it. Beer, easy, that’d be a stout, nice and easy drinking and although it would be hot down here in Aus for Christmas it should still make us feel nice and christmassy.

But what about the twist? I couldn’t just do another Guinness clone because let’s face it, if I wanted Guinness I could walk into any shop and buy some. No, this one should be different, I want it to have at least some reference to Christmas but not be a weird spiced fruitcake/Christmas pudding beer. It should also reflect a little on Christmas in Australia.

I got to thinking and stumbled upon the Star Wars Christmas Special. (Linked version has appropriate audio still under copyright edited out, please don’t illegally download media, it genuinely hurts the makers and makes for less content for the rest of us!)

Anyway, for those who don’t know, after Star Wars episode IV: A New Hope came out, they also brought out a Christmas special. It was beautifully horrendous, an eclectic mess of characters that shouldn’t be related or doing the things that they’re doing.

So I wanted to make a stout that followed these lines. A bit of an unexpected recipe, something that references Star Wars in a way but also reflect the area we are celebrating Christmas in.

Galaxy hops and Gladfield’s Supernova malt should do the trick! Let’s dig into these ingredients a bit more..

Galaxy is an Australian hop with lots of passion fruit and other tropical fruit flavours. Definitely not what you’d expect in a stout, could be great, could be a bit of an eclectic mess with lots of unexpected characters rearing their head when you least expect….wonder where I’ve seen that before?

Supernova malt is roasted malt that’s designed to be an alternative to crystal malts, adding a nutty, toasted caramel flavour to your beer as well as a little colour.

These should make for a pleasant but unusual stout that echoes back to Australian flavours and a little bit of a space theme!

Full recipe below, then we’ll get onto the brew day!


Star Wars Christmas Special Stout

4.9kg (78.2%) Gladfield Ale Malt

220g (3.5%) Flaked Oats

150g (2.4%) Dehusked Carafa III

330g (5.3%) Gladfield Light Chocolate Malt

650g (10.4%) Gladfield Supernova Malt

15g Galaxy @ 60mins (20 IBU’s)

15g Galaxy @ 30mins (15 IBU’s)

20g Galaxy in 20 minute whirlpool (10 IBU’s)

Safale US-05

Mash at 66 for 60 minutes with 10 minute Mash out for 10 minutes.

Water Profile

Ca Mg SO4 Na Cl HCO3

46 8 53 39 60 119


Brew Day

I started out by collecting my mash and sparge water, started the Grainfather App and began heating for the mash.

Ready to start heating my strike water, salt adjustments in.

Once heated I mashed in.

Now as you can see, this was a seriously thick mash and I think the fact that I used oats and the de-husked variety of Carafa III caused some circulation and lautering issues. It was almost a stuck sparge, requiring a lot of stirring to try and make a pathway for the water to rinse the grains.

Super compacted, hard to sparge effectively.

These issues aside I still managed to hit my desired efficiency and final gravity of 1.054 SG.

The boil went nice and smoothly. No boil overs since I try to scoop the hot break off the top as early as I can to avoid it building up. It only requires a few minutes of scooping before it’s all gone. Here’s a quick before and after.

Before scooping out the hot break
After scooping out the hot break.

After the boil, came cooling and transferring to the fermenter. I came out of the Grainfather’s counterflow chiller and through a Wortometer, a product from Grainfather to give you an accurate post-chiller temperature reading.

Because it has been hot here lately, my ground water temperature is quite a bit higher than normal. I was only able to get the wort down to around 30 degrees C. I left this in the temperature controlled freezer to cool down further to pitching temperature and pitched my yeast. US-05 at around 25 degrees C.

Just before chilling

Once proper pitching temp was reached, I (quickly!) took the lid off and pitched the yeast as well as dropping in my new Tilt Hydrometer after it was sanitised.

I set the Tilt up to log to a google sheet for me on an old phone I had around the house. This phone will sit near it and constantly update the readings on the sheet, giving me update information on my brew from anywhere I can get an internet connection! This blows my mind a little, I can check on it while on a break at work, if I was overseas I could pull out the sheet, connect to wifi and see what it’s doing and estimate when it’s done. It’s a very high tech, thoroughly over-engineered solution to a problem that in reality…isn’t even a problem! I love it!

Interesting to see the slight discrepancy between the thermometers. One at the top of the brew, one in the middle.
Expecting blow off with this brew!

For now that’s all, I’ll keep you up to date on social media with how it’s going and show you the final result when it’s ready

By for now, Merry Christmas and happy brew year!

Sean


If you have any feedback or edit suggestions for this post please contact us and let us know. We want to ensure the correct information is presented in the best possible way so that fellow brewers can stay well-informed.


Want to stay up to date with the latest from Sean and New Beerginnings? Like us on Facebook and Instagram or reach out to us on Reddit.

Brewing Software

Introduction

Hi all,

This week we’re going to get into something a little different. Instead of focusing on the brew itself, we’re going to take a look at the things we do and use to manage our beer before we even get to the brewing stage. That is, designing a recipe and helping to manage, track and tweak that recipe with accurate results using brewing software.

Although recipe creation could be done without brewing software (what did we ever do before computers!?) there’s no doubt in my mind at all that it’s infinitely easier.


Brewing Software

There is a myriad of options out there for brewing software, from small tools and calculators to fully featured apps that allow for multiple calculators and full recipe builders all in one app that is available on multiple platforms.

I’m going to attempt to cover several of these, from small calculators to a few different recipe building apps. Including:

  • BeerSmith 3
  • Bru’n water
  • Brewer’s Friend
  • Grainfather recipe tools
  • Brewfather

I do apologise if your favourite app is not listed here. By all means do let me know if there’s a specific app or tool you’d like me to cover and I’ll endeavour to do so but I also feel it’s not fair to do a review or comparison of something I’ve not used.

Each of these ones listed are ones I have personally used and I’m not being sponsored by or paid for any of these opinions or reviews.

This said, if you would like to sponsor New Beerginnings or support us in any way, I welcome it! Please reach out and we can chat about what it could look like and what you can expect from me in return for your support. But I digress…

I’m going to evaluate each of these in terms of price, functionality, special features, versions (any different platforms it’s available on), ease of use and average time to make a recipe (where available).

BeerSmith 3

Beersmith seems to be almost industry standard at this stage. There are people who swear by it and some that are less quick to sing its praises but nevertheless it is arguably the most widely used. It has an unbelievable amount of information and tools for a brewer to utilise, some of these can arguably make it somewhat less user friendly than other apps.

Price

Approximately $50 for the basic version. This also gets you a cloud account that can hold just 15 recipes.

Certainly enough to get you started but it can get annoying to manage these when it gets full and you might end up upgrading pretty quickly to the gold subscription.

The gold is a $15/year subscription and gets you up to 125 recipes and includes all future updates of the app.

Functionality

Contained within BeerSmith is the following:

  • Equipment profiles to dial in your brews to your specific setup.
  • Customisable mash, fermentation and carbonation profiles so you can save your favourite methods or use one of the app’s built in recommendations.
  • BJCP style guidelines that live update as you build your recipe to help you keep it in style.
  • Grain, hop, yeast and other add ons to get a recipe based on the exact ingredients you plan to use on your brew day. Because not all pale malts are created equal!
  • Water profile tools to help calculate your salt and mineral additions to get your water just right.
  • Recipe searching to discover recipes by other brewers and brew them as they are or adapt to your own liking.
  • Inventory keeping and Ingredient prices so you can keep track of purchasing ingredients and estimate the cost of a particular recipe.

Compatibility

BeerSmith 3 comes in formats for PC, Mac, iOS and Android devices so is incredibly compatible. The only catch is to use it effectively across multiple devices you really need to have one of the higher cloud storage accounts as 15 recipes doesn’t cut it.

Ease of use

As I started with them first, I find the mobile versions of BeerSmith easier to use but I must admit that the desktop versions do also lack quite a bit in terms of the UI. It has lots of options and functionality for sure but I feel it comes at the expense of being cluttered and looking very outdated.

Average time to build a recipe

iOS App – 3.45

Limitations

One major advantage for me of BeerSmith is the water profile tool it has built in. This tool exists in its full capacity in the desktop app only, the water options built in to the mobile version is so limited that it may as well not exist.

Bru’n Water

Bru’n Water is not a recipe builder but more specifically a very fully featured water profile tool in the form of a spreadsheet. It’s a great tool to accurately predict what water additions you need to hit a target profile and gives the most accurate estimation of mash pH that I’ve come across as it’s based on your grain bill and gets adjusted by acid malt or your salt additions. It also has a tab full of information about water chemistry so you can learn the how and why of how water affects your beer.

Price

Bru’n Water has a donation model where you can get the spreadsheet for free and choose to donate to help keep it up to date. This also gets you a different version of the spreadsheet with extra features to make it simpler and even more accurate to use. I’d really encourage giving your support as it’s worth the small spend.

Functionality

Not quite as fully featured as the other recipe builders on here as it’s solely focused on water but in terms of water I don’t think there is a better solution out there.

Special features

The best features of Bru’n Water for me are the mash pH calculator and access to multiple water profiles plus the ability to match to them quickly from your starting water source.

Compatibility

If you can use excel on your device, you can use Bru’n Water!

Ease of use

It takes some time to get your head around but once you’ve done it for a few different recipes and sets of grain bills it becomes fast and simple. It’s made even simpler by the water chemistry information and training contained in one of the tabs.

Average time to build a recipe

While you’re not actually building a recipe, there is a process to go through with entering your grain bill, setting your base and target water profiles and adjusting mash pH. This on average takes 5 minutes or so at first but significantly less time once you’re used to the process. I got it down to 1-2 minutes now unless I’m using an abnormally large grain bill or strange water profile that differs greatly from my starting water.

Limitations

I want to emphasise as strongly as I can that this is not a recipe builder, it’s purely a water profile tool. It is but one, albeit important part of your recipe building process.

Also, unless you have the paid version of the spreadsheet, you need to make a copy each time you make a new recipe, or else delete all the data in the sheet and start over each time.

Brewer’s Friend

Price

Brewer’s Friend comes in several forms, there’s the browser-based web app and the dedicated apps platform-specific apps for iOS and Android. Premium Membership allowing you to gain access to the web app is $3.45 AUD a month or around $34 a year. The iOS and Android apps are around $8 as a flat rate but will not sync across devices without the premium membership.

Functionality

In terms of functionality beyond simply creating a recipe, I like Brewer’s Friend the best. It has the ability to help you keep track of inventory along with a wide range of accurate and useful calculators.

Compatibility

As stated before there are web based apps along with apps for iOS and Android platforms. All of these require a premium account for full functionality. With this functionality comes cross-device syncing so you have your most up to date recipes with you everywhere.

Ease of use

Although simple, I found Brewer’s Friend the most clunky to use.

I found it took multiple steps to perform actions that other apps could perform with one or two or options for every recipe that can be covered in account settings in other platforms. Things like choosing metric over imperial measurements or EBC over SRM etc.

Having to select all of these options for each recipe greatly increased the time it takes to build a recipe from scratch.

Average time to build a recipe

iOS web app – 5.43

Limitations

Grainfather Recipe Tools

Price

Free, is best used however with a Grainfather to brew with. Which is not free, but is excellent! Anyone can use Grainfather recipe tools as a basic recipe builder and storage system.

Functionality

It has functions and features comparable to many other recipe builders, including:

  • Import/export to .beerXML files.
  • Style guidelines to keep your beer in range.
  • Archive of grains, hops, adjuncts and misc ingredients.
  • Mash, fermentation and carbonation profiles for you to use or customise and make your own.

Special features

The biggest reason to use Grainfather recipe tools only really comes if you have a Grainfather unit. Any aspects of your recipe up to fermentation will load directly into your Grainfather and be able to be tracked through the app, this includes all mash temps and boil schedule. It will also tell you the best time to start heating your sparge water and act as a great brew day clock that allows you to relax a little and be more productive with your brew day.

Compatibility

As it is web based, Grainfather recipe tools is compatible with any device that can access the internet. The app comes in iOS and Android versions.

Ease of use

I like the layout of the app, it’s a top to bottom recipe builder, you start at the top with fermentables then head down to add hops and adjuncts before ending up with mash, fermentation and carbonation profiles at the bottom.

It’s a very simple but satisfactory app that makes a nice interface to build off.

Average time to build a recipe

iOS – 3.21

Limitations

Other than the ability for it to connect to your Grainfather app for ease of brew days, the app is fairly basic. It’s very simple to use but there are other standalone beer recipe apps out there that do a better job. I tend to use only the import function so I can load a recipe into the app. I create my recipes in another app and export it to Grainfather recipe tools.

The other thing I have noticed recently with the Grainfather app is a slight inaccuracy with colour when importing or cloning recipes. I wrote up a clone recipe of a commercial beer (a stout) and it was so off that it ended up looking more like a porter or even a dark brown ale! Just double check things before brew day to ensure they’re going to turn out the way you expect!

Brewfather

Brewfather is bit of a newer app option that’s available to brewers. Another web app with a nice clean interface and simple structure to make designing a recipe a breeze. It’s by far my favourite of all that I tested as it has the accuracy and functionality of Beersmith combined with the modern UI and ease of use of the Grainfather app. It really is a best of both worlds.

Price

Free for a basic version or $1.99 USD/Month or $19.99 USD/Year for the premium version. The premium version allows more recipes than the basic free version but more importatnly, allows for the import and export of BeerXML files so it can talk nicely with other apps so you can import your existing recipes from another platform and I can also export them to the Grainfather app to allow for an easy brew day.

Functionality

  • Recipe builder
  • Water profile tool (a great one actually! allows you to select a profile manually or choose to use a profile recommended by the app based on your selected beer style)
  • Inventory
  • Equipment, Mash and Fermentation profiles, infinitely editable
  • Very large Ingredients lists, if you can’t find it then its very easy to add a customer one and have it be remembered for next time.
  • Batch & Fermentation tracking (Tilt, Plaato and iSpindel compatible)

Special features

It’s not that special but I’m just going to use this section to highlight a feature I really enjoy, which is the ability, when building recipes, to add items without always looking back at the main recipe screen. In other words, if you know you want roughly 4kg of Pale Malt, 500g of Munich and 150g of CaraPils (a great pale ale base by the way!) you can add it all from the one screen and not have to worry about being sent back to a screen again to hit “add malt”, then search, then select, then add to recipe. It’s a great time saver.

Compatibility

The free version is great to create a limited number of recipes in as a trial but doesn’t really allow for any compatibility, that’s a feature reserved for premium accounts. Once you’ve got that though and everything’s unlocked, it’s perfectly compatible and even allows options to scale the recipe correctly and make sure you hit the same numbers in both apps.

Ease of use

One word, Incredible.

Seriously, if you’re used to Beersmith this will be a walk in the park, if you’re totally new to recipe building, it’s intuitive enough to be able to get going with it without much guidance.

Average time to build a recipe

6.30 with some corrections to the recipe along the way.

Limitations

Free version very limited, good for a trial, that’s about it.


So that’s it, a quick run down of several of my favourite brewing apps/tools/recipe builders.

My personal choice is Brewfather as I find the workflow and functionality suits me the best.

Let us know which yours is or if theres anything different about these apps that I missed in this quick overview and we can go into a deep dive on it in the future.


If you have any feedback or edit suggestions for this post please contact us and let us know. We want to ensure the correct information is presented in the best possible way so that fellow brewers can stay well-informed.


Want to stay up to date with the latest from Sean and New Beerginnings? Like us on Facebook and Instagram or reach out to us on Reddit.

Brew Day #3 Test Batch – Strawberry Wheat

Hi all,

In this post I’m going to go through a brew day I recently had where I brewed a strawberry wheat beer. It was a lesson for sure that day and I hope you find it a good journey as I explain what went well and what didn’t go quite to plan on the day.

Last Week In New Beerginnings

This past week I have been fairly quiet on the brewing side of things other than preparing for this brew day by getting in early and buying the ingredients/equipment a little early as I knew the shop wouldn’t be open on the day I was planning to brew.

I am also planning my next brews, they will be intended for Christmas consumption and will be:

  1. The same Pilsner I made for the first Brew Day post with a slight change to Tettnang hops instead of Saaz.
  2. A pale ale that I haven’t been able to resist the small batches of even thought they’re not ready. It’s Cascade and Centennial so you know it’s good!

I’ll be waiting until mid-October or so until an order hopefully comes in for some more SS Brewtech Brewbuckets that I’ve had my eye on and order in for at Hoppy Days for a while now as there has been a massive backlog of orders in the factory where they’re made in the US, limiting supply to near extinction down here in Aus.

I’ll do the Pilsner first off when it arrives and hopefully by the time the Pilsner is done we will be closer to Christmas and it will be perfect timing to brew the Pale Ale. All going well they should be ready at about the same time, just in time for “testing” by the whole family!

For now, onto this week’s brewโ€ฆ


UPDATE: I’ve kept this post here as it is definitely one of my bigger lessons I’ve learned and I’m updating it with the rest of the story since it was brewed. This beer frankly didn’t turn out as good as I’d hoped. There were nowhere near enough strawberries and as a result I had a beer that was not fruity enough to be nice but not plain enough to enjoy as the base beer itself. Since it was already carbonated, in a keg and I didn’t have anything that I could fake a keg hop with strawberries with I chose instead to drink as much of it as I could stand and inevitably dump most of it.

This was still a great lesson as next time I do a strawberry wheat beer or sour I’ll know I need to add at least double or triple the amount of strawberries I did with this brew.


This Weekโ€™s Brew – Strawberry Wheat

What Should I Brew

I have been contemplating which beers I should make for my family’s Christmas this year. I wanted to try a few different recipes but didn’t necessarily want a whole batch of them so I purchased a smaller fermenter to allow me to experiment a little more then tweak and scale up the recipes if I liked them.

The first test batch was a lower gravity session pale ale. I didn’t document this beer but it was moderately hopped with cascade and centennial to around 40 IBU’s then dry hopped fairly aggressively. It smells fantastic! When it’s ready I’ll post a photo. The only issue with this is that I changed up my current equipment (a Grainfather) for my old stovetop BIAB and it turned out to be far more efficient than I remember. I estimated a 3.5-4% ABV on this beer but it ended up closer to 5%! Oh well, it’s not a session pale but it’s a damn good pale, it stays!

Now onto this week’s beer, this was the other option for a lighter beer originally for Christmas but I found out after I planned it that nobody was super keen on the idea so I would just brew this one for myself as a test regardless.

Recipe Creation

I’m sure many of you readers, especially the ones in Australia are aware of the issue with Strawberries at the moment. For those who aren’t it’s basically a literal needle in a haystack situation. The story goes that a disgruntled employee of a major strawberry grower that supplies many large supermarkets nationwide with strawberries began putting sewing needles into strawberries bound for the store shelves!

This has caused thousands of strawberries to be dumped by the truckload, wasting entire crops. It’s a stupid act by someone who just doesn’t think or care about the consequences of their actions.

The other side to this coin is the supermarkets, they want to continue supporting the farmers in their supply chain so are continuing to sell strawberries at a phenomenally reduced price. You can get a tray of strawberry punnets for as little as a few dollars in some places.

Now I like to think of myself as someone that wants to support the little guy or people in need so I took it upon myself to buy some of these strawberries and come up with a way to use them.

There are many ways to go about this but most have their downfalls:

– Strawberry Cider….don’t like cider that much.

– strawberry blonde…a good choice but I wanted to really show off the colour and beautifully delicate flavour of these strawberries so a blonde may be even too much.

– strawberry sour…next time, not for this brew due to the reasons listed above.

– strawberry wheat…perfect. I can think of no better way to showcase the flavour and colour of these delicious strawberries than a very light, clean wheat beer.

Recipe Breakdown

Batch size: 12L

Estimated OG -> FG: 1.045 -> 1.008

Estimated ABV: 4.85%

IBU: 18

Ingredients:

Malt:
1.23kg Pale 2-Row Malt
1.08kg Wheat Malt
200g Acid Malt

Hops:
20g Hallertau @60 minutes for about 18 IBUs

Specialty Ingredients:
500g Fresh Strawberries, boiled for 5min and purรฉed then cooled. Place in fermenter just before the wort.

Yeast:
SafAle US-05, half a pack

Water additions:
9g Gypsum (Calcium Sulphate)
2g Calcium Chloride

Finings:
Whirlfloc, 1/4 tablet at 15mins

Equipment + Setup

For this brew I decided to use the Grainfather for the sake of convenience. It being only a half batch however, there were not enough grains to use the basket as intended. You would either take a hit on efficiency or have to use more grains. To combat this I purchased the Grainfather Micro Pipework that allows either low gravity or lower volume batches to be done without the issues mentioned above.

While the strike water was heating up I began chopping up strawberries and heating some water to make the purรฉe. In hindsight now I wish I would have added more strawberries to get an even better colour but I am still happy with the results so far. Once the purรฉe was made I put it in the freezer to cool down. Once the beer was ready

a few hours later it was just cool and perfect to put into the fermenter.

Mash

For this recipe I wanted a nice light-bodied beer, so that generally means a well modified grain and a mash rest that gets a good mix between the alpha and beta amylase enzymes. I chose a middle of the road 65 degrees C for an hour, ramping up to a 75 degree C mash out for 10 minutes.

During the Mash the Grainfather constantly recirculates the wort to keep an even temperature. If you do not have a setup that does this it may be wise to stir the mash occasionally, measure the temperature frequently and adjust the temp as required to stay within your range.

Boil

The boil for this brew was very simple with just one hop addition at 60 minutes and the whirlfloc at the end. It was largely uneventful. Until it came to whirlpooling and this next step.

Cooling

After the boil I typically do a whirlpool in an effort to keep as much trub in the middle as possible so that the Grainfather can filter from the side up to the Counterflow Chiller.

This is a very uneventful process unless, like me in this brew, you stir too vigorously and too close to the filter and you knock it off its post!

This is what happened to me and I knew instantly that I had screwed it up, let’s call it screw up #1. Now there’s no way I’m sticking my arm into boiling wort to put a filter back on, even with rubber gloves the heat would be too much.

I decided, not thinking clearly in my desperate state, to give the pump a try anyway. This, it turns out was screw up #2, within 30 seconds the pump clogged and I was barely getting a trickle out of it.

What I eventually decided to do, again, against my better judgement and knowing that it was not at all the correct practice. Was get a drill powered pump and manually pump the wort directly into my fermenter hot and let it chill as quickly as possible in the freezer. It took 4 hours to cool down to pitching temp but is showing no signs of infection so far but is bubbling away nicely!

Pitching Yeast

Again, a fairly uneventful step as I’m using half (which I guessed as I poured it) a packet of US-05. No starter, no rehydration, just straight in.

Next Steps

It will now stay in primary with the strawberries for around a week or until I reach the expected finishing gravity, at which point I’ll cold crash at 1 degree C for 3 days and bottle with dextrose as my bulk priming sugar.


Conclusion

The only conclusion I can draw from this so far is…

DON’T WHIRPOOL SO HARD YOUR FILTER FALLS OFF!

But really, this was a good experience to have but also a very important one to share with all of you. People who run home brewing websites tend to be looked on as people that never mess up, never get fermentation issues, stuck sparges, equipment failures etc. I think this may be in part because they carefully curate the information they share. The other side to that though is that possibly because they know they are sharing it, they tend to document, and hence think about the entire process in great detail, which leads to preparedness and fewer mistakes.

When brewing, you will screw up, somehow or somewhere along the way it will happen and we need to not be precious about it but learn from it. When I screwed this up the other day I was furious with myself thinking the post was ruined and I wouldn’t have anything for you guys but then I thought “Why not post it?” And have turned it into a lesson for myself. I can confidently say that I will never whirlpool so hard that I knock the filter off again!…..I hope.

Cheers, until next time,

Sean


If you have any feedback or edit suggestions for this post please contact us and let us know. We want to ensure the correct information is presented in the best possible way so that fellow brewers can stay well-informed.


Want to stay up to date with the latest from Sean and New Beerginnings? Like us on Facebook and Instagram or reach out to us on Reddit.

Ingredients Series #5 – Finings

Hi again,

Thanks for joining us this week, I know I said that posts may be a little more sporadic but over a few days off recently I was hit with inspiration to write a post, so here we are!

This week we have the last instalment of the ingredients series. So far we have looked at Malt, Hops, Yeast, Water and last week’s post on Specialty Ingredients, what could possibly be left? There is one ingredient that doesn’t really fit into any of these categories, and that is Fining agents you can add to help clarify your beer. Read on below to hopefully gain a little more clarity (pun intended) on these ingredients, the way they work, are made, and some other methods you can use instead of or alongside finings to help clear your beer.


Last Week In New Beerginnings

This week I have bottled the Cascade/Centennial Pale Ale I made as well as trying the first one after only 4 days in the bottle because I couldn’t wait! The result was delicious but predictably under carbonated. I’m now going to exercise a little more patience and wait a couple of weeks.

This week coming I am planning to brew a strawberry blonde ale to make use of the cheap strawberries around at the moment in Queensland. Look out for a brew day post soon after!

Now into this week’s topic.


What are Finings?

Lovers of a good hazy NEIPA read no further, for the following statement could shock you.

The majority of brewers love to see a nice clear beer in their glass.

Sure, hazy or juicy beers have their place but there is something very satisfying about producing a crystal clear lager or IPA. In the culinary world it’s a common saying that you eat with your eyes first and certainly for me this translates to the world of beer. I think part of it is the surprise. You’re almost expecting a certain flavour or juicy character from a hazy or opaque beer because you can see…stuff in it. With a crystal clear and bright beer it seems like “how can there be any flavour in here? It looks like yellow water!” Then getting hit in the face with a flavour bomb of great crackers malt character in a Pilsner or intense hop character from an IPA.

Brewers have searched high and low for the best ways to clear their beer over the years and have found several methods over the years. I’ll go through the specifics later but first I’ll look at how finings work as a concept.

Opposites Attract

Most particles carry some sort of positive or negative charge. Only very few elements are naturally neutral. Any chemical reaction is basically an exchange or sharing of electrons to allow both particles involved in the reaction to reach a more stable state than they had on their own.

But how does this relate to beer?

Like everything else, beer contains particles, both positively and negatively charged. The way finings work is taking advantage of these charges to drop certain particles out of solution, making the beer clear.

To be slightly more specific, the particles in beer that cause haziness, like yeast and hop particles stay in suspension because they are small enough to float and stay in the beer indefinitely. Overall they have a positive charge, so finings (negatively charged) work to bind themselves to these particles and therefore make them larger and heavier, making them easier to drop out of suspension.

So to answer the question in the heading of this section, Finings are an ingredient you add to your beer that helps drop out particles that would otherwise make it hazy.

I will also add a little note about other methods of clearing your beer that can be used in lieu of, or alongside your finings.

Types of Finings

Auxiliary Finings Vs Finings

So when I say haze-causing particles in beer are generally positively charged, there are in fact some negatively charged ones too. They are typically produced on the hot side of the beer making process and are a large component of kettle trub. Auxiliary or kettle finings deal with these quite effectively by being positively charged and binding themselves to the negatively charged particles.

You would never add Auxiliary and normal Finings at the same time as they would only serve to attract each other, negating the effect they would otherwise have on your beer. Auxiliary Finings are also sometimes called Kettle Finings as that is the place you typically add them to aid the settling out of kettle trub so it doesn’t make its way into the fermenter.

Irish Moss

The first fining I will talk about is Irish Moss, the common term for Carrageenan, is a Kettle fining that is added towards the end of the boil, usually at 10-15 minutes to go. Originally derived from a particular species of seaweed, it is very effective at helping to drop out kettle trub. Care must be taken to not add too much or too little as too little and it will not be very effective but too much may also cause issues down the line when using other finings later in the process. A permanently hazy beer could result. They typically come in packs with instructions on how much to add for the amount of beer you have, I’d follow these instructions to the letter as the other potential downside is having your beer taste like seaweed!

Whirlfloc

Whirlfloc is a commercially produced, tablet version of Irish moss and should be available at most good Home Brew Stores. Typically designed for a 40L/10Gallon batch, I’d recommend using half a tablet, crushed/cut up and sprinkled into the wort at 10 minutes to the end of the boil.

Gelatine

Gelatine is a very common fining in the home brewing world, it used to be in the commercial brewing world also but is falling away somewhat due to the fact that it is derived from animals and breweries tend not to want to eliminate potential vegetarian or vegan customers. Gelatine is a substance that helps to coagulate molecules and is the component of Jelly that makes it come together and wobble in the oh-so-satisfying way that it does. It is made by boiling any animal parts like skin, bones, cartilage, horns for a very long time until the connective tissues all start to break down and the Gelatin separates. It is then either sifted, filtered or evaporated away from the rest of the matter.

Yep, gross… Does it stop me from using it in beer? No, unless I am making a beer that I know could potentially be drank by a vegetarian or vegan.

Gelatine is typically added at the end of primary fermentation and works very quickly, 24-48 hours is typically all it needs in my experience. It’s prepared by preparing a bowl of hot water (microwaved for a minute or so), dissolving the gelatine into it and then dumping that into the beer.

It’s also sometimes referred to as powdered time, in the sense that it seems to promote several aspects of beer that typically only come with time. Clarity, for one, but also other aspects like the depletion of hop flavour and aroma. It can be also used to partially or completely skip the “green” phase of beer that usually stays around for a couple of weeks after it is kegged/bottled that can make it not as pleasant to drink.

The difference Gelatine makes is incredible, but it even more effective is our next fining.

Isinglass

You may have heard of this one, it is an ingredient that is quite polarising but has been common in some very popular beers in the past, most notably Guinness until recently. It works in much the same way as Gelatine but is reportedly much more effective. It is made by dissolving in acid and purifying the swim bladders of fish. It is odourless, colourless and almost pure collagen. It has such a strong effect that it is actually able to work repeatedly, meaning if you move the beer and take some particles from the bottom and put them back into suspension it will reclarify the beer. This is something that sets it apart from other finings like gelatine, which can only clear the beer one time and repeated shaking or moving of the vessel will put the particles back in suspension.

It is used in the same way as gelatine but as it comes in sterile liquid form, only needs to be tipped in, no further preparation required.

Biofine Clear

Finally something for the vegans! Not all finings come from unspeakable parts of animals boiled for hours until they are left in a gelatinous goop.

Biofine clear is a colloidal solution of silicic acid in water designed to aid the sedimentation of yeast and other particles from beer.

A colloidal solution is basically a solution in which microscopic particles of an insoluble substance is distributed and suspended within another. Much the same as yeast suspended in beer, the yeast does not dissolve into the wort/beer but it does stay evenly distributed in suspension throughout the beer.

Again, this is designed to be added to the fermenter but the difference here is that it’s essential to make sure it is evenly distributed in the beer. The easiest way to do this would be transfer the beer from the primary fermenter to a separate fermenter for secondary fermentation or ageing and put the finings in the secondary fermenter in the same way you would do for sugar in a bottling bucket for bulk priming.

P.V.P.P “Polyclar”

Polyclar is a fining that is a specially formulated plastic designed for use in wine and beer brewing, yes, it’s a plastic! Again, even distribution is a must for this one so I’d recommend the same racking to a secondary fermenter method.

After use, Polyclar must be filtered out for safe consumption, so I would also invest in a beer filter. An in-line filter like this one should suffice.

Filtering

The other way to clarify your beer without using any other fining agents or ingredients is to filter it. This involves either a small gravity-fed filter like the one above, which is great for larger particles like hop material but some microscopic particles could still slip through. The other option is a filter that has a 1 micron or smaller cartridge and can handle a pressurised transfer from a pump or gas line, here is an example and the filters to go with it.

I myself have not filtered any beers, nor do I have plans to. I’m happy with the clarity I am able to achieve with careful brewing practices, ingredient selection and use of finings when necessary. I rarely even use gelatine, my process is typically

– 1/2 a whirlfloc tablet at 10 minutes to the end of the boil,

– A whirlpool at the end of the boil to concentrate the kettle trub and hop matter in the middle of the kettle, rack off to my counter flow chiller from the side of the kettle to avoid the trub.

– Cold crash at the end of fermentation.

If I feel that either due to the ingredients or the style of beer, extra steps are required, I have used gelatine in the past to get that extra bit of clarity.

Cold Crashing

Cold crashing is a technique you can use on its own or in conjunction with the other ingredients/methods.

It works on the basic premise that we learned in high school science class. You can dissolve more sugar in 1L of hot water than 1L of cold. Cold crashing brings the temperature of the beer right down to just above freezing point (usually 1-2ยฐC or lower) and holds it there for 1-3 days in order to reduce the amount of particulate it’s capable of holding. Any particulate that it can no longer hold simply drops out and usually remains at the bottom of the fermenter unless it is stirred back up.

Especially when used in combination with finings it produces a very bright and clear beer. If you are only crashing with a normal fridge without a temperature controller then it will only get between 4-6ยฐC so I would advise leaving it for a little longer, perhaps 4-6 days.


Conclusion

Thanks for joining us in the last of the ingredients series. I hope you are now even more confident in using finings and know a little more about the background of them and how they work.

Posts will continue here frequently and will focus on various aspects of producing beer. Everything from spotlights on certain aspects of the process or equipment to recipe creation and even tasting.

Until next time,

All the best,

Sean


If you have any feedback or edit suggestions for this post please contact us and let us know. We want to ensure the correct information is presented in the best possible way so that fellow brewers can stay well-informed.


Want to stay up to date with the latest from Sean and New Beerginnings? Like us on Facebook and Instagram or reach out to us on Reddit.


If you are in any way interested in contributing to the blog Iโ€™m all ears, message me on here using the contact form on the site or reach out on social media.

Ingredients Series #5 – Specialty Ingredients

Hi all,

Thanks for joining us this week for the last of the major ingredients in our ingredients series. We’ve looked at Malt, Hops, Yeast and Water in previous weeks but this week is dedicated to anything else you can put in beer. I’m calling it specialty ingredients.


Last Week In New Beerginnings

Ok so let’s address the Elephant in the room here, it has been a month since the last post. I am truly sorry for that. I have had a few personal upheavals and changes of circumstances that have torn me away from brewing for some time. I’ve started a new job and until I get that all under control I may be cutting back the frequency of the posts. I have plans to expand and hopefully get some more contributors along the line but for now it’s just me and until I get on my feet at my new job I’ll still be posting only monthly or possibly fortnightly.

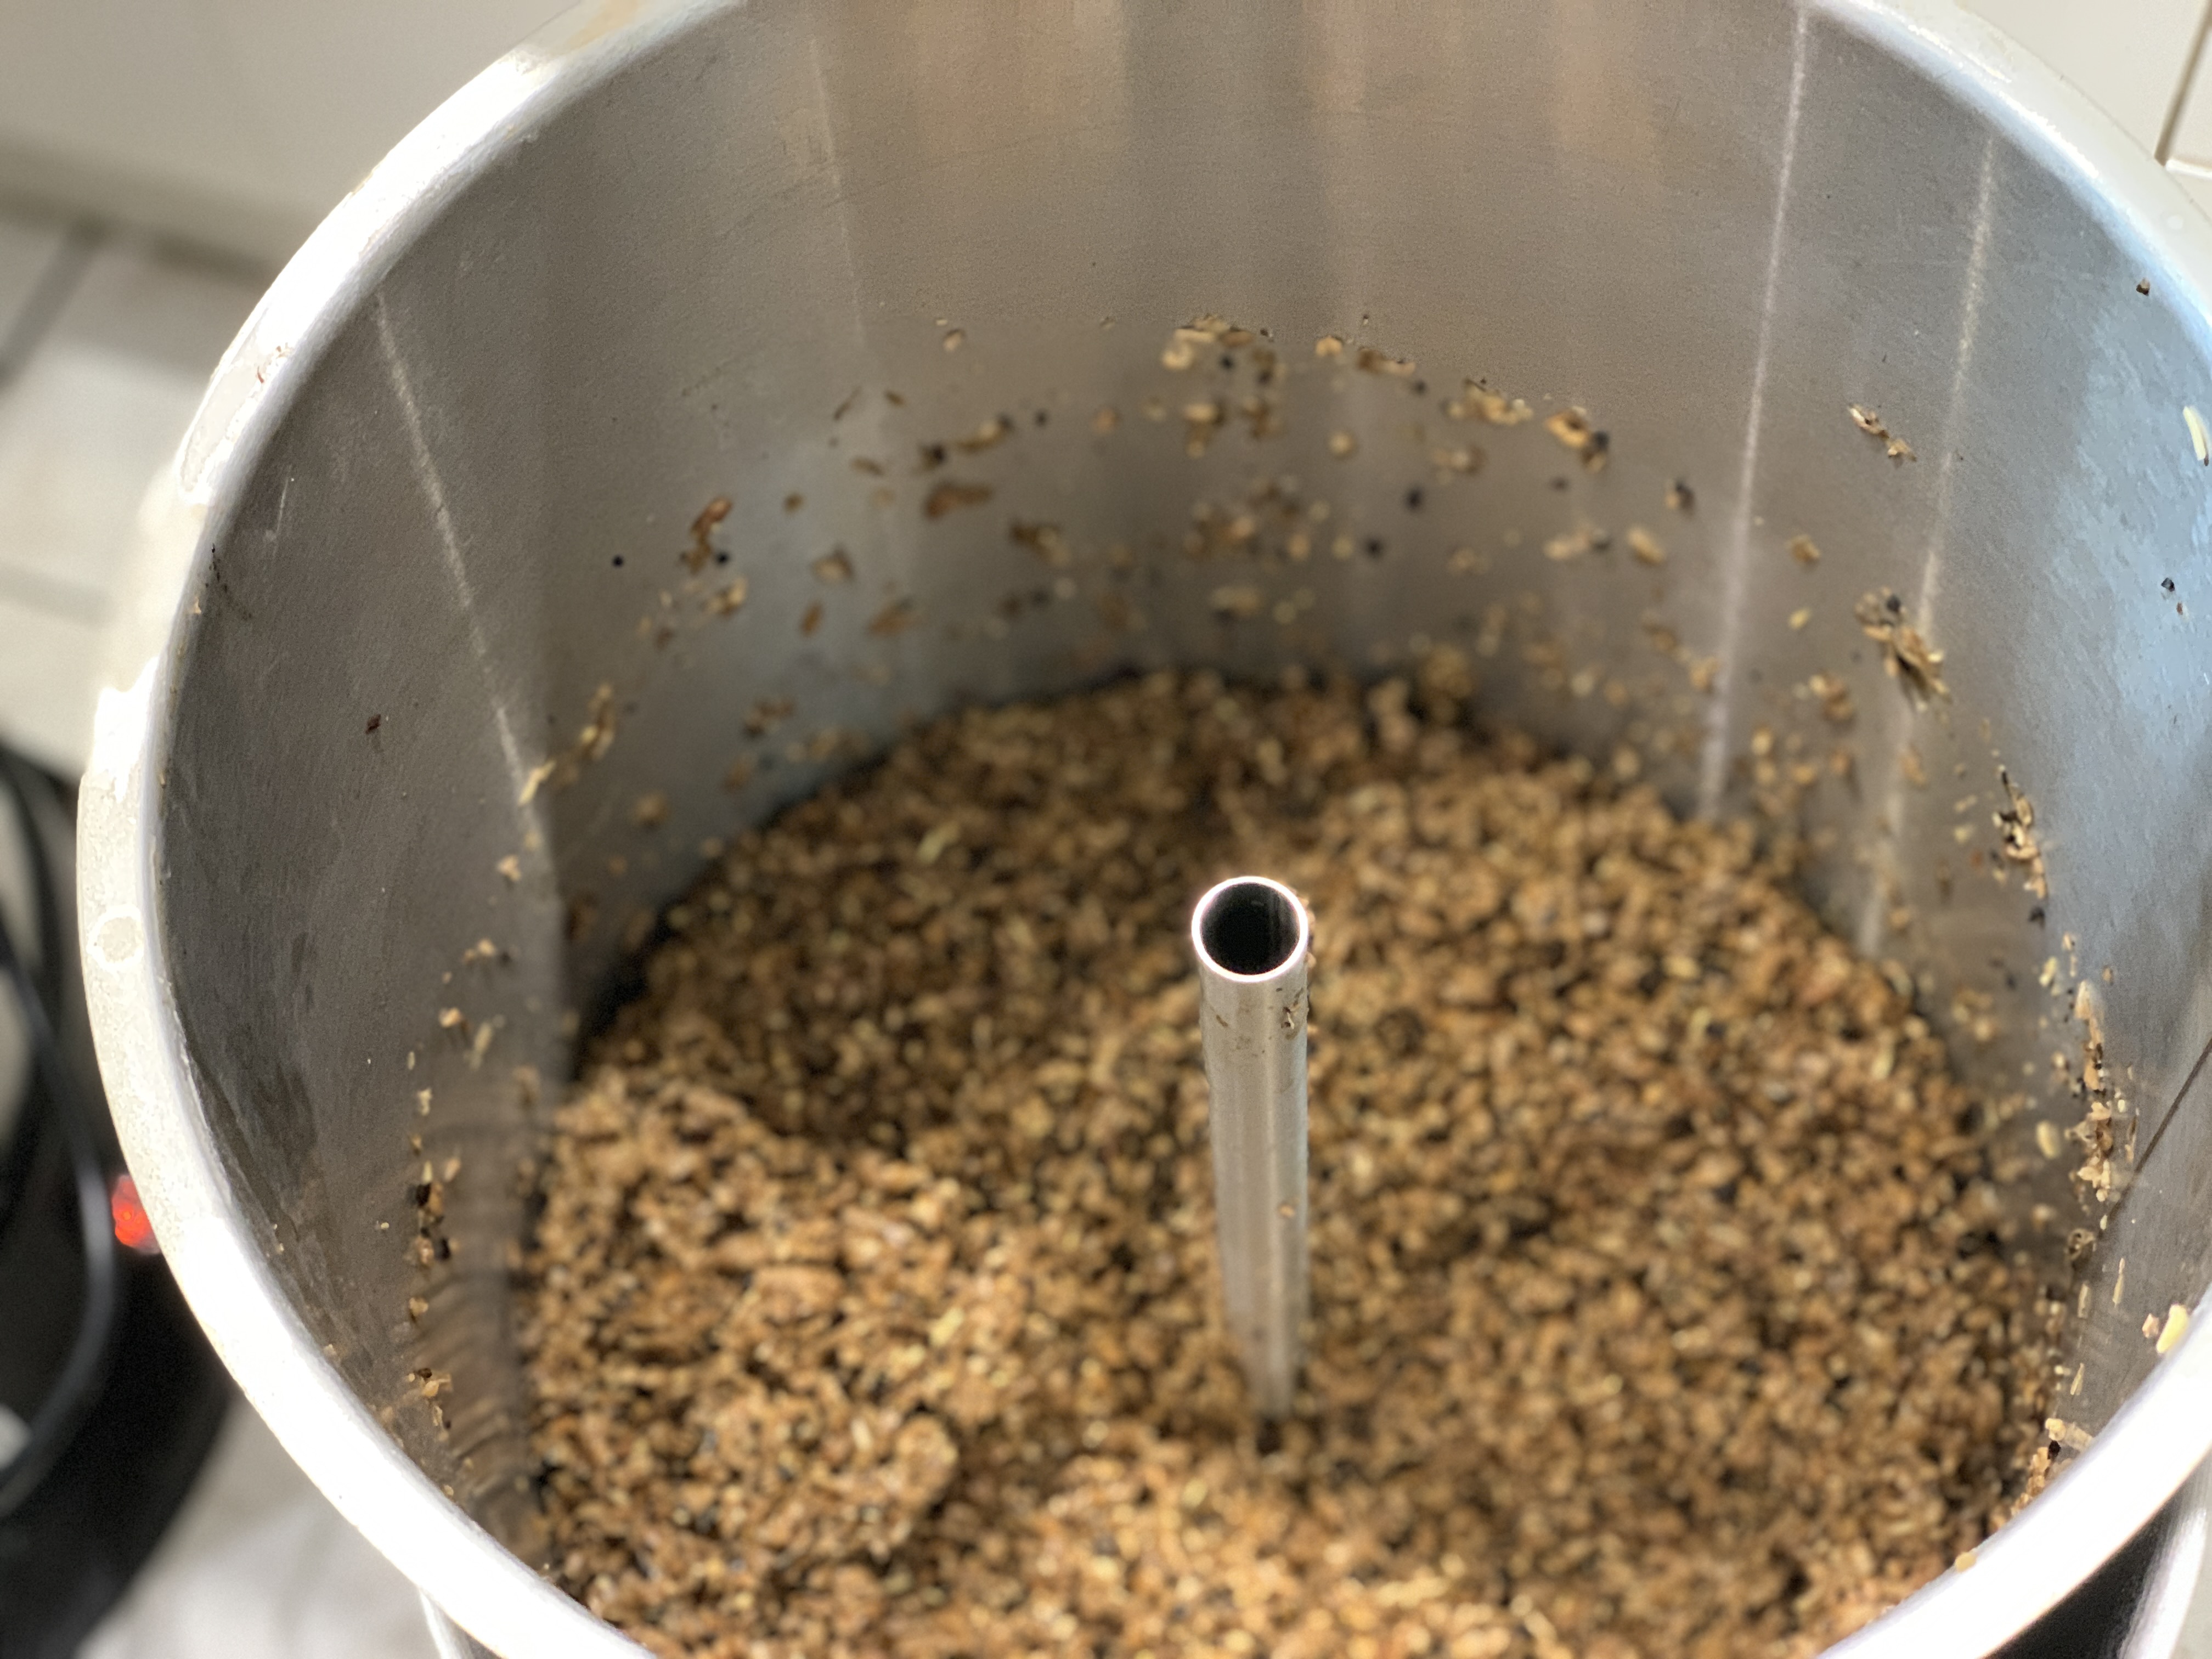
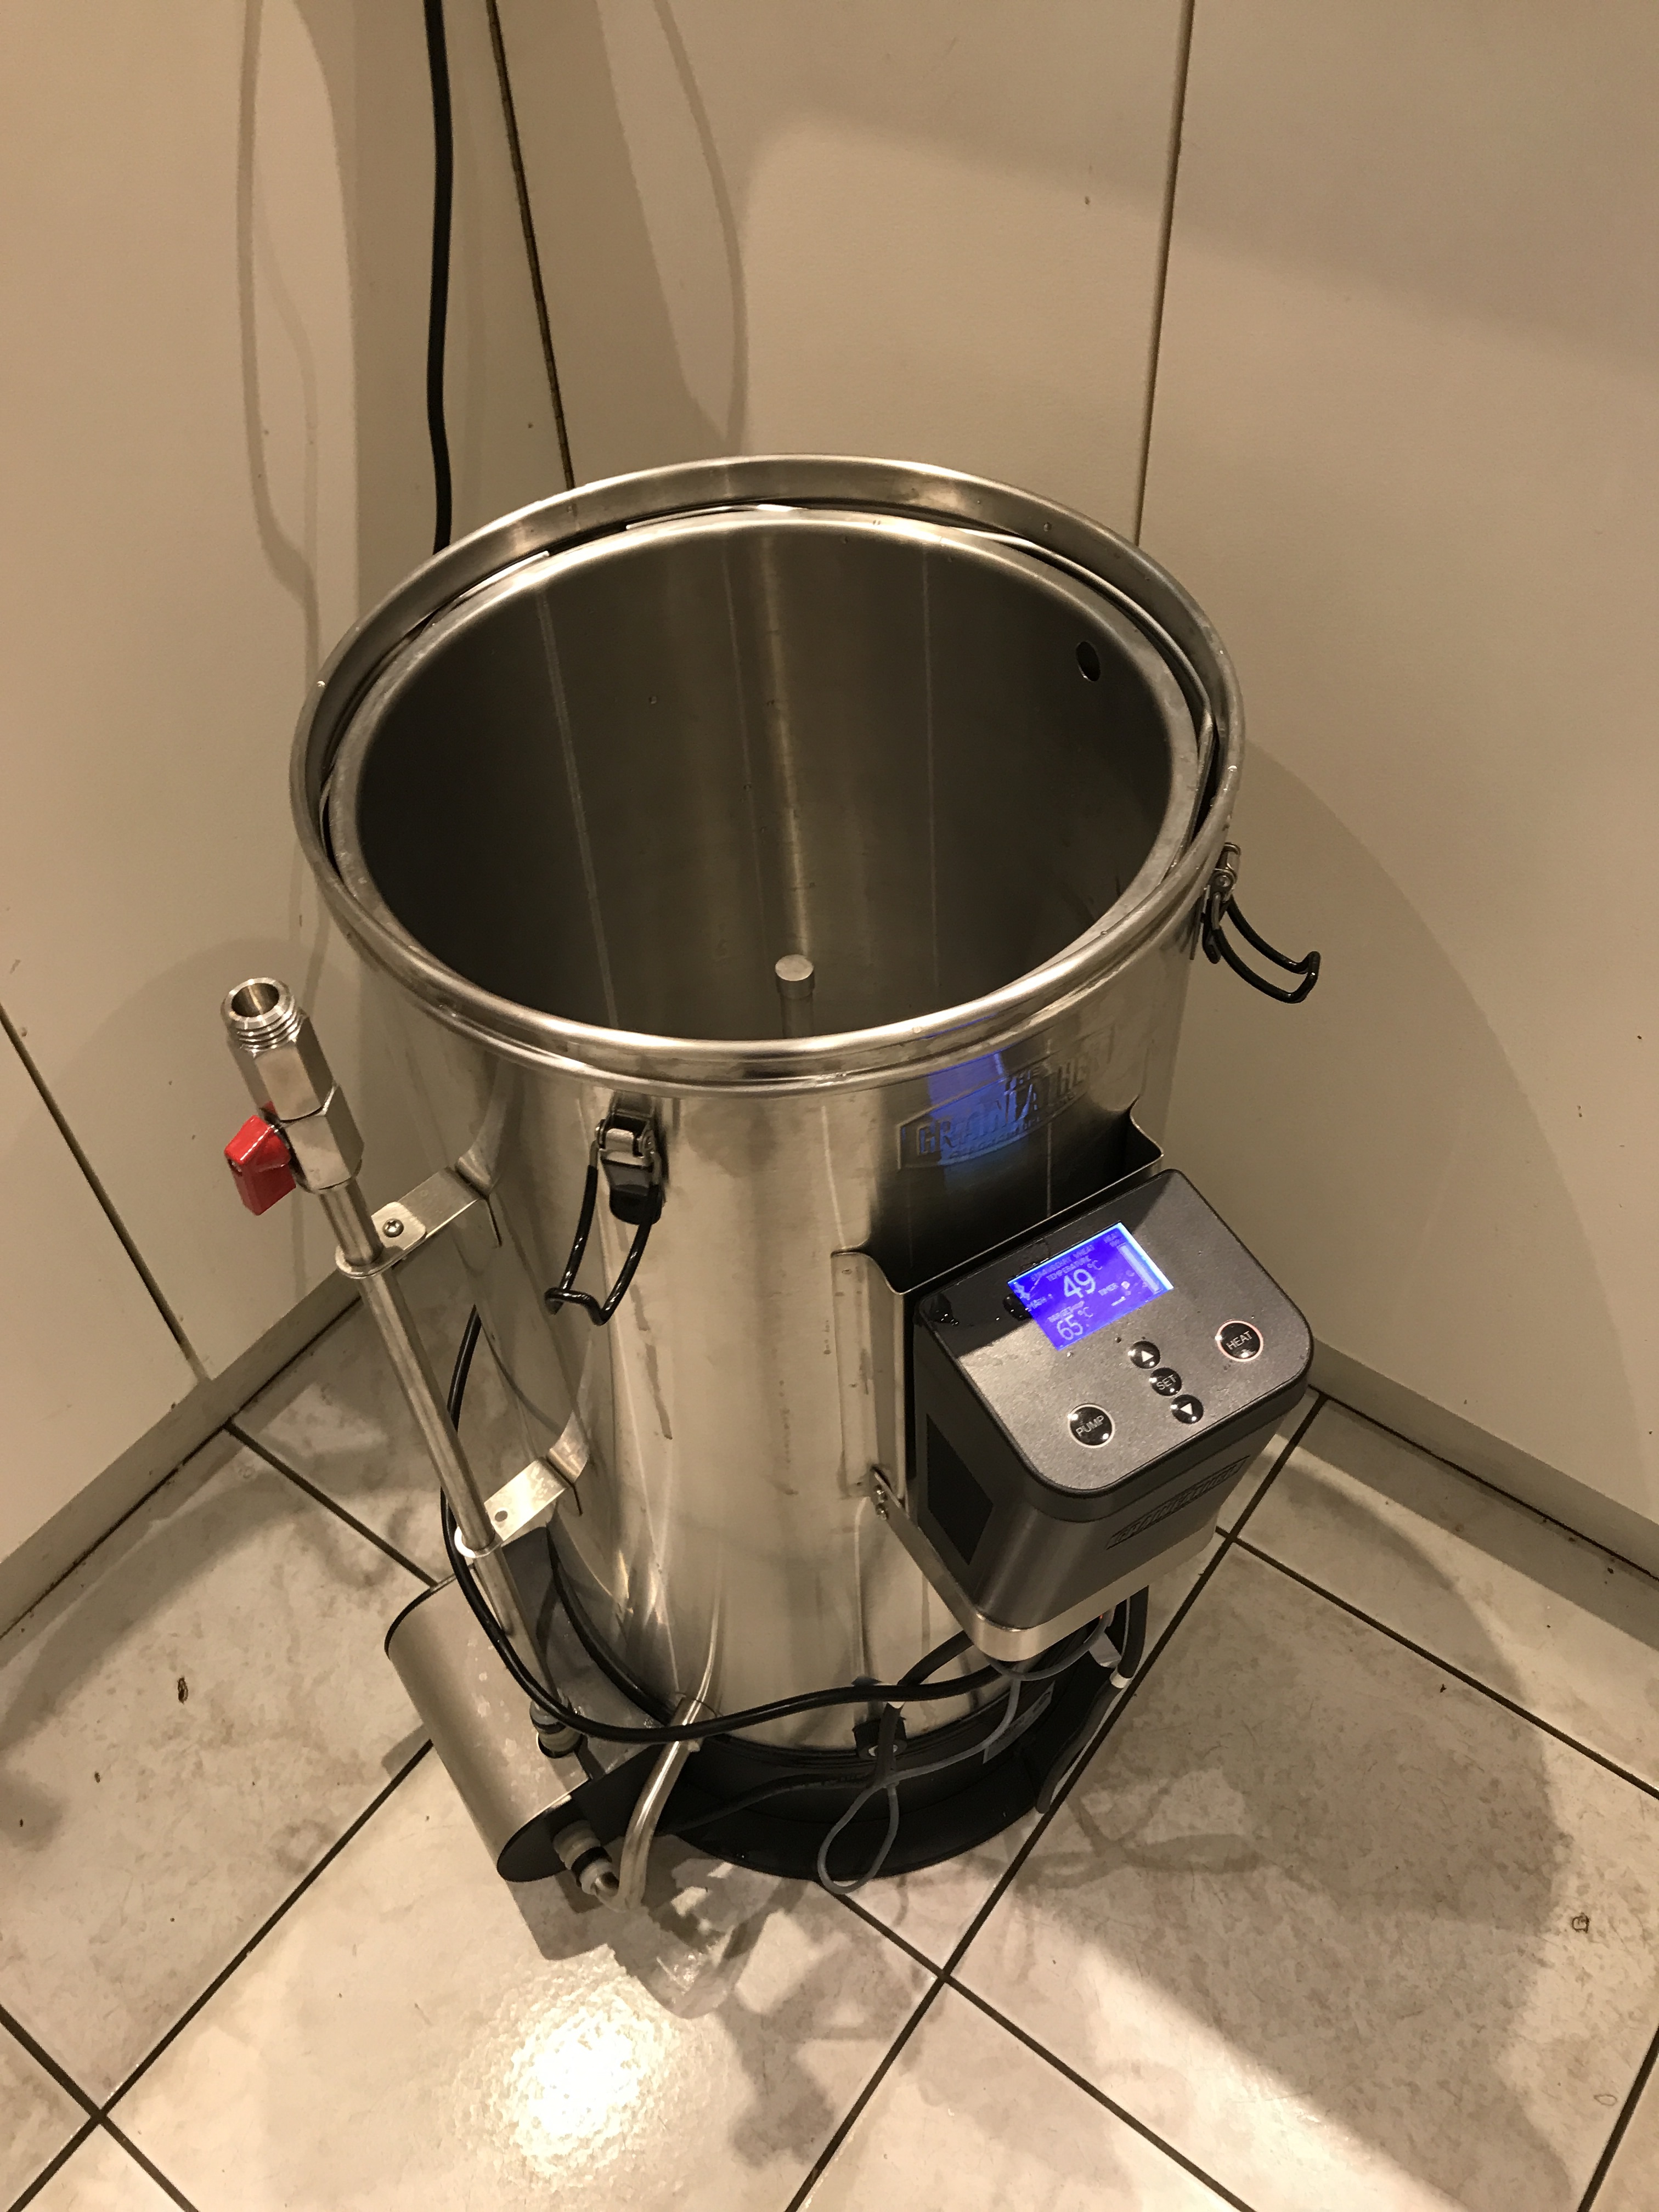
In terms of what I’ve been up to brewing-wise, I have a nice cascade/centennial hopped pale ale on at the moment that I’m hoping will be lovely and planning to brew a strawberry blonde ale soon. These are both test beers for Christmas so I’m only doing small batches until the recipe is tweaked enough that I’m confident to brew a full 23l batch that I know will be good and tasty.


Ingredient considerations

With this myriad of ingredients come a few considerations. Some of which I will cover in the individual ingredient descriptions later but will try to generalise here first as well.

When adding these specialty ingredients it is probably worth thinking of four things:

  1. What characteristic of this ingredient do I want in my beer?
  2. How much of that character do I want?
  3. How will it work with the other ingredients in the beer?
  4. Are there any downsides to adding this ingredient and how can I get around them?
  • 1. What characteristic of this ingredient do I want in my beer?
  • With things like fruit this may be obvious, a fruity flavour or sour quality. But this can be complex when thinking of other characteristics like smoke and spice it has potential to get a bit more tricky. You may have to use more than one ingredient to achieve the desired objective.
  • 2. How much of that character do I want.
  • Deciding how much character you want may be easy but having that translate into “how much of x ingredient should I put in my beer?” Is the hard question. As a general rule, I would think of how much you think you need to achieve the character you want and use about half of that as a starting point. The other thing to consider is the other characteristics of that ingredient such as sweetness that you may have to battle with, more on that in a second. One rule that’s followed quite often is the 1/2 a lb to 1 gallon of beer which roughly equates to 220g per 3.75l.
  • 3. How will it work with the other ingredients in the beer.
  • Most brewers are pretty confident at blending flavours when it comes to malts and hops, grouping citrus, floral, spicy or earthy hops together properly to get the right flavours for your beer. The same goes for blending these other ingredients. You would never really blend salted caramel and oysters together as a food pairing so why would you put them in your beer? Conversely, chocolate and salted caramel would go very well together in or out of a beer so go ahead and pair them, but maybe in a big porter/stout and not a Czech Pilsner. Just because ingredients go together does not mean they will work for your particular style of beer. When pairing all of this, go back to the first point here and think “what character do I want in my beer?” And build the entire beer around that so it is the star. It can work the other way around but it is much harder to get ingredients to fit into a great existing beer recipe that it is to design a beer that fits a particular ingredient.
  • 4. Are there any downsides to adding this ingredient and how can I get around them?
  • All ingredients have considerations to account for when using them. For specialty ingredients it can be anything from acidity and overpowering flavours to excessive sweetness or haze. What I would suggest is to look up any ingredient you mean to use and look at its previous uses in beer to see if there is a write-up on how it is best used and if there are any characteristics that are worth avoiding.
  • For specialty ingredients I will cover a few of the downsides that may occur frequently and are worth considering when adding these ingredients to your beer.
  • Acidity – This relates to a lot of fruit, which is generally acidic in nature, but all fruits are not created equal and some will have much more prominent acidity than others. Lemon and citrus fruits for example.
  • Acidity will cause sourness which in some styles is desired but if added too early in the process can interfere with other processes in the brew like mashing or primary fermentation. Because of this, it’s generally advised to either only add any particularly acidic ingredients in secondary fermentation in place or alongside a dry hop or counteract the acidity if using in the mash/boil by adding ingredients like chalk (calcium carbonate).
  • Sweetness – most of the items in the list of ingredients below will add either sugars, carbohydrates or both which can affect the specific gravity of the wort. You must account for this when adding these ingredients and make sure you are aware of how much sugar or potential sugar the ingredient has. There is a formula to calculate how much sugar an ingredient will contribute to your beer, this is taken from the Brew Your Own website (www.byo.com)

You can calculate how much a fruit addition will affect its specific gravity by using the following formula:

SG = [Wfruit X (Psugar/100) X 45]/Vbeer

In the equation, SG is the specific gravity increase due to fruits. It is given in โ€œgravity points,โ€ or the decimal portion of a specific gravity number.

Wfruit is the weight of the fruit in pounds.

Psugar is the percentage of sugar in the fruit.

The number 45 is the extract potential โ€” in gravity points per pound per gallon โ€” of simple sugars (such as fructose, glucose and sucrose).

Vbeer is the volume of beer in gallons.

For example, if you use 10 pounds of cherries in your five-gallon batch of cherry wheat, you would calculate the specific gravity addition like this:

SG = [10 (14/100) 45]/5 = 12.6, or about 13 gravity points.

If your wheat beer weighed in at 1.048 before the cherries were added, it would now have a specific gravity of 1.061

Knowing the percentage of sugar in a particular ingredient is very helpful too. See the table below taken from “The curious cook” by Harold McGee

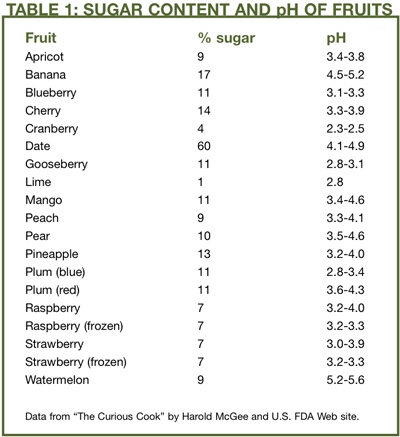
For other ingredients not in this list, an internet search should be able to get you a good approximate value.

  • Haze – Another attribute of adding ingredients, especially fruits to beer is their potential to contribute haze to the beer. They contain pectins, tannins and other peptides that are likely to cause haziness in the beer. These can be managed to a certain extent by using finings like Irish moss/whirlfloc in the boil or polyclar/gelatine during secondary fermentation to help drop these out.
  • The only other consideration to make is when to add the ingredients.
  • Mash – if you want the flavour or colour to be in there from the beginning. Bear in mind that the flavour or aroma will be lower than if you were to add it later. It can also have an effect on the mash pH so you may be less efficient than you were expecting or start to extract tannins unless you account for it with water chemistry adjustments.
  • Boil – the boil is a very common place to add these ingredients as they will be very well incorporated into the beer, even if added as a late addition. Again, the pH will change and may have an effect on yeast viability. Adding ingredients like fruits in the boil may also produce haze as it causes the pectins that the fruit naturally contains to come out of the fruit and into the beer.
  • Primary fermentation – This I would say is probably the least used stage for adding specialty ingredients as you generally want to leave the yeast to do its thing. Nevertheless you can add ingredients at this stage.
  • Secondary fermentation – This is probably the most common stage as it is when you would also add your dry hops. Make sure the ingredient is properly sterilised as you don’t want to accidentally introduce any other microbes.
  • Packaging – This is also done regularly, sometimes to add extra sugar to help carbonation and sometimes purely for the fresh flavour/aroma aspect. Again it’s vital to ensure the cleanliness of the ingredients to be added to keep some microbial stability, especially since it could make for some exploding bottle bombs when added at this stage!

  • Types of Specialty Ingredients

Specialty ingredients are any ingredients you add to your beer that don’t fall into the Malt/Grain, Hops, Yeast or Water categories. Of course this is an incredibly broad range of possibilities and by no means would I consider this post to be a complete list, merely a suggestion of the most common specialty ingredients that people add to their beer.
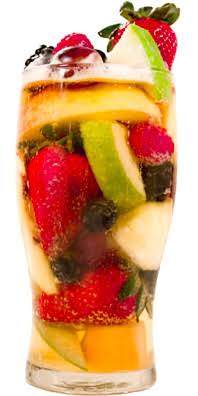
Fruits & Vegetables
Lemon/Lime – These can be in juice, sliced, crushed or whole form and contribute that familiar sour/sweet citrus character but very little colour. Best added during fermentation alongside or in place of a dry hop addition as boil additions can turn quite bitter. Be sure to account for the high amounts of acidity these fruits will produce. High amounts of acidity can be detrimental to yeast and either produce off flavours or stop fermentation completely. Potential Beers – Mexican Lager, Cal. Common, Lighter Ales

Sultanas/Raisins – Can be used towards the end of the boil, Whirlpool or during secondary fermentation. Remember to think of these as concentrated grapes so the sugar content is very high when compared to the weight. Potential Beers – Porters & Stouts, Barleywines, Scottish Heavy.

Passionfruit – Being such a strong yet delicate flavour, I’d recommend not using Passionfruit during the boil but rather as an addition alongside or in place of a dry hop. This fruit pairs well with hops that naturally produce Passionfruit-like notes like Galaxy or Vic Secret, even Enigma which tends to blend well with fruity flavours. Potential Beers – Pale Ale, IPA, IIPA, DIPA,

Mango – Mango can be added in many forms at many stages but one of the most common would be during fermentation, as a purรฉe. This will add the natural sweetness (as well as a small %ABV hit from the fructose) and flavour/aroma aspects of mango. It will blend well with other tropical fruit additions as well as some hops/esters that may contribute this tropical/stone fruit character. Potential Beers – Lighter ales, very lightly used in some lagers. May not blend well with strong/dark ales.

Figs – Whole, sliced or purรฉed figs work well when used in the later stages of fermentation. They contribute a dark complex character and slight sweetness. Potential Beers – Barleywine (a couple of commercial examples of this out there!), porter, English Bitter/Strong Ale.

Dates – Similar to figs in their use, Dates contribute much more sweetness and will actually pair very well with figs in beer. See above suggested beers for beers that will work well with dates.

Raspberries – These would have to be one of, if not the most common specialty additions to beer. They give an obvious, immediate sweetness and their high acid content make them an excellent fruit addition for sour beers. Most often purรฉed and thrown in the fermenter or used for a kettle sour (soured after the mash, boiled for 20 minutes and left to sour for several days before the final boil) They also contribute a reddish hue to the beer. Potential Beers – Anything sour, IPA, Saison, Light ales, Wheat Beers.

Grapefruit – Characteristically a very sour fruit, this aspect will be present in beer made with grapefruit also. May contribute a reddish hue to the beer. Potential Beers – Similar to Lemon/Lime or Raspberries.

Mandarins/Oranges – Can be used in purรฉed or zest form, typically either very late boil/whirlpool addition or as a ‘dry hop’ for flavour and aroma. Even a whole slice of orange in some beers when served is ok. Generally light Wheat beers like Blue Moon. Potential Beers – Wheat beers, Weissbier, Light ales.

Cherries – Another common addition for many styles of beer, can impart red or even blue’ish hues to beer. Cherries lend themselves nicely to sour beers or lighter/wheat styles. Can be used chopped or Purรฉed.

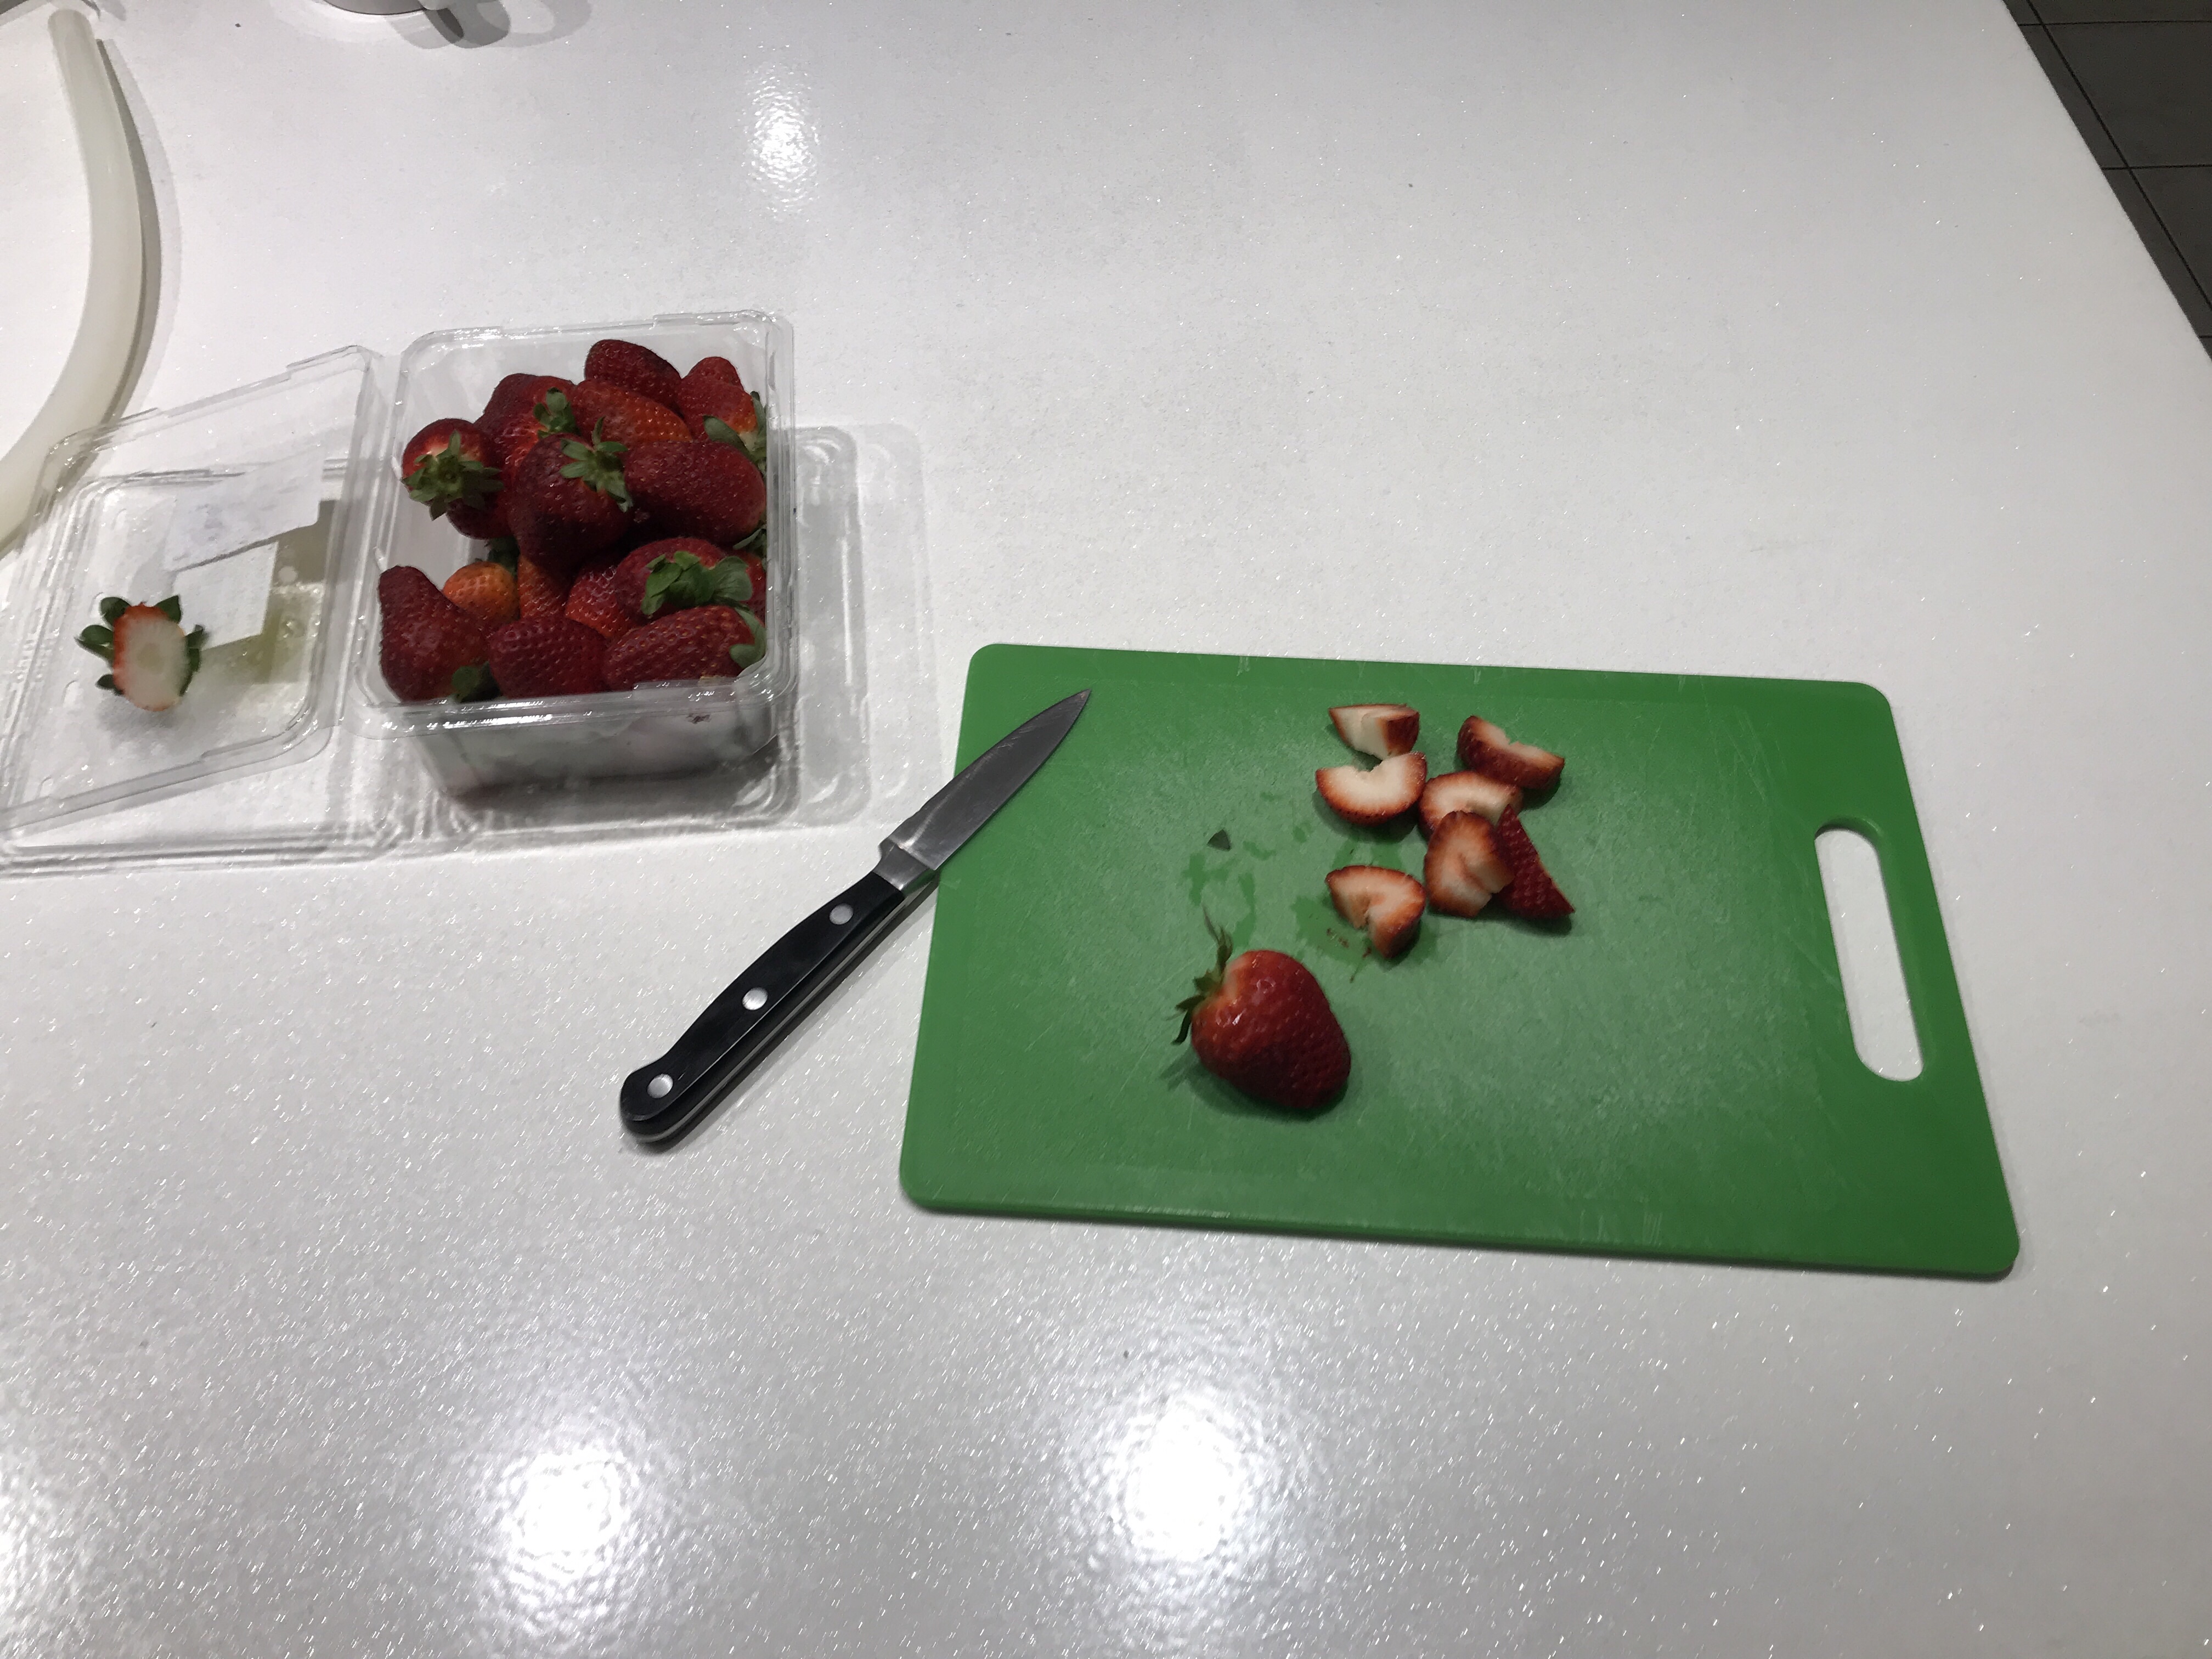
Strawberries – These berries contribute their signature colour and light flavour. Not as well suited to darker styles, Strawberries are another good addition to lighter ales, wheat beers or sours. Use chopped or purรฉed.

Blueberries – A good contributor to colour and flavour, Blueberries work well in light or dark beers but do not contribute the colour you would think. Although the pigment in blueberries themselves gives a blue colour, in the concentrations you find it in your beer it gives more of a reddish colour.

Blackberries – A great contributor of slightly sour flavours as well as some residual sweetness and dark red to nearly purple colours. Although they could be used in a lighter flavoured beer, they really shine in darker beers like a fruity porter. (I’ll attach a Blackberry Baltic Porter recipe at the end of this post).

Coconut – We taste coconut and we think tropical flavours, Although it won’t contribute much in the way of colour. Coconut will pair well with anything else tropical like Pineapple, mango etc since we’re used to tasting these flavours together. Potential Beers – Quite a wide range for this one, everything from tropical pale ales to stouts or porters, anything you want that tropical flavour in. Try some toasted coconut flakes in a porter/stout for a tropical flavour that really compliments the roast malt character!

Pumpkin – This is typically added to beers around the US thanksgiving time. Paired with spices to emulate the classic American Pumpkin Pie dessert, namely Cinnamon, ginger and nutmeg.

Beetroot – Beetroot will contribute its classic pinky purple flavour and a slight vegetable character. I would use this in any beer you want to be visually striking.

Herbs
Rosemary – A very earthy herb with a strong aroma and flavour. Use sparingly and only in beers that can handle or compliment the strong flavour such as some dark English ales or English/American Browns. Rosemary is so strong it has the potential to either partially or completely replace hops.

Mint – A lighter flavour but just as pronounced, mint can be added on its own or as a compliment to another ingredient, e.g. Mint and Strawberry sour.

Coriander – Coriander is used in various styles of beer but most notably German beers like Gose and it contributes nutty or even citrus notes.

Fennel – Adds a spicy and Aniseed-like flavour to beer and can be used as an additional bittering agent if used in the boil.

Spices
Ginger – Obviously this can be used on its own for a ginger beer but in regular beer Ginger contributes a strong flavour with a bit of spice. Suggested uses are chopped or purรฉed in either the boil or in the fermenter alongside or in place of a dry hop.

Chillies – Heat is a property rarely found in beer, other than alcohol heat that is! Chillies can be added to pretty much any beer that doesn’t already have a ‘hero’ element that’s designed to shine as it could be overshadowed by the heat.

Cinnamon – As mentioned before, this can be added along with other ingredients to create a typical American style holiday beer and adds an earthy spice to the beer. You can use whole or crushed, usually in the secondary fermentation stage.

Cloves – While this flavour/aroma is naturally produced by some yeast, that doesn’t mean that you can’t add them to the beer individually as well. Be careful not to overdo it as they can quickly overpower other elements of the beer.

Vanilla Beans – another common addition to beer of many styles. Vanilla is a familiar flavour that can make things appear sweet. Not because vanilla is sweet but I think it’s more because we associate it with familiar sweet things like ice cream. Vanilla is actually nice and pleasantly earthy, subtle in small amounts but don’t overdo it as it can quickly overpower other elements. Potential Beers – Stouts, Porters, many malty beers like butters and cream ales.

Hot sauce (like Tabasco) – this can be classed and used in a very similar way to chillies in terms of heat. The only different consideration to make for chilli sauce is the individual flavour of different sauces and how that may pair with the other flavours in your beer.

Sweets/Candy
Bear in mind with any sweets or candy that they will usually add some very simple sugars that are easily fermented so will add a little in terms of abv and may take away some body.

Liquorice – This flavour may be somewhat present in your beer due to some malt and yeast characteristics but other brewers choose to put it in separately.

Honey/maple syrup/golden syrup – Sometimes put in as a step in the boil, sometimes the fermenter, these very simple sugars break down and get consumed easily by the yeast. Because of this, you may find that there may not be as much flavour as you think for the amount you add. This is not to say add more as it will detract from the colour and body of your beer. Potential beers – wheat beer, English bitter, generally more malt-forward beers.

Chocolate – very different from using chocolate malt, which doesn’t actually contain any chocolate, adding chocolate to beer can add sweetness, a rich to almost slick mouthfeel and obviously colour. It can be added in various forms, from chopped up bars, whole dark or milk chunks, powder, essence and can be added at any stage, the most common being the boil or in the fermenter. Potential beers – generally anything dark unless using white chocolate. Will pair well with other sweet or salty flavours, a small amount of diacetyl may be acceptable in beers produced with chocolate as they may add this as a characteristic by themselves.

Salted Caramel – again, this may add a diacetyl-like quality to the beer and be careful with the saltiness of the caramel as it can add unwanted salt ions to the beer and affect the overall taste and head retention. Again, this would be used with generally darker beers, or at least beers that it’s acceptable to have a higher finishing gravity to be able to enjoy the sweetness of the caramel. I’m talking English bitters, Scottish heavy or mild, brown ales or even porters.

Cordials/fruit concentrate – most commonly used when making ciders, these can also be used in beer to add a fruity quality and usually are added in the fermenter either for primary fermentation or even as priming sugar. I’d be careful with this last option as you may not know the exact sugar content of the concentrate so you could inadvertently overdose the beer with sugar and create bottle bombs!

Hard candy (jolly rancher/big red/fantales) – sweets like this can add a wonderful flavour and colour to your beer. I’ve seen beers brewed with these and they have been striking in colour and the flavour phenomenal. Again, they are basically pure sugar, simple sugar that will ferment very easily so they may not add much in terms of body to the beer. Because of the wide variety of options, what you add to what beer is very much open to your own interpretation and personal taste.

Biscuits (Oreos/digestive biscuits) – Biscuits add, unsurprisingly, a biscuity character along with a subtle flavour of the type of biscuit you want to add. Generally suited to fuller body beers due to the amount of unfermentable carbohydrates in the biscuits, they can add a wonderful complexity. I like to use biscuits that have lots of different ingredients other than just plain flour, oats, other grains, as they all add a small degree of difference to what’s already in your beer.

Meat/Fish
Chicken – I’ll just leave this here.

Bacon – I’ve had people say they’ve added cooked bacon to beer, at phenomenal rates, I’m talking 1/2 a kilogram or a pound of bacon or more! Some reports were terrible, others said not too bad. Relatively uncharted territory here so tread carefully!

Oysters – a common ingredient in some places, most often in Stouts. They can be added anywhere from the mash through to the fermenter (although I’d be careful about adding seafood at any stage on the cold side). It is common to use any part of the oyster, from the shell, though to the meat or some even chuck whole live oysters in! Using shells was also purportedly introduced to add calcium carbonate to the mash and reduce the risk of astringency from tannins in the dark roasted grains. Although the flavour of oysters can be quite delicate, the salt and fishy component can quickly take over so I’d start out with a couple of whole or a half dozen’s worth of shells per 19l batch to be on the safe side and work your way back up from there.

Other
Coffee – this is an incredibly common ingredient, especially in dark beers. Coffee can add the obvious coffee notes but also an overall richness or even chocolate-like character. It can be overpowering so I would add no more that a single shot or equivalent to your beer at first and work upwards from there according to taste. It is almost always added in the fermenter as or in place of a dry hop. A couple of notes on it though. Firstly, I would decide if you wanted to use liquid coffee or ground coffee. If using liquid coffee, pour it in as evenly over the wort as you can and let it distribute itself. If using ground coffee, I would use a coarser grind and slightly more grounds as it will help them to fall out of suspension later.

Yoghurt – This makes a great natural souring agent due to the lactobacillus cultures it contains and acidity it produces. It also doesn’t add much in the way of body or colour so is great for lighter styles of sour beers like Berliner WeiรŸe. it’s generally recommended to make a starter with the yoghurt and add it to a lightly boiled wort for a day or two then boil and continue as normal. See this page on souring from Milk The Funk.

Breakfast Cereal – this can be added at many stages, most common being the mash or fermenter. It will definitely add sweetness but also many other potential flavours from chocolate to fruit to even some honey-like flavours. Will work in any beer you can dream up but a recommendation is to pair the beer with a cereal that will compliment it. E.g. lighter cereals for lighter beers, dark/chocolate cereals with dark beers where you may desire a chocolate flavour.

Wood chips/bark/branches/tips – There are many ways to add these to beer, I’ve seen them in the mash, boil and fermenter, with the latter being the most common. Especially the case with wood, these ingredients are typically used to help the beer age and take on the character of the ingredient. It is probably more practical to put some oak staves in your fermenter during secondary and leave it for a month than it is to buy a barrel and age your beer in there! That said, if you have the money, space and desire to buy a barrel, nothing will simulate it better than actually brewing in a barrel! I along with most people however, do not have the money, space or desire to buy a barrel, so I’d opt for the oak staves every time.

Potato chips – This is an odd one I came across but I thought I’d throw it in. I guess if you have a favourite flavour of potato chip, throw it in! I would suggest the mash for these, or if it’s the smell you’re after, maybe add them as a flame out addition at the end of the boil.


Thanks for your patience with getting this post out. I hope it’s given you some good tools to start you on the journey of making your beer weird!

As stated before, I plan on being more consistent with post timings from now on. Yes they may still be spaced far apart at first but once things are a little more under control again my goal is to get back to the weekly posts.

If you are in any way interested in contributing to the blog I’m all ears, message me on here using the contact form on the site or reach out on social media.

Until next time,

All the best,

Sean


If you have any feedback or edit suggestions for this post please contact us and let us know. We want to ensure the correct information is presented in the best possible way so that fellow brewers can stay well-informed.


Want to stay up to date with the latest from Sean and New Beerginnings? Like us on Facebook and Instagram or reach out to us on Reddit.