
Whether you’re new to kegging and want to build something yourself or you’re already kegging with a smaller kegerator and want to expand to something more flexible you may want to consider building a keezer.
What exactly is a Keezer?
A keezer is a converted freezer with a temperature controller to allow the storage and dispensing of generally many more kegs than your typical kegerator. They can come in many different shapes and sizes, with taps coming out the front, top or even out of a piece of wood called a collar that’s built between the body of the freezer and the lid.


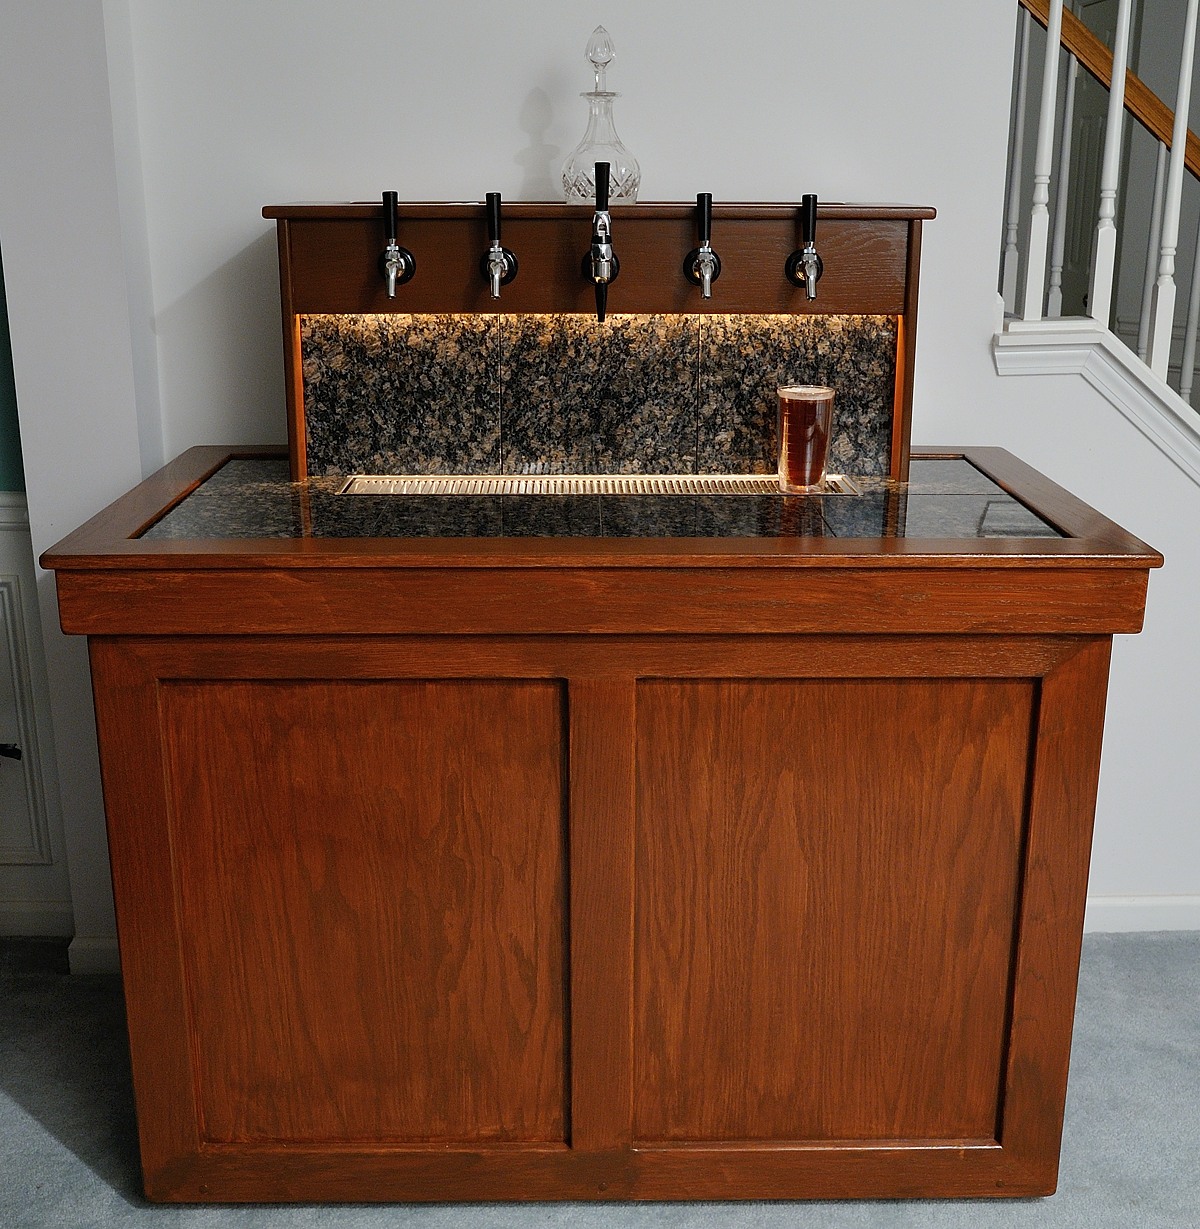
The range of possibilities are endless, you can keep it bare and minimalistic like the image on the left, have something more pleasant looking but still functional at minimal expense like the image on the top right or you can have a fully enclosed, backlit bar station for placement in a space that isn’t the rear of the garage!
In this post I’m going to tell you all the tools you need, equipment you need to buy and approximate costs (in Australia anyway!) you can expect to be able to make this kind of thing yourself at home.
I’m going to do this by walking you through my own process of updating my old kegerator to a keezer so I can expand with more taps and flexibility.
Keezer Build
Determine available resources
So I started with a freezer I already had and was using as a fermentation chamber. It wasn’t quite big enough anymore for the amount I was brewing but would be a perfect update to my serving capacity. I also had some old plywood laying around from a project a few years ago.
From here I knew that I would be making a keezer with a collar as I already had most of the stuff I needed. The only things I had to buy were:
- More beer/gas line
- Right-angle brackets to form the collar
- Varnish to seal the plywood
- Caulk/sealant to form an airtight seal between the collar and freezer body
- The extra taps/shanks/hardware needed for the expansion
Begin by planning the design/layout
Once I knew the type of keezer I was making and had all the resources I needed it was time to actually plan the build carefully.
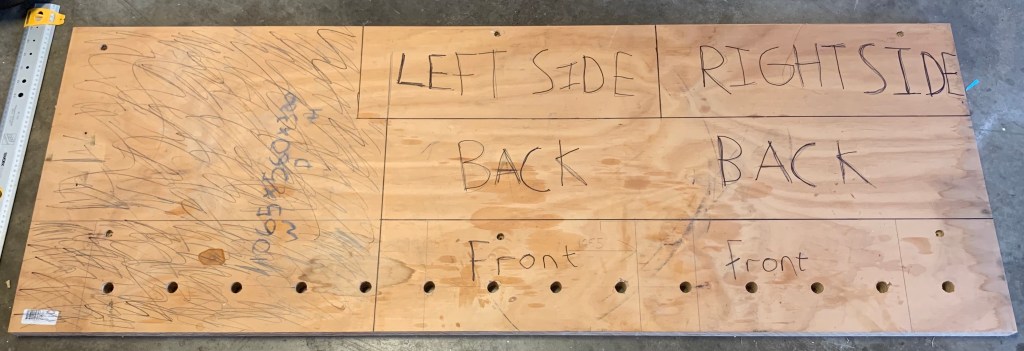
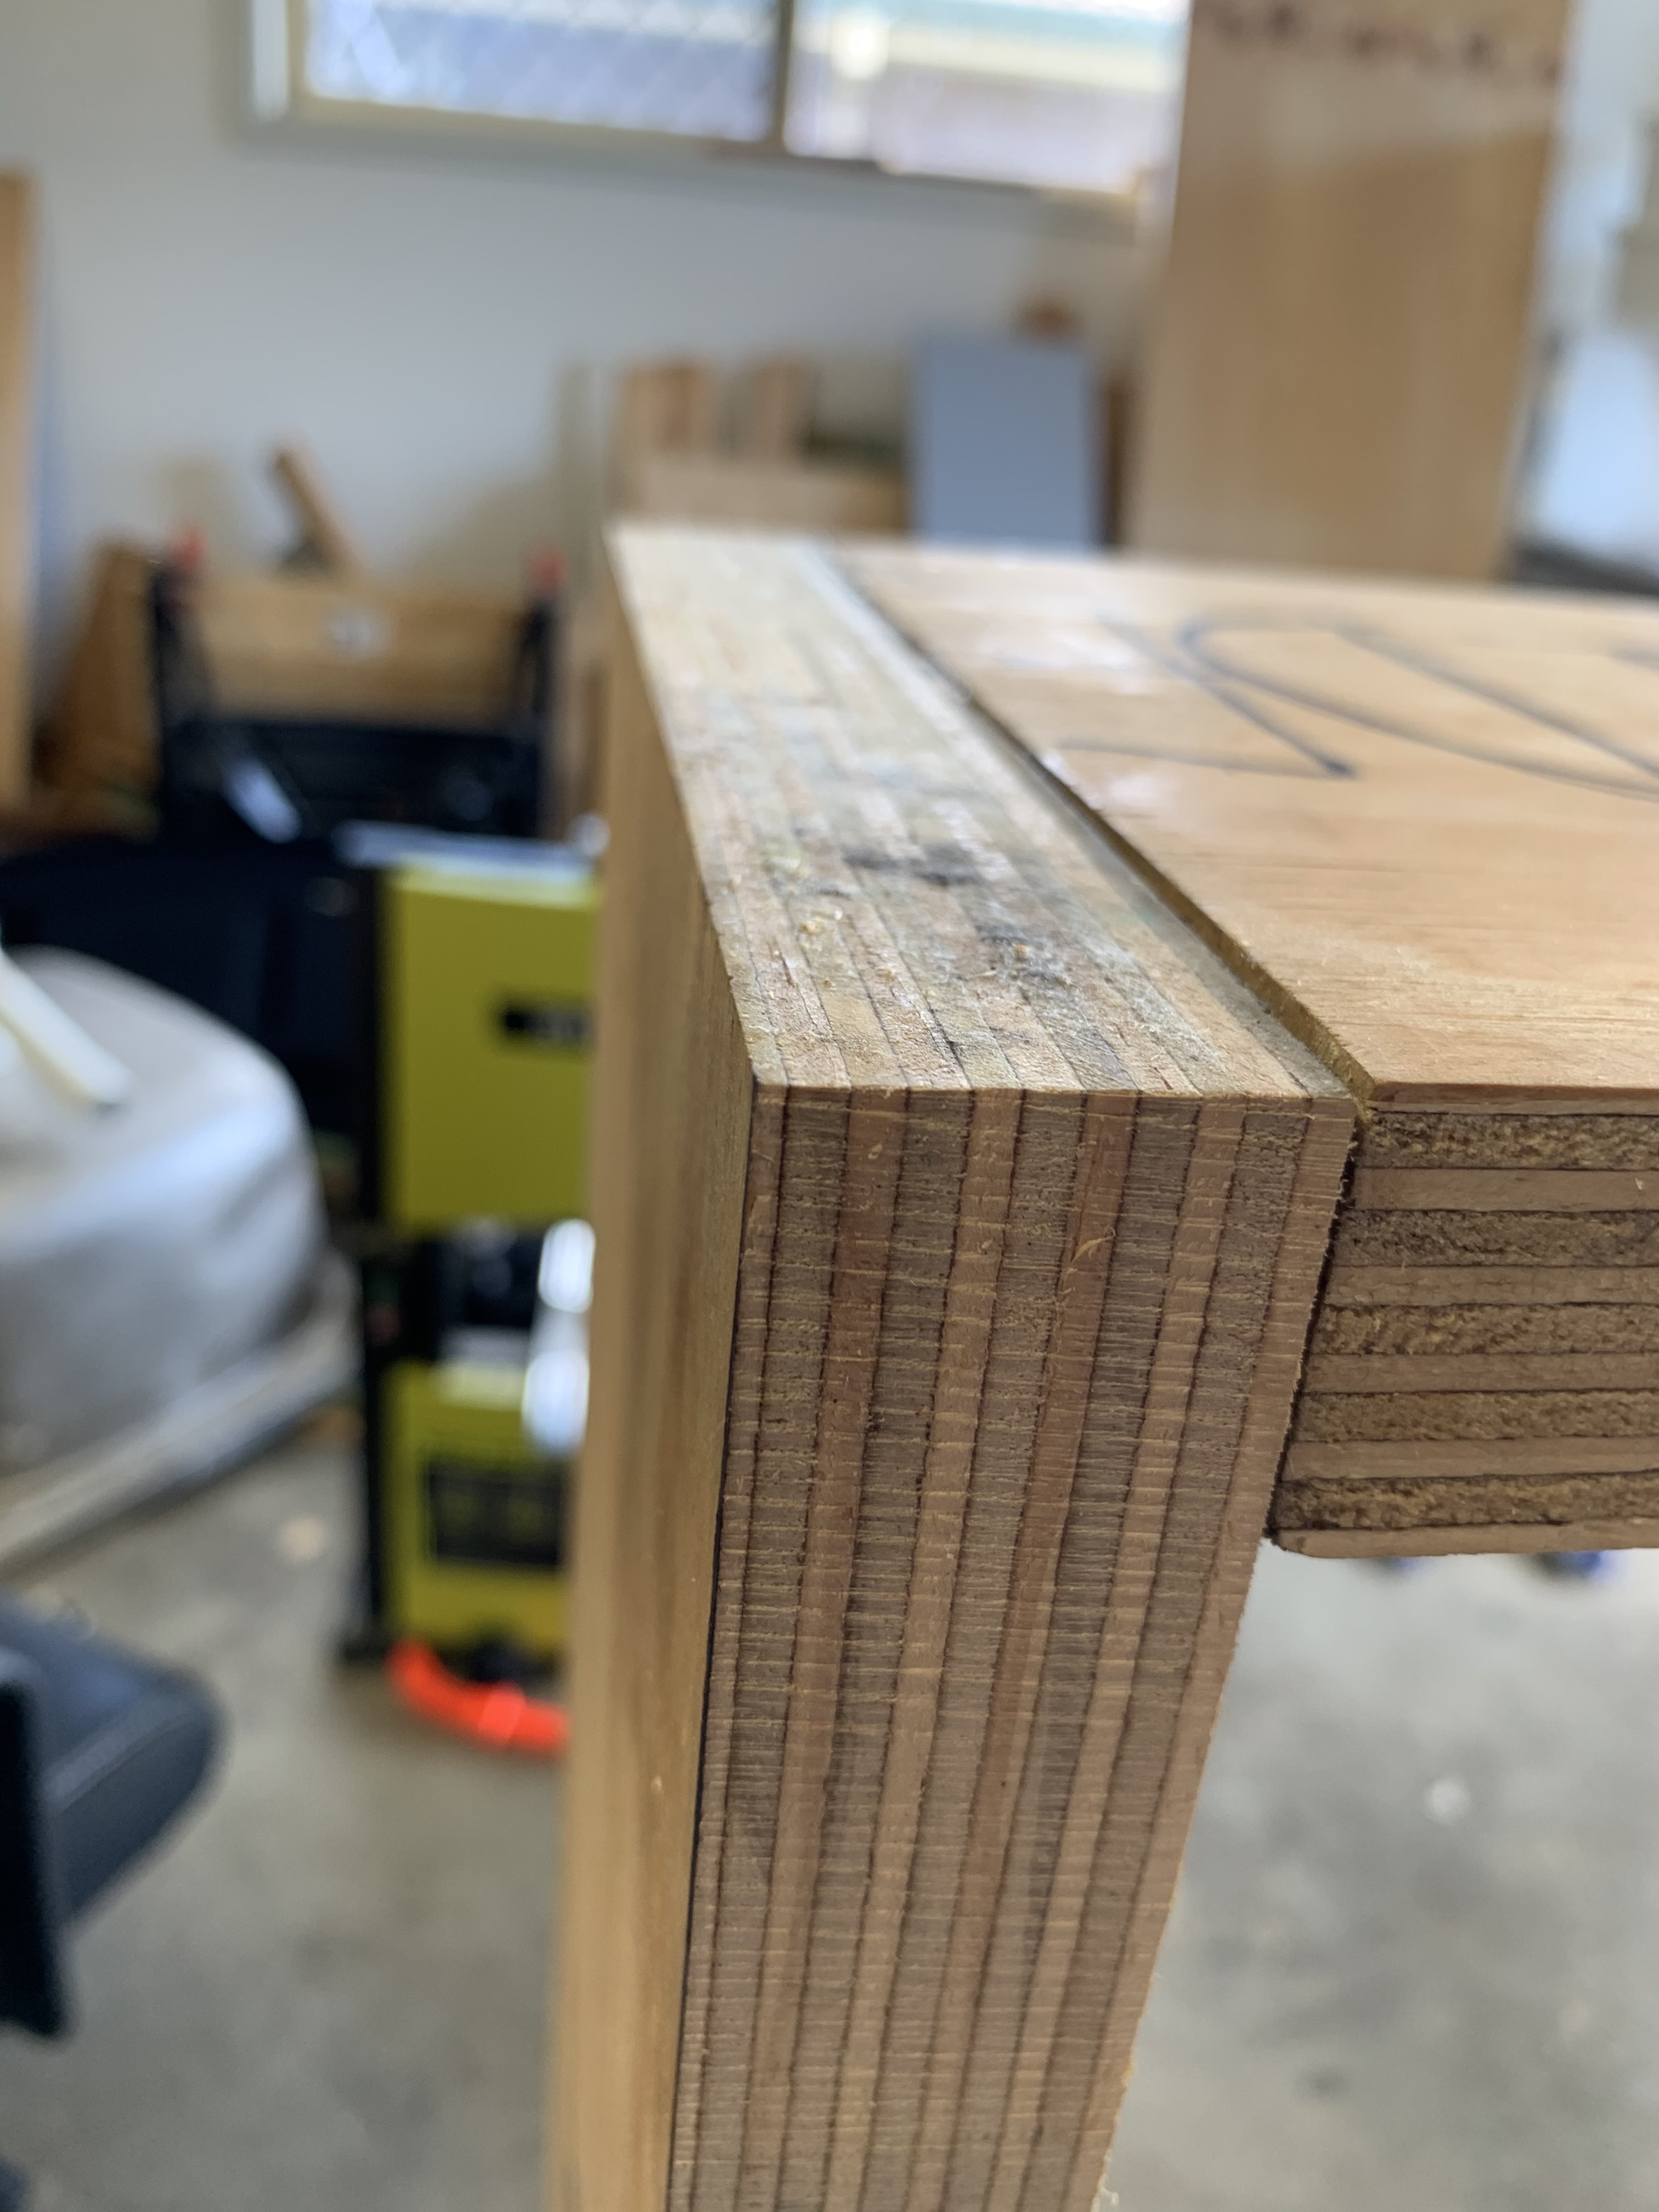
The plywood I had needed a bit of work first as all I had was a big long sheet of it so the task was to figure out the most efficient way of cutting it down. I had used this for a workbench with holes drilled in for a long time so thought the holes would be well-suited to filling in and drilling back out as needed to add even more taps.
The important thing to note about the wood is that it has to be reasonably thick. This is for two reasons, one because it needs to support the weight of a tap and shank without bending or buckling and two because it needs to keep the cold in and heat out. If the wood is too thin, there won’t be enough material to support the tap and shank very well but most importantly it will make your keezer very expensive to run due to poor heat insulation. I used 2.5cm or approximately 1 inch thick plywood that was very dense to help with a bit of thermal insulation. The other thing you could use is two thinner pieces of plywood with dense, closed-cell foam packed in between, even using a can of expanding foam would be better than nothing.
Once I had all this marked out, I cut it up. You could use a handsaw for this if you really wanted to work on your upper body strength, but me being a little lazier than that chose to use power tools! The best thing I had on hand was a handheld jigsaw but I’d highly recommend a circular saw if you have one as it will make much straighter cuts than a jigsaw would. As it happened My cuts were straight enough and only needed a bit of smoothing out with a handheld plane and some sanding.
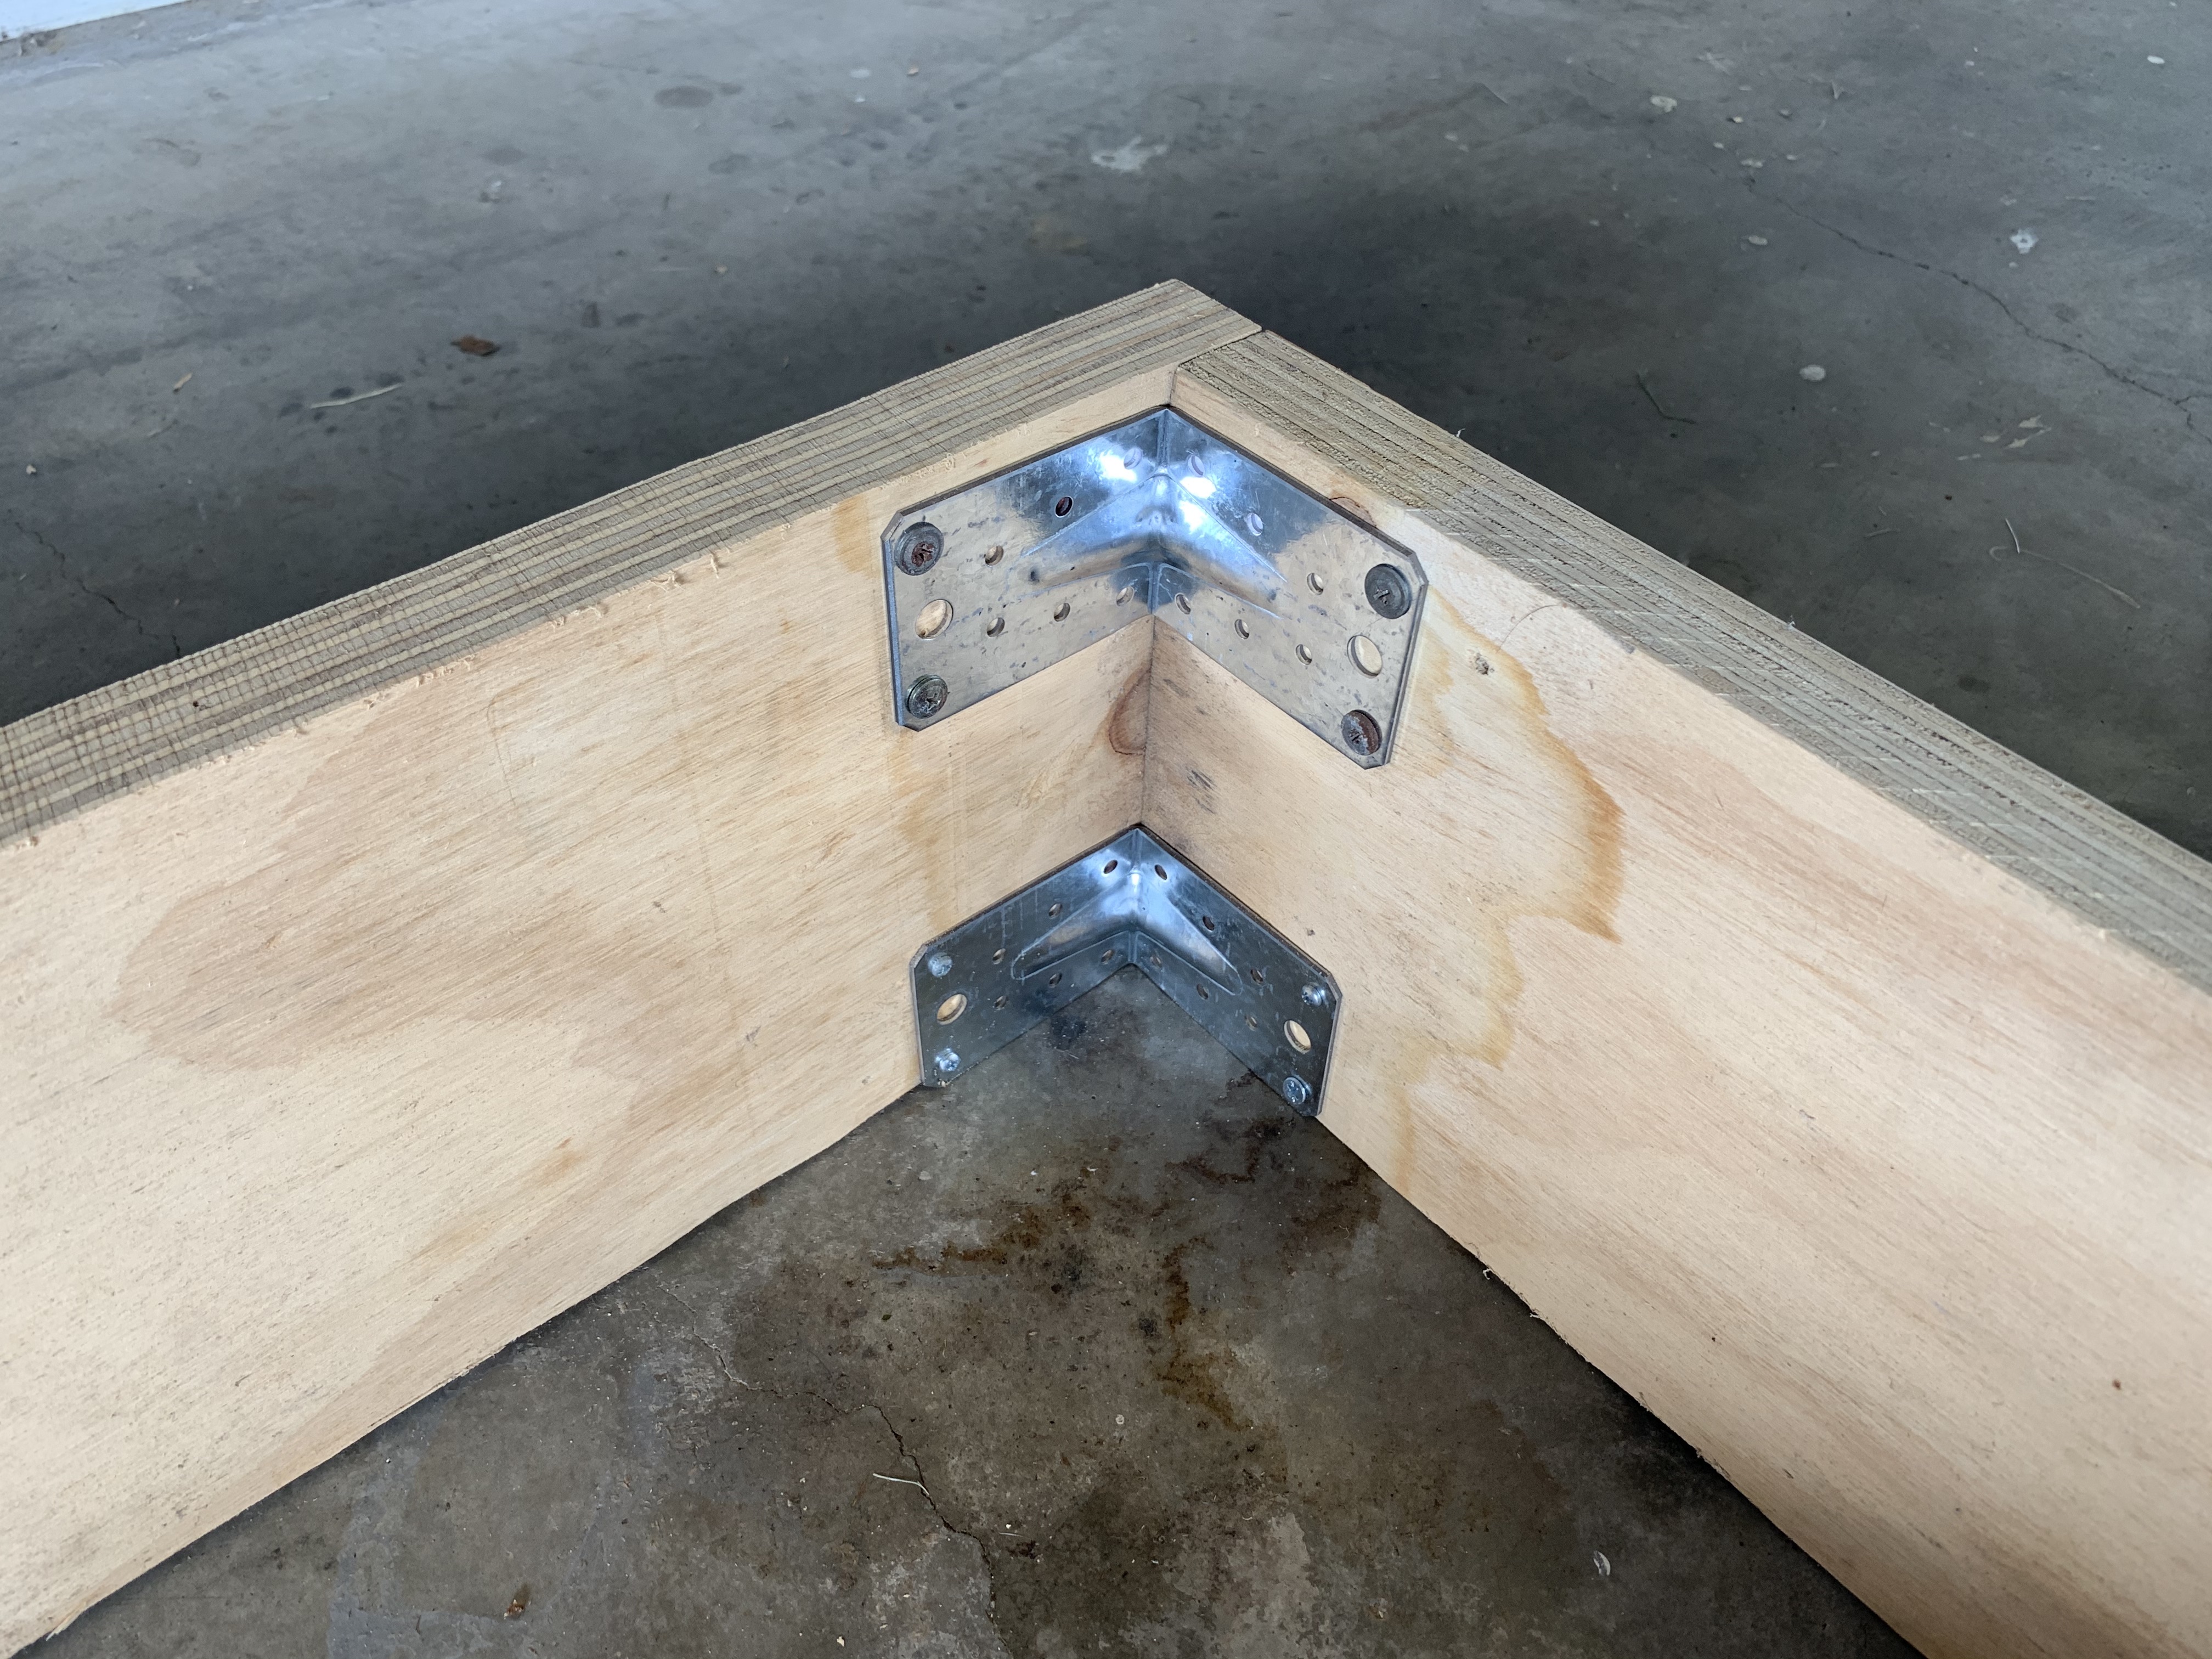
Once the pieces were cut it was time to do a test fit of the brackets to find the best orientation of all the pieces.
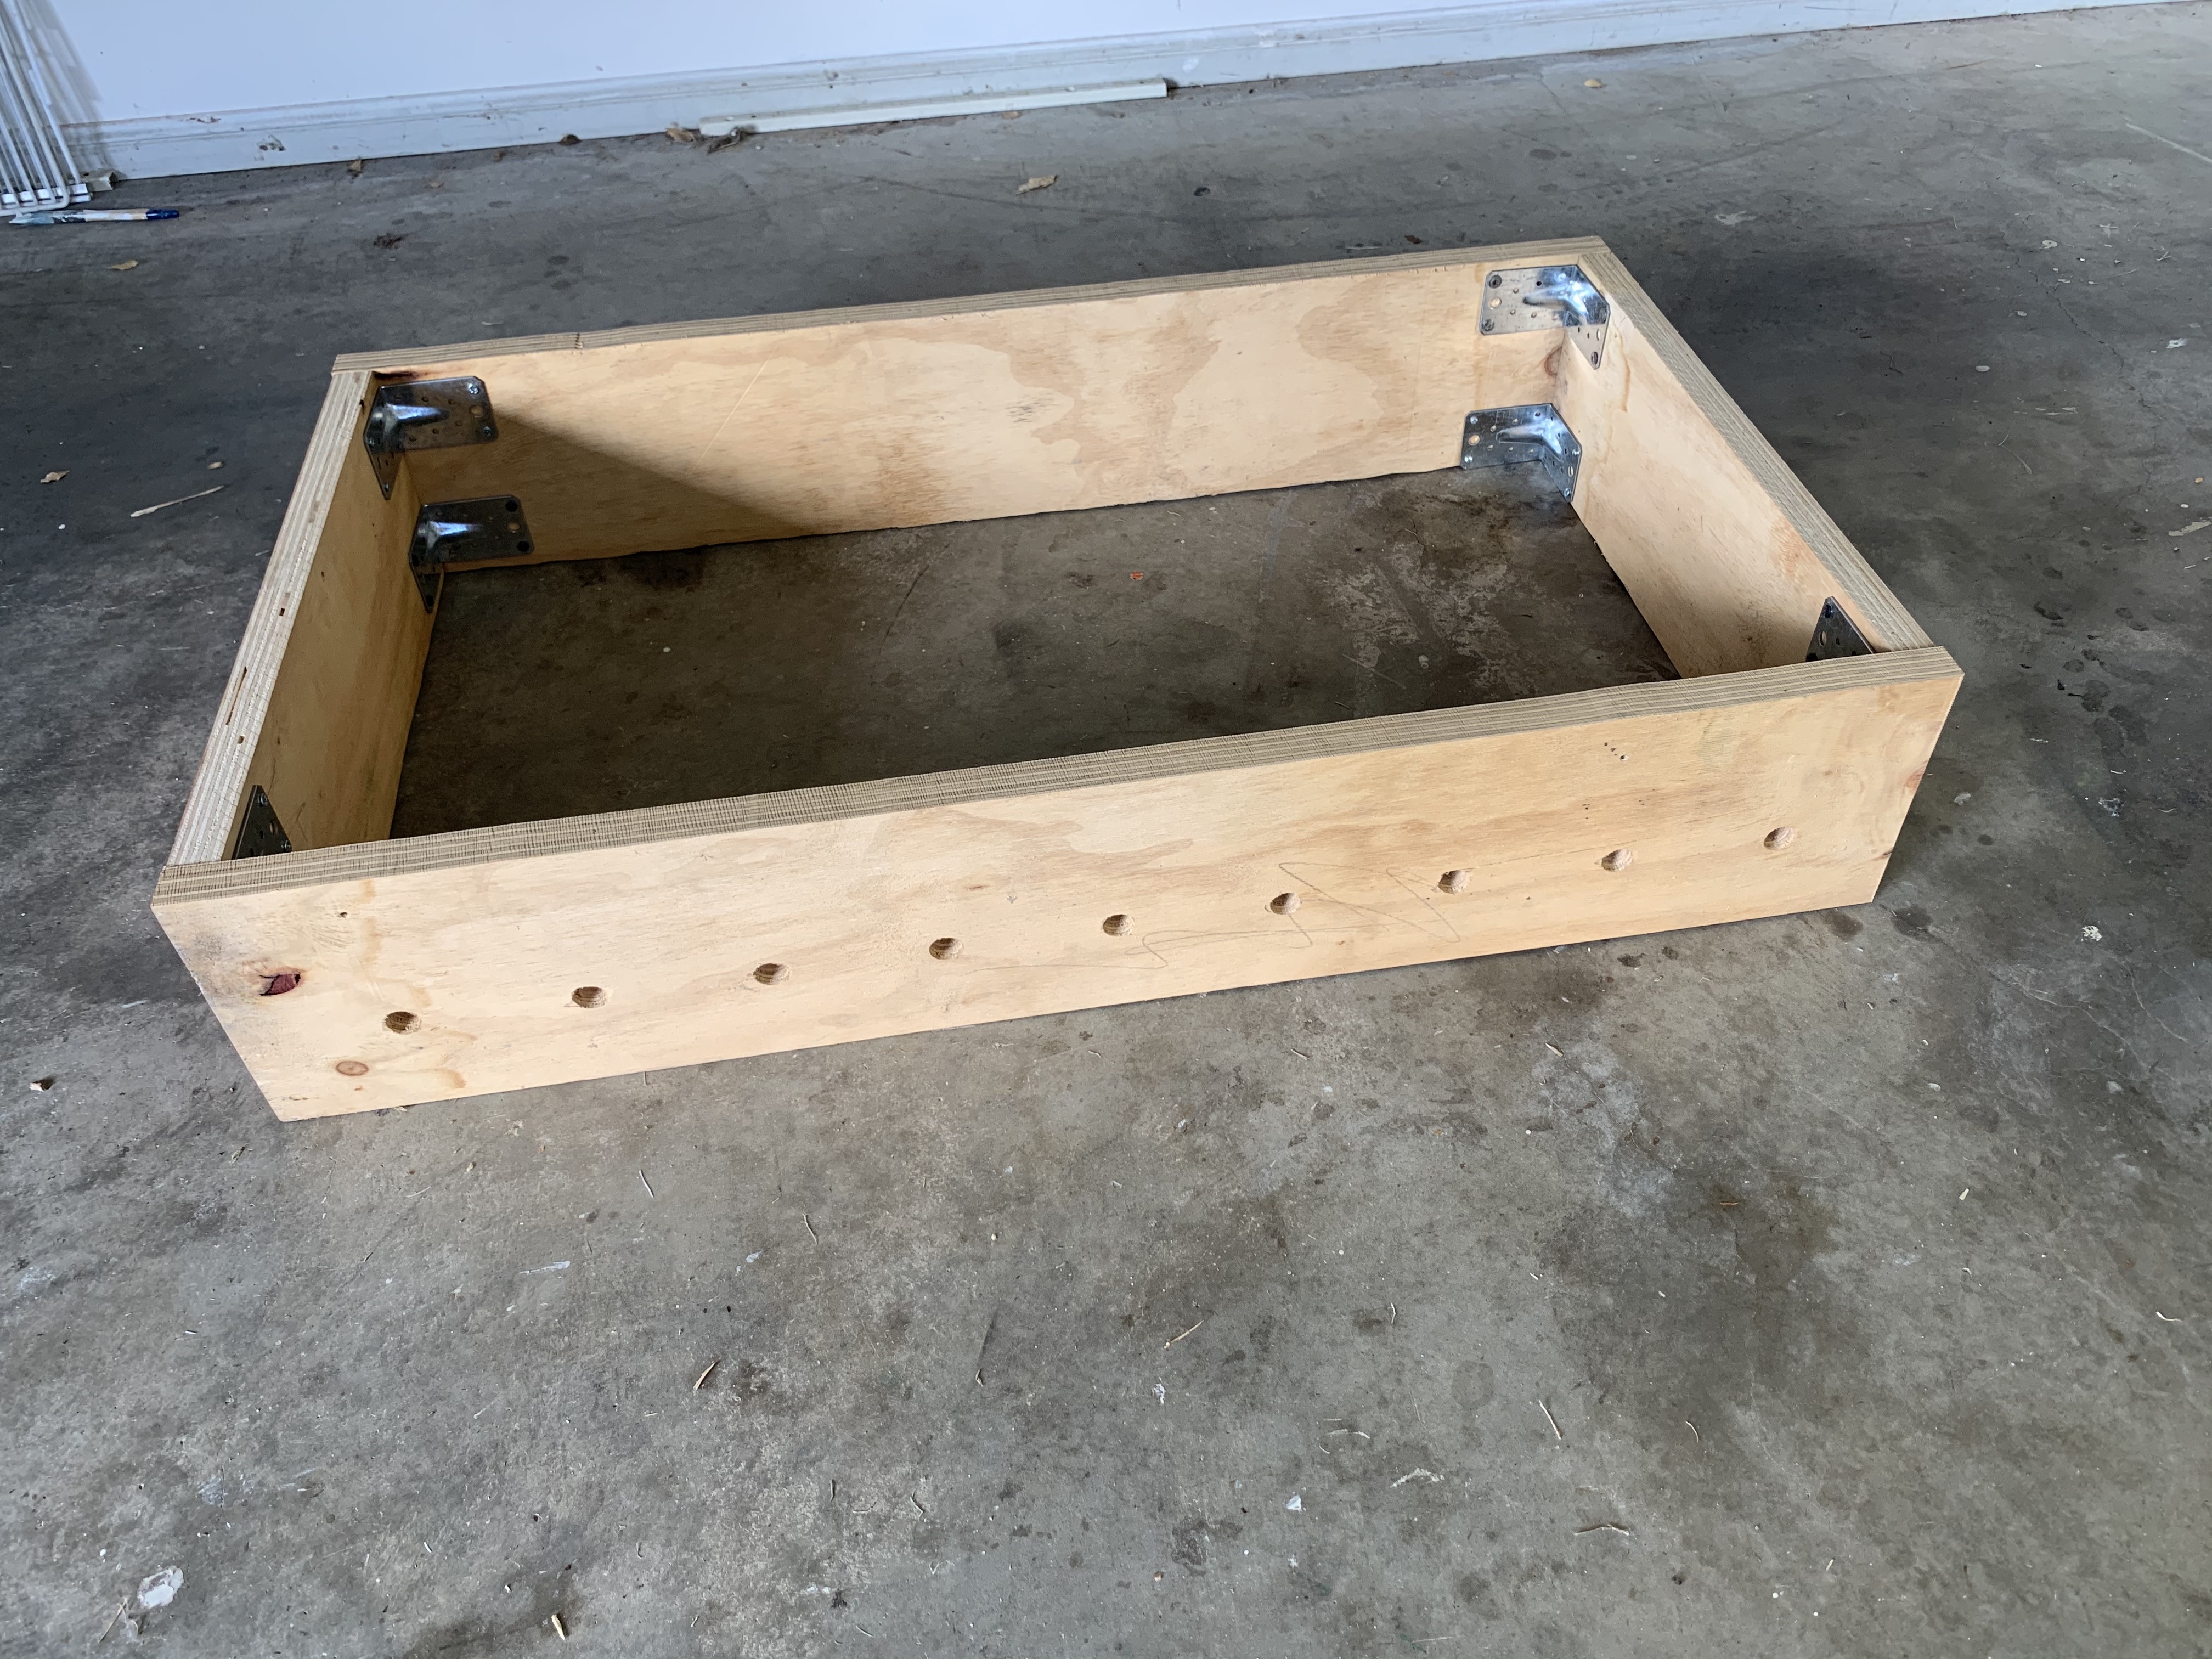
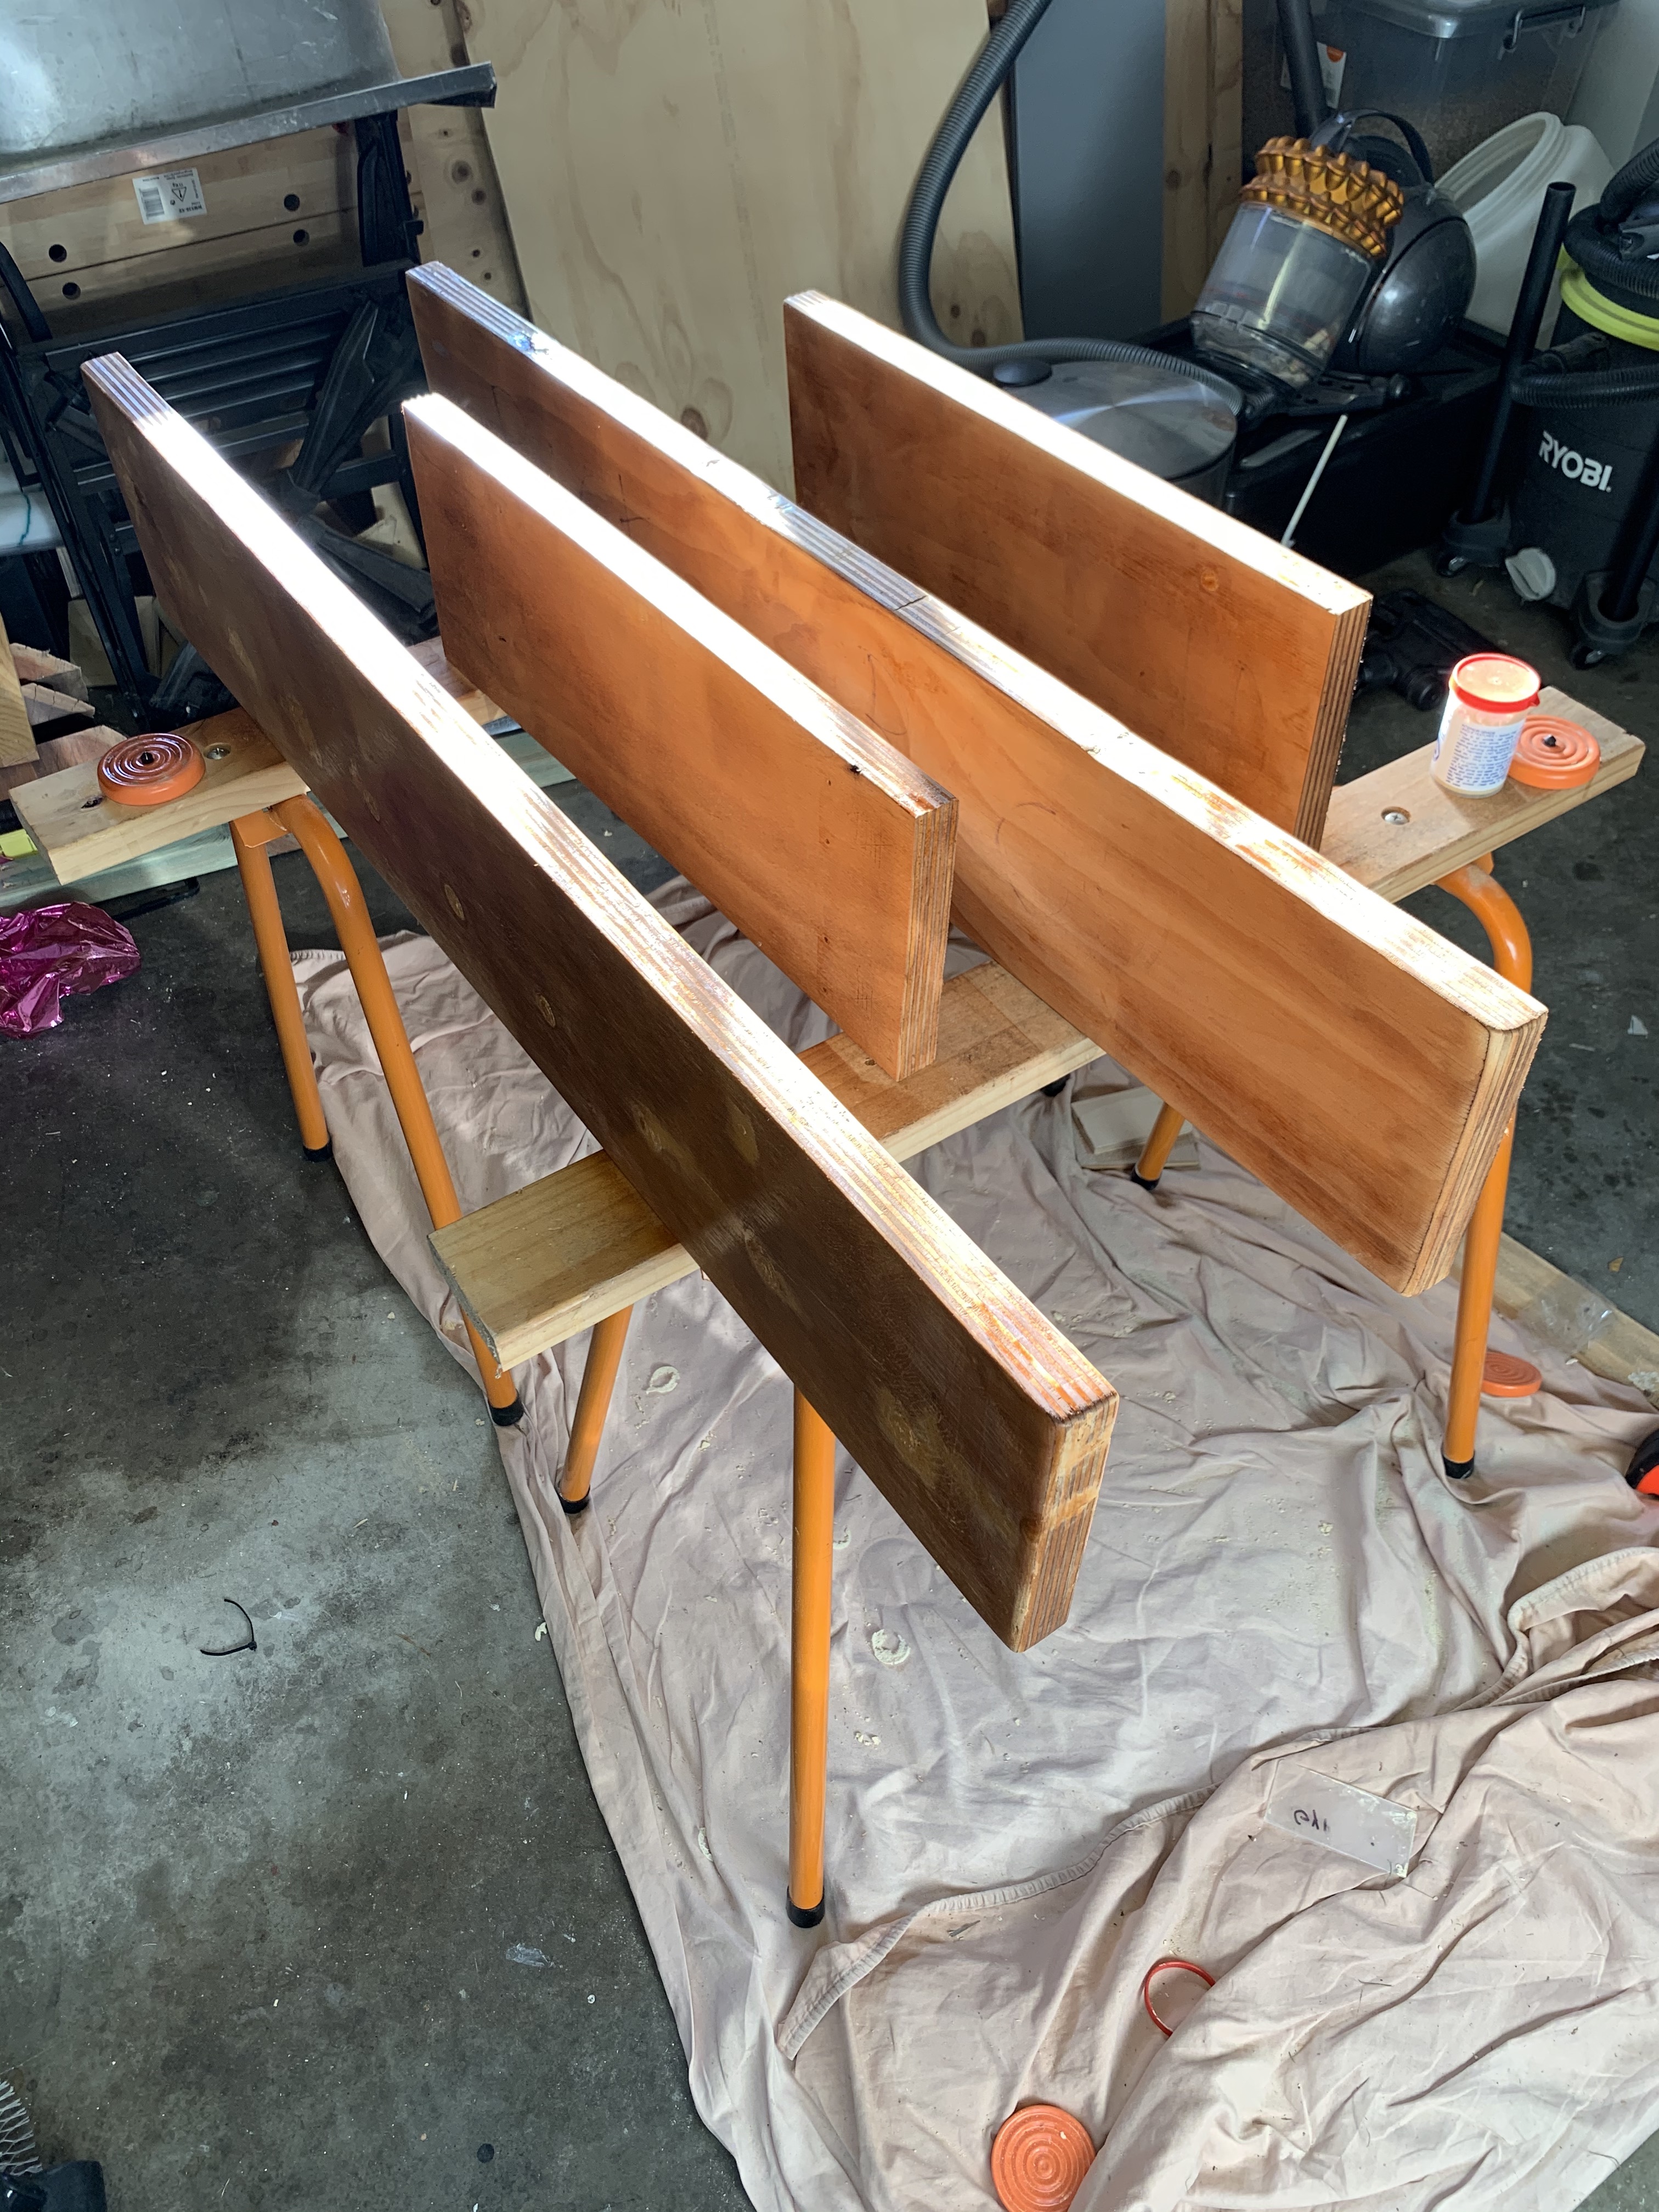
So next was the sanding and smoothing of all corners as they were initially quite sharp. The rest was also sanded to give a nice smooth finish when varnished.

After that it was a matter of filling in any holes and starting the varnishing process. For this I took it all apart again and varnished all pieces separately with a spray-on varnish. I gave everything 2 coats of a stained varnish and 2 clear coats. You could realistically use whatever you like to achieve the colour you want.
My advice is to do this outside or in a room that is ok to be covered in a very very thin layer of varnish as it tends to get everywhere. I also wore latex gloves and a respirator to ensure my outsides and insides didn’t get the same thin coat!

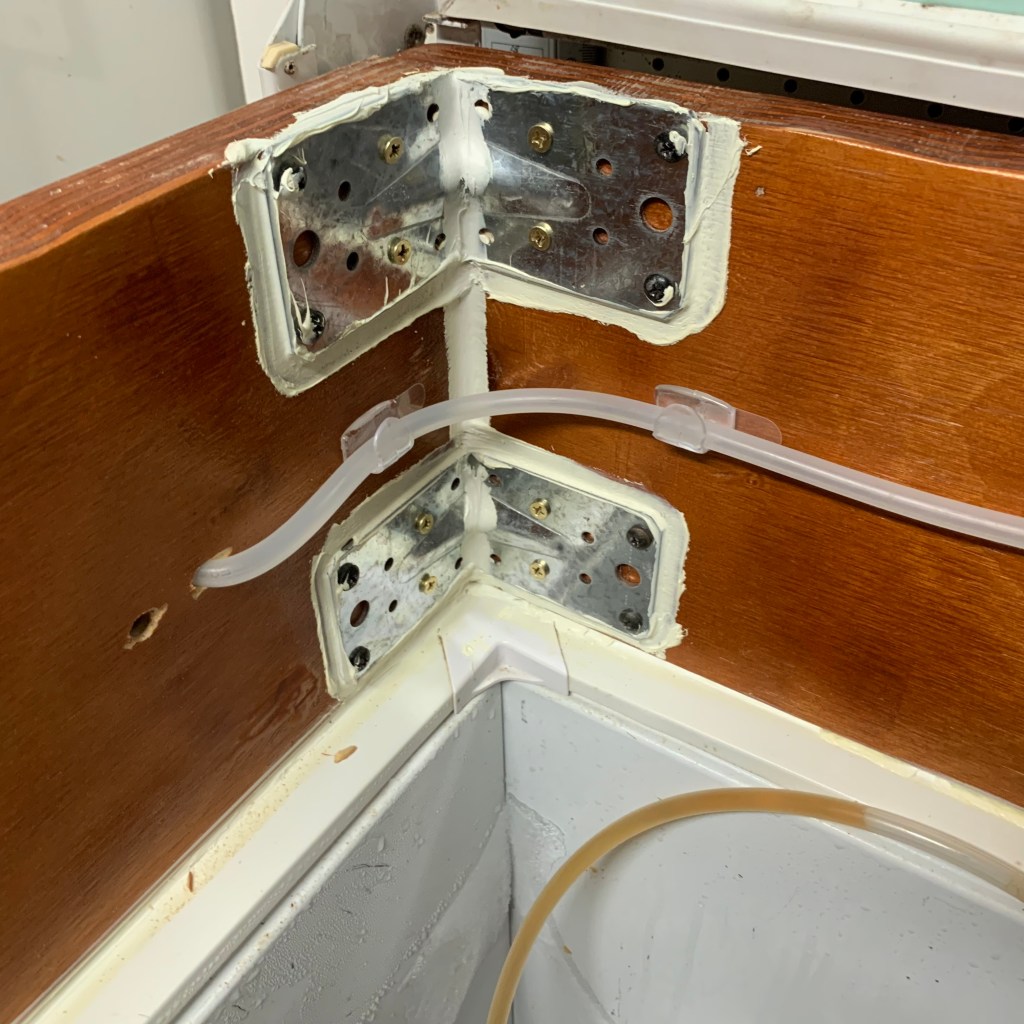
After the varnishing it’s time for a final fit and seal of all the edges before finally sealing it onto the body of the freezer. That began by tilting the lid back, unscrewing it from the freezer (being VERY careful not to damage the internal springs of the lid!) and attaching it to the collar once it was fitted.
Excuse the terrible seals, I’ve never claimed to be a plumber and I’m not now! All I wanted was an airtight seal on the corners to prevent as much heat transfer as possible.

More Planning!
After the physical build of the collar was finished, it was time to plan the inside. For this I went to a fantastic website called Lucidchart that’s free to use and is perfect for making graphical plans of different elements and connecting them together.
This is the plan I drew up of the inside plumbing I needed. The keezer would have 5 taps but can possibly fit 2 more as well as a nitro gas setup if required down the road.

So then I looked at what I had that could be used:
- 5 Kegs
- 4-way gas manifold
- Beer/gas line
- 3x gas and 3x liquid disconnects for the kegs
- 3x taps and shanks
- 1x door-mounted drip tray
and drew up a list of equipment I needed to buy:
- 2x gas and 2x liquid disconnects
- 2x taps and shanks
- More beer/gas line
- 1x door mounted drip tray placed next to the old one
- 1x Tee bar splitter for the force carb line
Once I had all of this it was a matter of connecting it all up. I made the choice of going with MFL connectors instead of barbs for all new connections as they make for an easier time in future if things need to be reconfigured. See all the assembly pictures below.


After this it was all tidied up and beer lines neatly cable tied in loops to make them easier to manage. To calculate the length of beer line needed I used this website, although the units are all in US imperial, they are easy enough to convert with a quick google search. As a result of balancing lines correctly the beer pours perfectly from each tap.
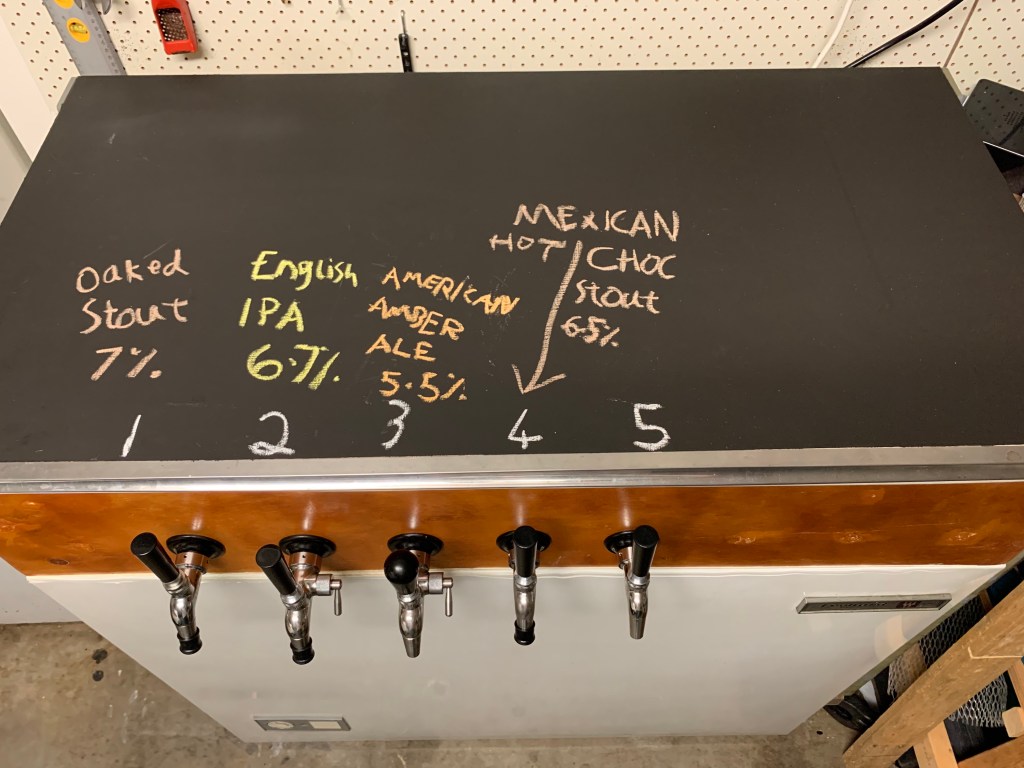
The final touch I put on the keezer was a big space on top that I could write on to display what was on each tap. You can buy chalkboard paint at most hardware stores, craft shops or specialist paint stores.
Ok so what’s the damage?
Any keezer or kegerator build (many of the principles here could also be applied to a kegerator too) can be as expensive or cheap as you’d like. For me I wanted to get decent fittings that would last a long time but not spend big bucks as the freezer I’m using is quite old and will eventually need replacing. Everything I’ve done can be ripped out and added onto another freezer when the time comes.
I’ll do these costs as though I’m buying everything new:
- Freezer: $0-$500 depending on how you get it, mine was off gumtree for $0!
- Wood: $0-100, if you can use what’s laying around, great!
- Brackets: <$10.
- Varnish: Approx $50, I had to get an extra few cans so budget more if you’re getting the spray on stuff as it gets expensive.
- Sealant: $10, just get a small squeeze tube.
- Taps & Shanks: $50 and $35 each respectively, total $450 for 5x
- Gas manifold: $40
- Beer/Gas line: $2/metre, up to $50 for everything required
- Disconnects: usually around $9/each, so $90 for all 10.
- Drip trays: $65 each or $130 for 2 if you need extra length.
- Kegs: $150 new, $50 used, free if you have nice friends. max if buying all new $750, more likely $250 if buying the pre-loved variety, just expect to spend a bit on new seals and lids.
- Gas bottle: $100
- Gas regulator: $70
So potential lowest price if buying everything new is just over $2k or if buying second hand kegs, $1,700. Because I had most of this stuff already I got all the stuff I needed to upgrade for around $350!
This just goes to show that if you can be resourceful and use what you already have then you can make BIG cost savings. the price difference compared to buying a whole kegerator system that only has 3 taps is around $1,000 or around $1,400 for 4 taps. At that rate it’s not that much more to build your own system that is both a fun project that teaches you a lot but also lets you customise your setup much more or even move it to another fridge/freezer when the time comes to upgrade later on.
Thanks for reading through this guide and please let me know if there’s any more detail you’d like on any parts of this process and I will be able to update it for you!
Happy building!
Sean
If you have any feedback or edit suggestions for this post please contact us and let us know. We want to ensure the correct information is presented in the best possible way so that fellow brewers can stay well-informed.
Want to stay up to date with the latest from Sean and New Beerginnings? Like us on Facebook and Instagram or reach out to us on Reddit.
