Hey guys,
Thanks for joining me this week where I’ll be going through my brew day that I had. As it involves what I’ve been doing brew-related this week, I’ll keep the “what’s brewing this week” section shorter than usual. The only other thing that I’ve really been doing is trying to contact people for interviews/photos etc so I can bring some different content to you guys and remaining active in the Home Brewing communities I’m part of, namely Facebook and Reddit.
This week’s brew
This is the first instalment of my Brew Day Series. In these posts I’ll go through not only the process and ingredients used in this brew, but also a little about the why behind them, a little about recipe creation and what I might change in future.
What should I brew?
I have recently invested in some better temperature control so wanted to do a beer that necessitated good and accurate temperature control. I was thinking of brewing a Kolsch but had trouble finding the right yeast so I thought of what had similar ingredients and Pilsner came to mind with a slight change in hops.
Recipe creation
For this Pilsner I decided I wanted to go very traditional and work back from there so I looked at as many Pilsner recipes I could so I got a good impression of what was traditional vs what is popular now and figure out what I wanted in the beer.
I ended up with the following recipe:
91.8% (4.5kg) German Pilsner Malt
4.1% (0.2kg) Each of Melanoiden and Acid Malts
50g of Saaz at 60 minutes
30g at 20 minutes
20g at 2 Minutes
1/2 a Whirlfloc tablet put in at 10 minutes
1 Packet Mangrove Jack’s M76 Bavarian Lager yeast (this was the first time I’ve used this brand of yeast).
This made for a Pilsner that fell within the BJCP guidelines for the style with some traditional elements combined with some more modern ingredients that gave the characteristics I was looking for.

Let’s break this down a little and I’ll go through my choices of ingredients and why I chose them.
Pilsner Malt: I’m making a Pilsner so I’d like to think this is a given. The particular Pilsner malt I got is a German Pilsner malt so it’s very light in colour and gives a nice medium body and head retention.
Melanoiden Malt: This malt is a very highly modified malt in terms of proteins and starches, it is excellent for promoting flavour stability, mouthfeel and body. It is a darker malt which can be scary adding to a characteristically light coloured beer but used in small quantities it’s ok.
Acid Malt: This malt is modified to have a high acid content. The purpose of this is to adjust the pH of the mash to around 5.3, ideal for a light coloured, crisp beer.
Saaz Hops: These are the signature hop in a Pilsner so were an absolute must. They give a herbal, earthy, and spicy aroma and flavour but have a low Alpha Acid content so lots must be added for bittering. You could use a different hop as long as it is European and complimentary to the Saaz but I wanted to do a single hop beer so stuck with the Saaz.
Whirlfloc: Another signature feature of a Pilsner is its crystal clear appearance, for this I wanted to give every opportunity to drop out hot break material so whirlfloc is a must. However, I’ll not be using any other finings throughout the process as I want to do a traditional lagering process, which should assist the beer in dropping nice and clear.
M76 Yeast: I have not used this yeast before but chose it based upon excellent reviews combined with advice from my local home brew supplies store. It is a bottom, cool fermenting lager yeast from Bavaria, perfect for the German Pilsner I wanted to create.
The other thing to note about this recipe is that I performed a 75 minute boil instead of the regular 60. The reason for this is that lighter malts like Pilsner have less DMS precursors removed by the killing process because they are kilned so lightly. Boiling for a longer time removes these and makes your Pilsner less likely to smell and taste like corn on the cob due to DMS!
Equipment and setup
I brewed this batch using a Grainfather system. It’s my second time brewing with one and I liked it even better this time round than the first. It’s very accurate, hit all my numbers and I noticed how it adapts the power of the heating element depending on how close the wort is to the desired temperature to avoid overshooting it.
The first part of the setup for me is to clean out and sterilise any equipment I’m going to use that day to avoid the chances of contamination. I usually clean my fermenter and then leave it until right before I’m needing to fill it to avoid having it sitting out for a long time and getting re-contaminated.
After this I fill the Grainfather up with the water I’m using for the mash and start heating. The Grainfather app has a calculator built in to help calculate how much water is needed for the amount of grain you have and account for temperature.
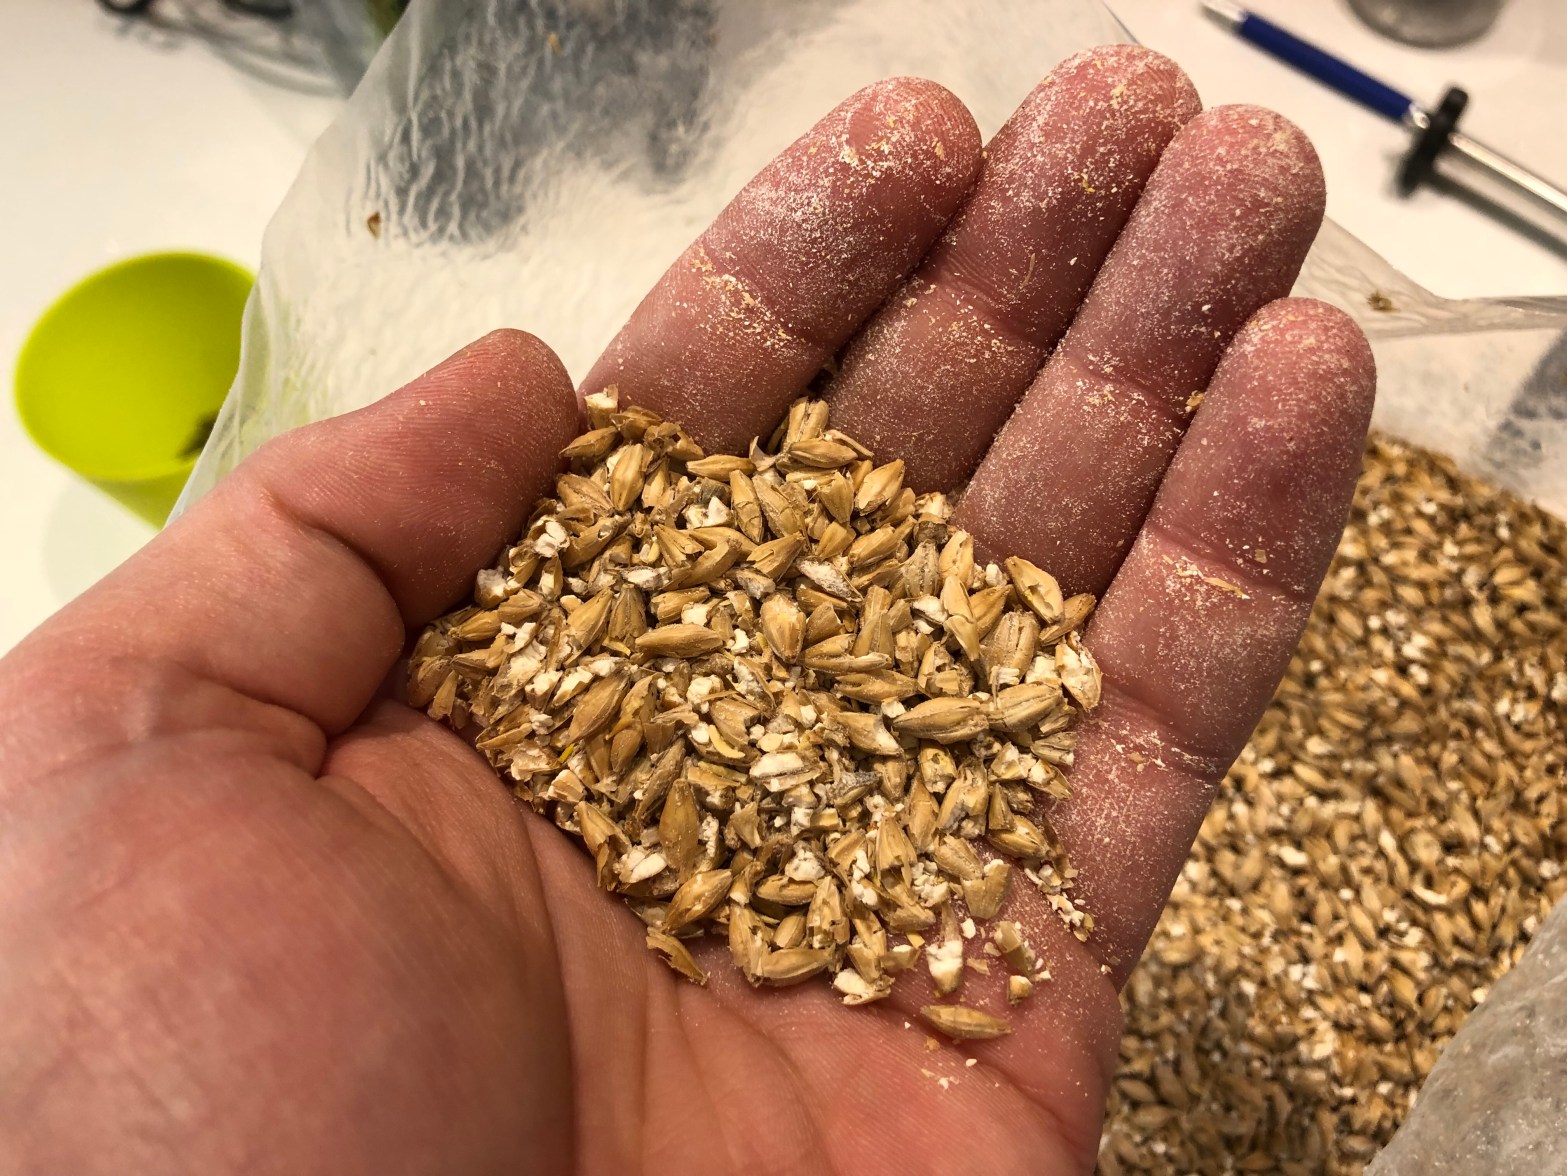
Once heated I dump in my grains. Normally you would have to crush your grains at this point if you were crushing them yourself but mine were already crushed pretty well by the store. Crushing them breaks open the husks just enough to expose the insides of the grain containing the starch and proteins. It’s only crushed enough to turn it from the top picture below to the bottom.


Mash
This is what the mashing in process looks like, essentially just mixing the grains with the water to ensure there are no dry spots left and all grains are in contact with the wort.
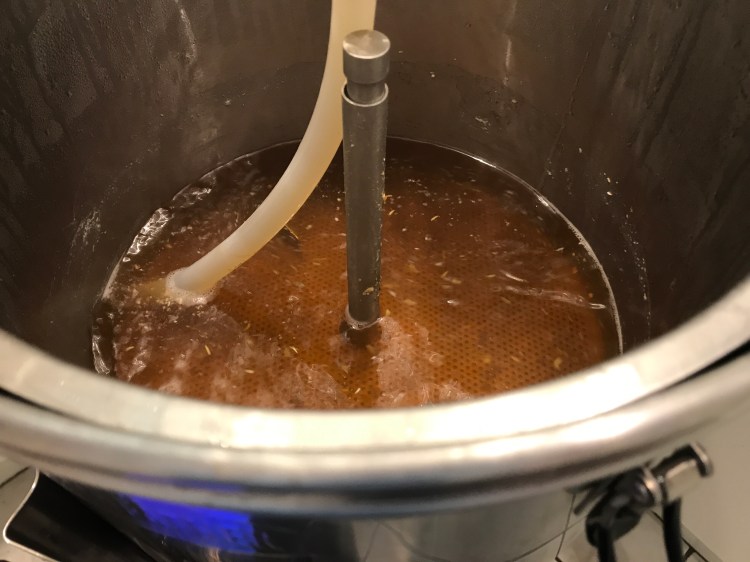
After the grains have been mixed on this system you place another plate over the top to stop the grains from rising and turn on the pump which begins recirculating the mash over itself to help with extraction of sugars and lets the grains act as a natural filter for the wort. The mash continued at 65°C for an hour then 75°C for a mash out for another 10 minutes. Here is the pump switching on and starting this recirculation process on the Grainfather vs what the wort looks like after mashing for 30 minutes:
Sparge
After the 60 minute mash we continue to sparge the grains with some separate sparge water at 75°C. During the sparging step the Grainfather automatically begins heating the wort to boiling temperature so that its up to temp by the time you’ve finished the sparging process.
On the Grainfather system, sparging works by lifting the inner basket and pouring over your pre-heated sparge water to rinse through the grains. There are several calculators out there for mash and sparge water volumes but for this recipe I just used the built in ones in the Grainfather app. See below for a photo and brief video of the sparging process.

Boil
Once you have finished sparging, depending on how long the process takes, you should be ready or nearly ready to boil.
As stated previously, due to the higher than usual risk of DMS that comes with very light malts like Pilsner, this boil was a 75 minute boil instead of the usual 60. The other tactic that’s essential to combating DMS and other off flavours (like Diacetyl or other VDK’s) is a strong, rolling boil. This will help evaporate or convert them into harmless substances that will not turn into off flavours in the finished beer.
The other purpose of the boil is the isomerisation of the Alpha Acids in the hops to bitter the beer. Again, a vigorous boil is essential.


During this time, since I had 75 minutes to spare, I decided to make use of my spent grains. Used grains can be used for several purposes as they are high in sugar and nutrients. Some people compost them, others bake (you can use them in bread wet or dried) but I chose to use mine as animal feed as I have a family in my neighbourhood that have several horses. I took some time between hop additions to go down, introduce myself and let them know that I’ll have some feed for them from time to time.
Cooling
Once the boil was over and I had my hop material whirlpooled into the centre of the Grainfather, I connected its counter flow chiller to the pump.

I ran the wort back into the Grainfather for a few minutes with no cold water to sterilise the chiller then ran cold water through also until the temperature dropped about 15-20 degrees. This way when the wort is transferring into the fermenter it is already well and truly ready for the yeast to be pitched. It was around 5-6°C above the temperature of the tap water. You can also see in the picture below that it was remarkably clear when transferring and with long term lagering will only clear up further.

Testing
In order to accurately determine the alcohol by volume (ABV) of the beer you need to take a specific gravity reading just before and at the end of fermentation using a hydrometer. This wort had an Original gravity (OG) of 1.048.

The cloud-like floating material in there is hot break that made it in through the whirlpool and grainfather’s filter and drops out of suspension easily to a brilliant clear finish.


Pitching Yeast
Once all the wort was transferred to the fermenter I pitched the yeast which I rehydrated in room temperature water with some Light DME and pitched the yeast into the fermenter. Once this was done I immediately placed it into the temperature controlled freezer set to a lager temperature where it will ferment for around a month then bottle lager for another month after that.
Next Steps
Other than monitoring the beer and making sure it adheres to lager temperatures the next step is bottling and storing for sufficient time to carbonate the beer. I will update in another post after it has been bottled.
Thanks for reading this week’s post, I will continue to post brew day updates whenever I have one. Other than that, please look out for our next post where start to highlight some of the equipment needed for brewing.
Best,
Sean
Check us out on Facebook or Instagram or follow us on Reddit.

3 thoughts on “Brew Day #1 – Pilsner”