Hello again,
I’m back again for another quick post but I’d like to introduce a segment at the top of each post where I quickly touch on anything beer related that I’ve worked on in the past week or so.
This week I haven’t been doing much that’s beer related other than worrying about running out of my Golden Ale and collecting enough bottles to brew another batch. One thing I have been working on every chance I got is the Brewing Glossary, This took an immense amount of research and fact-checking and it’s still not fully complete! I’ve enlisted the help of my brother who you will see at some stage will be a contributor to the site. He is providing the background on everything Microbiological and chemistry related due to his current field of study. Please check it out and let me know in comments or by Contacting Us if you would like a definition refining or added.
Anyway, on to this week, in this post I’m going to talk about the brewing process. By this I mean running through things that should be done during every brew day followed by the steps of a basic brew day, stopping along the way to discuss which methods may skip some steps in the process.
Brew day Basics
This section will cover steps that should be common to any brew day.
Cleaning – This should be an activity that every brewer, regardless of other processes, equipment, ingredients or method of brewing should do and do thoroughly. Inadequate cleaning practices leads to everything from off-flavours to legitimately scary bottle bombs. I like to look at my equipment in phases and respond appropriately.
Bottle/Keg full of beer – Drink and enjoy until its gone.
Empty bottle/keg – Rinse immediately, clean and rinse again with proper brewers cleaner such as PBW or something similar. Your Local Home Brew Store (LHBS) should be able to help you out with this depending on what they stock.
Cleaned/Rinsed bottle/keg – Store until ready for next use. If storing a keg for a long time you can fill it with distilled water or sanitiser until ready for use.
Ready to use bottle/keg – Rinse to remove any potential dust that may have formed and sanitise with a no-rinse sanitiser such as Star San. Again, your LHBS can help you choose one that they stock. The no-rinse aspect is important since rinsing with water can reintroduce any potential bacteria/wild yeast that’s residing in the water.
Any equipment used after a brew day – Disassemble completely and clean with PBW or similar. Dry thoroughly and reassemble ready for next use. This goes for everything from pots/fermenters to tubing/pumps, anything that the wort/ beer will touch.
Any equipment to be used during your brew day – Clean again if necessary (e.g. if in storage for a significant enough amount of time to get dusty). Sanitise with Star San or similar and remove any excess foam but DO NOT RINSE.
Brew Day Steps
This section will focus on steps that any brew day must go through. Broken down simply, any brew day should generally go like so:
– Ensure equipment is clean and sanitised.
– Heat water.
– Mash (Unless you’re doing extract).
– Boil, including adding hops.
– Cool.
– Transfer or ‘Rack’ to fermenter.
– Pitch yeast.
– Clean up.
This first step has already been adequately covered in the previous section but in the below section I’ll go through these other points.
Heat Water
I’ll break this step down into Extract or Partial Mash/All Grain.
For Extract this simply means start your water boiling and do any water treatment if necessary (more on that in a later post!)
For Partial Mash/All Grain it means to treat and heat the water you’re going to be mashing with, known as your strike water. It is generally best to use a calculator to determine how much water to add at what temperature as it will change depending on how much grain you have. If using the BIAB method you’ll be mashing with your full volume of liquid so you need to account for evaporation and boil off. Generally 30L should be sufficient for a batch that will end up being ~20L.
If doing a traditional all grain mash then the ratio of water to grain is often of a concern. Too little water and there could be some dry dough ball-like spots in the mash and you don’t get enough extraction but too much and there isn’t enough density of grain to get the best extraction from the enzymes it contains. However, with the popularity of BIAB nowadays where it is standard practice to mash with a full volume of water, this latter concern is thought about less and less often on the home brew scale. The best water-grain ratio generally falls between 2.1-3.1L per kg of grain or 1-1.5qt per lb of grain for those using imperial measurements.
For the temperature you are heating your water to I advise to always use a calculator like the one here or in your brewing software if you’re using it, I use BeerSmith and have always found it to be very accurate. This temperature is very important as your water will cool down once you add your grains to it so you may not get the right enzymatic activity. With a temperature adjustment you can make it so that once the temperature has settled, is exactly at the temperature you would like to sustain throughout your mash.
Mash
Now that our water is heated we can start our mashing process unless we are doing a purely extract brew.
Dump your grains into the correctly heated strike water and stir. Stirring helps to break up any dry clumps so all the grains are in contact with water and able to get the enzymes working and converting the starches into maltose. You can use a spoon but often a large paddle is used that has slots for better mixing.
The mash has a tendency to stay fairly consistent in terms of temperature but care should still be taken to try and keep it as stable as possible either with insulation or temperature control. From this point, mash according to your recipe, including any temperature changes or additions to the mash. Sparge (unless your using the BIAB method and have your full volume in the mash tun) to rinse the grains and extract as much of the sugars as possible but keep in mind over sparging can extract tannins that make your beer bitter and astringent. A good rule of thumb is to check the specific gravity of the runnings and when they hit around 1.010-1.008, stop sparging or stop when you have hit your required boil volume of wort, whichever comes first.
Boil
There are several reasons for boiling your wort.
– Isomerisation of Alpha Acids in hops to bring out the desired bitterness qualities.
– Sterilising your water to get rid of any bacteria that may be still residing in there.
– It’s the only way to remove some of the unwanted proteins and other organic matter that’s in suspension to clear up the beer visually and from any unwanted flavours.
– It’s the only way to break down DMS (corn-like off flavour) precursors so they all get consumed completely during fermentation.
– Removing compounds that cause temporary water hardness (Calcium Hydrogencarbonate)
It is vital for each of these steps to a achieve a strong, vigorous rolling boil. If this boil is not achieved, some of these compounds/organisms will stay in solution and can lead to off flavours or contamination. If you live in a place that is significantly above or below sea level then you may need to double-check your natural boiling temperature and adjust accordingly. If you’re high up then your boiling temperature can be quite low, even over 10 degrees C lower than sea level and you may need to boil for longer. Again there are some calculators available to assist you with this.
The length of time you boil for is something that has been debated by some brewers but the general accepted standard is a 60 minute boil.
Hops added during this time convert their Alpha Acids into iso-Alpha Acids which give bitterness. The longer they are present in the boil, the more Alpha Acid conversion takes place and other hop characteristics are put aside. As a general rule of thumb you can look at it like this:
60 Minutes or more – Alpha Acid conversion to add lots of bitterness, little to no flavour, little to no aroma.
45 Minutes – High bitterness, medium flavour, little to no aroma.
30 Minutes – Medium bitterness, high flavour, low aroma.
15 Minutes – Little bitterness, medium flavour, high aroma.
0 Minutes (Flame Out) – Little to no bitterness, very low flavour, very high aroma.
At the end of the boil a cake of organic material from proteins in the wort to hop matter usually collects at the bottom of the kettle. To help clear this out of the rest of the beer, a whirlpool is often formed to help collect it all in the middle at the bottom of the kettle where you can then siphon off the beer and have it be clearer than it otherwise would be. It can be started by hand, grab a spoon and start stirring or if you’re using a pump then you can recirculate it in a circle to start and maintain the whirlpool.
Cooling
When the boil is finished the wort is actually quite vulnerable microbiologically. It has risk of infection by airborne yeast or bacteria but we can’t pitch our chosen yeast that we wish to ferment with as it will be overcome by the high temperatures and be killed so we need to cool the wort down to pitching temperature but be as quick as we can about it.
To do this quickly brewers can rely on several methods, most involving pieces of equipment. I’ll list these methods below in order of expense and link to an example of one if applicable:
Ice: For some brewing methods, people may choose to add some top up water to adjust their gravity. I used this method for a while but chose to measure out my water then freeze it to act as a chilling method.
Ice Bath: This method is simple, fill a large sink or bathtub with water and ice and place your fermenter full of hot wort in there until cool.
Plate Chiller: These chillers are quite effective and basically have two in pipes and two out pipes, one pipe for wort and one for water. Hot wort passes over rippled plates (to give more surface area) that transfer their heat to cool water on the other side. Here is an example.
Immersion Chiller: These are copper or stainless steel coils that will sit in your boil kettle throughout the boil then when you’re ready to cool you connect one end to a cold water tap and place the other end in a sink or safe place to dispose of the very hot water coming out the other end and run the water through the inside of the coil so the wort transfers its heat to the water in the pipe. This method is very effective, often more effective than the plate chillers, especially when you stir the wort as its chilling. Here is an example.
Couterflow Chiller: These chillers are highly effective but often expensive. They consist of one copper coil inside another, cold water flows in the outer coil and the hot wort flows in the inner coil generally but different companies have different designs. Here is an example, below is a picture of the one that comes with theGrainfather.

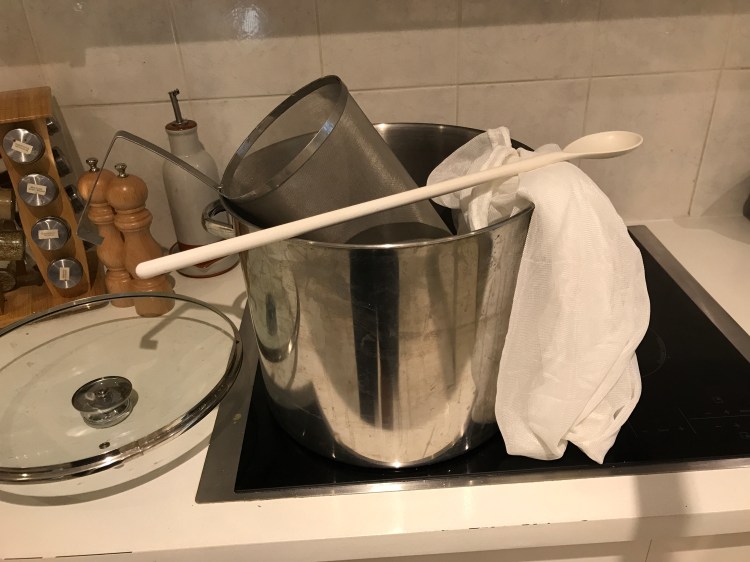
Transfer/Rack To Fermenter
This step is simple but has a few considerations. Firstly, are you siphoning or pumping? Siphoning is cheaper as you don’t have to buy a pump but it’s slower and unsanitary unless you buy a siphon starter like this one to avoid using your mouth. Pumping (as shown in the above photo with the Grainfather) is faster and easier but you need to buy and maintain a pump like this one.
Pitching Yeast
Once your wort is cooled you can take a Specific Gravity (SG) reading and pitch your yeast. At the recipe creation stage you should give yourself an idea of how much yeast you need to ferment your beer. Most packs come with enough yeast to ferment at least 23L of full strength wort (about up to 1.050-1.060 SG) if either of these aspects are increased (more beer or higher SG) then you should consider pitching two packs to avoid a stuck/stalled fermentation where the process stops and you’re left with a considerably higher SG than you intended and your beer will be very sweet.
If using dry yeast, it’s best to rehydrate it to get it acclimated to a liquid environment. I do this by placing it in a glass of lukewarm water with some Dry Malt Extract (DME) for food for 30-40 minutes before I need it.
If using liquid yeast, it’s usually recommended to make a yeast starter in water mixed with DME around 24 hours before you need it. There are calculators out there to assist you with pitching rate and starter calculations or it may be available in your recipe creation software like BeerSmith.
Cleanup
So during and after all of these steps and your beer is in the fermenter, it’s highly recommended that you immediately clean all of your equipment thoroughly using the thought process listed above. There are a great many articles on cleaning so I’ll not go through it here but rather point you to my favourite one from Brülosophy creator Marshall Schott, here it is.
I hope you enjoyed this week’s post and found it informative. As always, please let me know in the comments or by contacting us if you’d like any more information or believe you may be able to correct or further define anything within this post.
Until next time,
Sean
Like us on Facebook and Instagram or get in touch on Reddit.

One thought on “Brewing Process”